
JAVA + graphQL로 안드로이드 어플 클론코딩하기
게시일:
Overview
장고로 프로젝트가 마무리되자 말자 선택한 프로젝트는 안드로이드 클론 코딩이다. 개발자들이 많이 쓰는 JAVA라는 언어에 대해서 전혀 몰랐기 때문에 나중에 Spring으로 개발을 진행하는 상황을 대비할겸, 가장 핫한 주제인 모바일에 관련된 어플을 만들어보고싶기도했다. 사실 안드로이드를 개발해본적은 없지만 해킹 및 안드로이드 어플을 리버싱하는 과정을 통해서 대략적으로 어떻게 생겼는지에 대한 정보는 알고 있지만 정확히 어떤 식으로 안드로이드가 동작하는지에 대한 개념은 머리에 정립되어 있지 않았다. 이번 기회에 해킹이 아닌 개발의 관점에서 안드로이드 어플을 개발해보고 싶었다. 최근 코틀린으로 앱이 많이 개발되고 있기는 하지만 자바로도 짜보지 않은 앱을 코틀린으로 짜보기보다는 자바로 먼저 짠 뒤에 코틀린으로 포팅하는 방식이 더 효율적이라고 생각이 들었다. 그래서 요 근래 며칠간 자바의 정석이라는 책을 속독하였는데 내용이 너무 좋았다. 아무래도 low단에서 분석을 많이 진행하였다보니 책에서 저자가 설명한 메모리 그림들이 쏙쏙 이해가 잘 되었다.
이번에는 어떤 것들을 공부해볼까라는 생각을 하다보니 크게 4가지 정도가 머리속에서 떠올랐다. 매번 새로운 것들을 시도한다는 것은 여간 고통스러운것이 아니지만 하고나서 결과물을 볼 때의 그 성취감이 매번 도전을 하도록 만든다.
- graphQL로 API 구현하기
- JAVA로 안드로이드 개발
- 네이버/카카오 계정 로그인 구현
- redis 사용해보기
이 전 프로젝트의 주제였던 eaten-Away 서비스를 만드는 과정에서 REST로 api 서버를 설계하였었다. GET, POST 등의 HTTP 메소드와 연동하는 부분이 편리하고 좋았지만 비슷한 기능을 가진 여러 기능들이 각각 매칭이 되어야한다는 불편함이 있었다. 이런 몇가지 불편함을 해소하기 위해서 facebook에서 graphQL을 고안하였다고 하는데 직접 사용을 해보면서 어떤 점이 개선이 되었는지를 비교해보고 싶었다. JAVA의 경우 앞서 말했듯이 Spring으로 개발을 할 프로젝트가 준비되어 있기 때문에 이를 위해서 미리 JAVA를 숙달한다는 의미가 있는 것 같다. (여담이지만 알고리즘에 대한 다른 사람의 풀이를 보면 C++ 뿐만 아니라 JAVA로 작성된 코드들이 많은데 책 한권 봤다고 이해가 되더라.) redis 같은 경우는 캐시 서버?? 관련 개념으로 자주 등장하는 것 같은데 아무래도 개발초보다 보니 멀티 쓰레드/DB/캐시 관련 지식이 부족하다보니 왜 저런 애들이 추가로 쓰이는지가 궁금하였다. 그래서 만약 안드로이드 개발에 사용될 수 있다면 한 번 같이 사용해보는 것도 괜찮다고 생각이 들었다. 마지막으로 네이버/카카오 계정 로그인 구현의 경우 요즘 대부분의 앱들이 따로 회원가입을 처리하지 않고 해당 api를 사용하기도 하고, 회원가입 및 개인정보와 관련된 부분을 덜 신경쓸 수 있다는 점에서 사용을 해보기로 마음먹었다. 어차피 클론코딩이고 어플에서도 api로 구현하긴 하였다.
AppName
원래 하고자 하는 다른 어플이 있었는데, 메일로 문의한 내용에 대한 답변이 오지 않아 부득이하게 변경을 하게 되었다. 많은 사람들이 클론 코딩 주제로 인스타그램을 선정하였는데 nodejs, react가 아닌 JAVA를 토대로 비슷하게 흉내내보는 토이 프로젝트로 진행하기로 하였다.
JAVA 핵심 정리
자바를 공부하는 처음 접하거나 헷갈리는 개념들이 몇 있었다. 그 개념들에 대해서 간략하게 이해한대로 정리를 해놓고자 한다.
제어자(Modifier)
제어자는 클래스나 변수 등의 선언부에 함께 사용하여 의미를 나타내는데 하나의 대상에 여러 조합을 사용하는 것이 가능하다. 하지만 public, protected, default, private을 의미하는 접근 제어자는 한 가지 종류만 사용이 가능하다.
static
static은 클래스 내에 생성이 될 경우 인스턴스에 관계없이 같은 값을 가지게 된다. 이는 static 클래스 변수를 모든 인스턴스가 공유함을 의미한다. 그 외에 static이 붙은 변수나 메서드 등은 인스턴스를 생성하지 않고 사용이 가능하다. 이 경우에 만약 메소드를 static으로 생성하였다면 인스턴스 멤버를 직접 사용하는 것이 불가능하다.
class Student{
	static int grade = 90;

	static {
		// 스태틱 변수의 초기화 수행
	}

	static int is_bigger(int a, int b){
		return a>b;
	}
}
final
final은 용어에서 예상이 가듯, 변경할 수 없다는 의미를 주기 위해 사용한다. 변수에 final을 붙히게 되면 상수가 되며 메서드에 붙히면 오버라이딩을 지원하지 않음을 의미한다. final은 클래스, 메서드, 멤버변수, 지역변수 모두에 사용이 가능하다.
final class Wizley{
	final int grade = 100;

	final void getGrade(int grade){
		return grade;
	}
}
위와 같이 Wizley라는 클래스를 final로 선언을 하면 다른 클래스의 조상 클래스가 될 수 없으며 내부 값인 grade의 값 변경이 불가능하며 getGrade의 경우 오버라이딩이 불가능하게 된다.
만약 인스턴스의 변수가 final일 경우 생성자에서 초기화를 수행한다.
class Student{
	final int grade;

	Student(int gradeinfo){
		grade = gradeinfo;
	}

	Student(){
		this(0);
	}
}

class Test{
	public static void main(String args[]){
		Student A = new Student(100);
	}
}
이렇게 클래스 내부에서 값을 설정하지 않은 경우 생성자를 통해 초기화가 가능하며 그 후에는 값에 대한 변경이 불가능하다.
abstract
abstract는 추상적인 형태를 표현하기 위해 클래스 또는 메소드에 사용된다. 선언부만 작성을 한 뒤에 구현을 나중에 작성할 시에 사용된다.
abstract class AbstractStudent {
	abstract void getGrade();
}
public
public은 접근 제어자 중 하나이며 멤버 또는 클래스에 사용된다. 이런 접근 제어자들은 멤버 또는 클래스에 대한 정보를 외부에서 접근하지 못하도록 범위를 제한하는 경우에 주로 사용하며 default가 기본적으로 설정되어 있다. 이런 접근 제어자들 중 public은 제한이 전혀 없는 경우를 의미한다. 이는 즉 어디에서는 접근이 가능하다는 것을 의미한다.
default
기본 옵션으로 설정되는 default는 같은 패키지 내에서만 접근이 가능하다.
protected
default보다 조금 더 넓은 범위로 같은 패지기 뿐만 아니라 다른 패키지의 자손클래스에서도 접근이 가능하다.
private
같은 클래스 내부에서만 접근이 가능하다. 또 private이 생성자에 추가된 경우 인스턴스의 생성을 제한할 수 있으며 생성을 위해서는 내부에서 생성에 사용할 static 메소드를 선언하여 호출하면 된다.
class Student{
	private static Student A = new Student();

	private Student(){

	}

	public static Student getStudent(){
		return A;
	}

}
지금까지의 접근 제어자의 접근 권한을 범위로 표현하면 다음과 같다.
public > protected > default > private
이런 특징에 의해 클래스는 보통 public 또는 default 중 하나로 생성이 되며 메서드 또는 멤버변수의 경우 4가지 옵션이 다 사용된다. 궁극적으로 이런 범위 제한은 클래스 내의 특정 정보를 외부에서 접근하지 못하도록 하기 위함이며 이는 캡슐화를 위함이다. 즉, 외부로부터 데이터를 보호하기 위해서 사용된다.
인터페이스(Interface)
추상 클래스와 거의 비슷한데 추상 메소드 또는 상수가 아닌 값을 가질 수 없다는 특징이 있다.
interface Movable{
	public static final int A = 0;
	public abstract move();
}
이런 특징으로 인해 멤버변수의 경우 무조건 public static final 이어야 하며 메소드는 public abstract이여야 한다. 만약 생략할 경우 자동으로 설정이 된다.
자바는 클래스에 대한 다중상속이 불가능하지만 인터페이스는 가능하다.
interface Foodeatable extend Drinkable, Eatable, Movable {}

class Student implements Foodeatable{
	public void move(){

	};
	...
}
인터페이스로부터 상속받은 메소드들에 대하여 클래스 내부에서 그에 맞게 구현을 해주어야 된다. 이런 점을 활용하여 다중상속을 구현하는 것이 가능하고 구현 부분이 인터페이스 내부에 존재하지 않기 때문에 그로 인하여 문제가 발생할 확률이 적다. 자바의 특성상 클래스를 구현하는 과정에서 다중 상속을 위해서는 다른 클래스를 클래스 멤버로 생성하여야 되는데 인터페이스로 이런 부분에 대한 효율적인 해결이 가능하다. 또한 서로 관계가 없는 클래스가 여러개 존재할 경우 인터페이스를 통해 상속관계가 아님에도 공통적인 구현이 가능하다는 특징이 있다.
이 점은 자바의 정석에 좋은 예제가 있는데 Unit이라는 클래스의 하위 클래스로 GroundUnit과 AirUnit이 있다고 가정해보자. 만약 SCV라는 Unit이 GroundUnit의 Tank와 AirUnit의 Dropship에 대해서 Repair가 가능한 경우 어떻게 구현을 해야될까?
만약 클래스 내부에 구현을 한다면 Repairable한 Unit의 개수만큼 오버로딩된 메소드가 구현되어야 할 것이다. 조상 또한 다르기 떄문에 최대한 공통적으로 묶는다 한들 결국 2개 이상의 메소드에 대한 구현이 불가피한 것이다.
이런 경우 Repairable 인터페이스를 연결해줌으로써 해결이 가능하다.
class Test{
	public static void main(String[] args){
		Tank tank = new Tank();
		SCV scv = new SCV();
		scv.repair(tank);
	}
}

class SCV extends GroundUnit implements Repairable{
	SCV(){
		// aa
	}

	void repair(Repairable r){
		if(r instanceof Unit){
			// aa
		}
	}
}
r이 Repairable 타입이기 때문에 인터페이스에 정의된 멤버만이 사용가능하다. 이 점을 활용하여 instanceof로 r이 Unit 중의 하나인지를 검증한 후에 구현코드를 작성하면 된다.
또 다른 점에서 인터페이스가 편리한것이 클래스 A와 B가 A->B의 형태를 가지고 있을 경우에 한 쪽에 대한 내용을 수정할 경우 두 클래스 내부의 관련된 코드를 모두 수정해야 된다는 특징이 있다. 이런 부분에서 인터페이스를 통해 접근을 하게 되면 둘 중 하나에서 변경이 필요한 경우 나머지 하나를 변경하지 않고 인터페이스 내부의 코드만을 변경하면 된다는 장점이 있다. 즉 A->I->B의 형태가 되는 것이다.
Settings
개발을 진행하기 전에 안드로이드 관련 기초적인 내용들에 대한 많은 공부를 하였다. 안드로이드 역시 Django와 비슷하게 꽤 자세한 document가 있다.
공부한 내용들에 대한 키워드를 간략히 남겨보자면 안드로이드 레이아웃에 대한 개념, 라이프 사이클, 4가지 구성 요소, 액티비티 스택, 프레그먼트 등이 있었다.
개발의 순서에 대한 설명은 아래의 링크를 참고하기로 하였다.
AndroidStudio
안드로이드 개발은 안드로이드 스튜디오를 사용하는 것이 가장 편리해보인다. qemu 에뮬레이터도 있을 뿐 아니라 pycharm과 거의 동일한 IDE 기능을 가지고 있다. 거기다가 layout을 쉽게 그릴 수 있도록 도와주니 더욱 좋다.
안드로이드 개발을 위해서는 먼저 java를 사용하기 위한 jdk를 설치해야 되며 그 후 안드로이드 스튜디오를 설치하면 dependency가 대부분 설치가 된다. 그리고 이는 brew를 사용하면 편리하게 설치가 가능하다.
brew cask install android-studio
Docker로 graphql-django 생성하기
이번에는 Django를 graphql과 엮어보기로 했다. 이를 위해서 Dockerfile을 아래와 같이 작성하였다.
FROM python:3

MAINTAINER Wizley <wizley@kakao.com>

WORKDIR /code
COPY ./requirements.txt /code

RUN pip3 install -r ./requirements.txt
그리고 requirements.txt에는 graphql 관련 라이브러리가 추가되었다.
aniso8601==7.0.0
asgiref==3.2.3
attrs==19.3.0
coverage==5.0.3
Django==3.0.3
django-cors-headers==3.2.1
graphene==2.1.8
graphene-django==2.9.1
graphql-core==2.3.1
graphql-relay==2.0.1
more-itertools==8.2.0
packaging==20.1
pluggy==0.13.1
promise==2.3
py==1.8.1
PyJWT==1.7.1
pyparsing==2.4.6
pytest==5.3.5
pytest-cov==2.8.1
pytz==2019.3
Rx==1.6.1
singledispatch==3.4.0.3
six==1.14.0
sqlparse==0.3.0
wcwidth==0.1.8
직접 설치를 하게 된다면 아래와 같은 명령어로 설치를 진행하면 된다.
pip install graphene-django
이제 도커 이미지를 생성할 차례이다. graphql-django라는 이름으로 생성하기로 하였다. 안드로이드를 자바로 짜기 때문에 Spring에 붙히면 어떨까라는 고민을 잠깐 했었지만 이번 프로젝트의 몸통은 안드로이드 개발에 두고 있기 때문에 전에 개발에 사용했던 Django를 사용하기로 했다.
Wizley:~/git/aintstagram/backend_api # docker build --tag graphql-django:1.0 .
명령어를 통해 확인을 해보니 잘 설치 된 것을 확인 가능하다.
Wizley:~/git/aintstagram/backend_api # docker images
REPOSITORY          TAG                 IMAGE ID            CREATED             SIZE
graphql-django      1.0                 a5fe92f02b0f        6 seconds ago       984MB
django              1.0                 0472bb664767        6 weeks ago         981MB
ubuntu              latest              72300a873c2c        7 weeks ago         64.2MB
phpmysqli           1.0                 b5cd17f37d99        7 weeks ago         83.9MB
python              3                   efdecc2e377a        2 months ago        933MB
nginx               1.17                2073e0bcb60e        2 months ago        127MB
mysql               8.0.19              791b6e40940c        2 months ago        465MB
이제 컴포즈를 올려서 실행을 시켜보도록 하겠다.
Wizley:~/git/aintstagram/backend_api # cat docker-compose.yml
version: '3'

services:
 graphql:
  container_name: aintstagram
  image: graphql-django:1.0
  environment:
    - DJANGO_DEBUG=true
  volumes:
    - ./code:/code
  ports:
    - "8000:8000"
  tty: true
  command: python3 ./backend_aintstagram/manage.py runserver 0:8000
정상적으로 잘 올라간다. Settings.py에서 SECRET_KEY만 슬쩍 빼주면 아주 기본적인 세팅은 끝이 난 것 같다.
이제 graphql이 제대로 작동하는지 테스트를 위해 아래와 같이 좋은 링크 두개를 찾을 수 있었다.
Integrate GraphQL into your Django project
INSTALLED_APPS = [
    ...
    'graphene_django',
    'api',
]
api라는 app을 하나 생성하고 INSTALLED_APPS에 추가해주었따. 그 후 메인의 url을 통해 graphql에 접근할 수 있도록 링크를 하나 설정해주었다. (이 경우에 csrf_exempt를 설정해주지 않으면 지금 상황에서는 400에러가 뜨게 된다.)
from django.contrib import admin
from django.urls import path
from django.views.decorators.csrf import csrf_exempt
from graphene_django.views import GraphQLView

urlpatterns = [
    path('admin/', admin.site.urls),
    path('graphql/', csrf_exempt(GraphQLView.as_view(graphiql=True))),
]
그 후 test에 사용할 UserModel을 api/models.py에 생성한다.
from django.db import models


class UserModel(models.Model):
    name = models.CharField(max_length=100)
    last_name = models.CharField(max_length=100)
그리고 통신을 위해 사용할 부분을 api/schema.py에 추가해준다.
import graphene
from graphene_django import DjangoObjectType

from api.models import UserModel


class UserType(DjangoObjectType):
    class Meta:
        model = UserModel


class Query(graphene.ObjectType):
    users = graphene.List(UserType)

    def resolve_users(self, info):
        return UserModel.objects.all()


schema = graphene.Schema(query=Query)
마지막으로 schema를 settings.py에 추가해주면 된다.
# Graphql

GRAPHENE ={
    'SCHEMA': 'api.schema.schema'
}
이제 localhost:8000/graphql/ 링크로 접속하면 아래와 같은 페이지를 확인할 수 있다.
이렇게 graphql을 사용하기 위한 환경구성을 마무리하였다!
Layout 만들기
안드로이드의 구조에서 res 내부의 Layout은 Django의 template과 같은 기능을 한다. xml로 설계된 button, text 등에 대한 요소들을 java 파일에서 가져와 사용하는 방식으로 구현된다.
public class MainActivity extends AppCompatActivity {

    @Override
    protected void onCreate(Bundle savedInstanceState) {
        super.onCreate(savedInstanceState);
        setContentView(R.layout.activity_main);
    }
}
기본 코드의 MainActivity를 보면 onCreate 부분에서 ContentView로 layout을 가져와서 뿌려준다. 이를 통해 activity_main.xml 파일의 내용이 해석되 렌더링 된다.
layout을 만들기 위해 인스타그램 어플이 가지고 있는 여러 페이지들에 대한 디자인을 따오는 작업이 필요하다. 즉 화면 정의서를 만들어야 되는데 이는 화면의 구조와 표시될 내용 및 기능에 대한 설명을 적어놓은 와이어 프레임을 작성해야 된다. 역시나 아주 좋은 프로그램이 존재했다. 바로 카카오에서 만든 Oven이다.
웹에서 간단하게 와이어 프레임을 작성가능하다. 이제 해야될 일은 레이아웃을 따보는 것이다. 클론 프로젝트의 장점은 잘 만들어진 어플을 디자인 구현에 대한 적은 고민으로 구현해볼 수 있다는 점이다. 아마 혼자 디자인을 한다면 올해안에 끝을 내지 못할수도 있을 것 같다.
대충 모양에 대해서 흉내를 내보았다. 이런 식으로 골격과 사이즈를 재서 디자인을 진행하는 것 같다.
본격 기능 구현 시작
이제 하나씩 시작을 해보도록 하자. 프로그램의 전체적인 흐름을 대략적으로 살펴보았다. 테스트를 위해서는 백엔드쪽 DB에 대한 설계가 좀 필요할 것 같긴한데 프로그램이 시작되면서 흐르는 루틴에 따라 개발을 해보기로 하였다.
IntroActivity
많은 어플리케이션이 실행이 되면 로고를 화면의 중간에 몇초간 띄웠다가 MainActivity를 띄우게 된다. 이를 위한 작업을 IntroActivity로 보통 명명한다.
위의 사이트에 IntroActivity를 구현한 내용이 있다. 위의 저자의 경우 LinearLayout을 사용하여 구현하였는데 나의 경우 ConstraintLayout을 사용하여 구현하였다.
<?xml version="1.0" encoding="utf-8"?>
<androidx.constraintlayout.widget.ConstraintLayout xmlns:android="http://schemas.android.com/apk/res/android"
    xmlns:app="http://schemas.android.com/apk/res-auto"
    xmlns:tools="http://schemas.android.com/tools"
    android:layout_width="match_parent"
    android:layout_height="match_parent"
    android:background="#000000"
    tools:context=".IntroActivity">

    <androidx.constraintlayout.widget.Guideline
        android:id="@+id/guideline_top"
        android:layout_width="wrap_content"
        android:layout_height="wrap_content"
        android:orientation="horizontal"
        app:layout_constraintTop_toTopOf="parent"
        app:layout_constraintBottom_toTopOf="@id/logo"
        app:layout_constraintGuide_begin="100dp"/>

    <androidx.constraintlayout.widget.Guideline
        android:id="@+id/guideline_bottom"
        android:layout_width="wrap_content"
        android:layout_height="wrap_content"
        android:orientation="horizontal"
        app:layout_constraintTop_toBottomOf="@id/logo"
        app:layout_constraintBottom_toBottomOf="parent"
        app:layout_constraintGuide_end="100dp"/>

    <androidx.constraintlayout.widget.Guideline
        android:id="@+id/guideline_left"
        android:layout_width="wrap_content"
        android:layout_height="wrap_content"
        android:orientation="vertical"
        app:layout_constraintTop_toBottomOf="@id/guideline_top"
        app:layout_constraintBottom_toTopOf="@id/guideline_bottom"
        app:layout_constraintLeft_toLeftOf="parent"
        app:layout_constraintRight_toLeftOf="@id/logo"
        app:layout_constraintGuide_begin="30dp"/>


    <androidx.constraintlayout.widget.Guideline
        android:id="@+id/guideline_right"
        android:layout_width="wrap_content"
        android:layout_height="wrap_content"
        android:orientation="vertical"
        app:layout_constraintTop_toBottomOf="@id/guideline_top"
        app:layout_constraintBottom_toTopOf="@id/guideline_bottom"
        app:layout_constraintRight_toRightOf="parent"
        app:layout_constraintLeft_toRightOf="@id/logo"
        app:layout_constraintGuide_end="30dp"/>

    <ImageView
        android:id="@+id/logo"
        android:layout_width="200dp"
        android:layout_height="200dp"
        android:src="@drawable/aintstagram"
        app:layout_constraintBottom_toTopOf="@id/guideline_bottom"
        app:layout_constraintTop_toBottomOf="@id/guideline_top"
        app:layout_constraintLeft_toRightOf="@id/guideline_left"
        app:layout_constraintRight_toLeftOf="@id/guideline_right"/>


</androidx.constraintlayout.widget.ConstraintLayout>
Guideline을 활용하여 레이아웃을 짜보았는데 위, 아래, 왼쪽, 오른쪽에 해당하는 가이드라인을 통해 중간부분에 위치하도록 하였다. 그리고 비율에 따라 같은 위치에 존재하도록 dp로 width와 height를 주었다.
<activity android:name=".IntroActivity">
    <intent-filter>
        <action android:name="android.intent.action.MAIN" />
        <category android:name="android.intent.category.LAUNCHER" />
    </intent-filter>
</activity>
<activity android:name=".MainActivity">
</activity>
manifest 부분에서 MainActivity가 가지고 있던 intent filter를 IntroActivity로 옮겨주었고 나머지 내용은 블로그와 동일하게 작성하였다. 이를 통해 어플이 실행되면 IntroActivity가 호출이 되고 쓰레드가 호출되어 handler의 결과에 따라 MainActivity로 이동하도록 하였다.
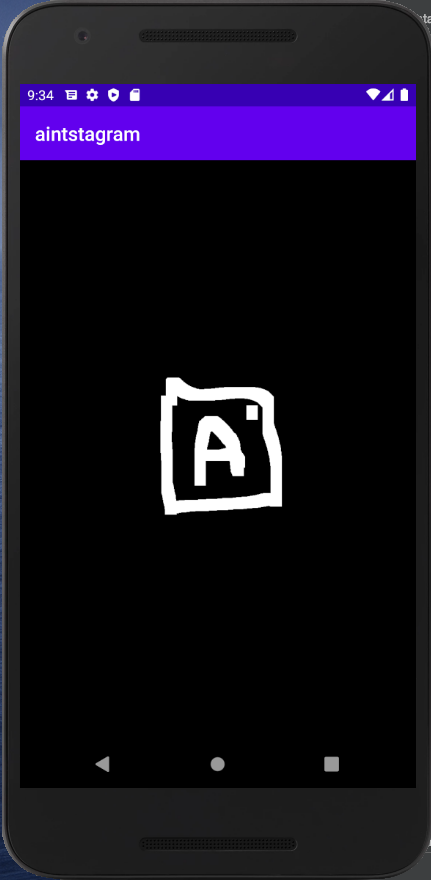
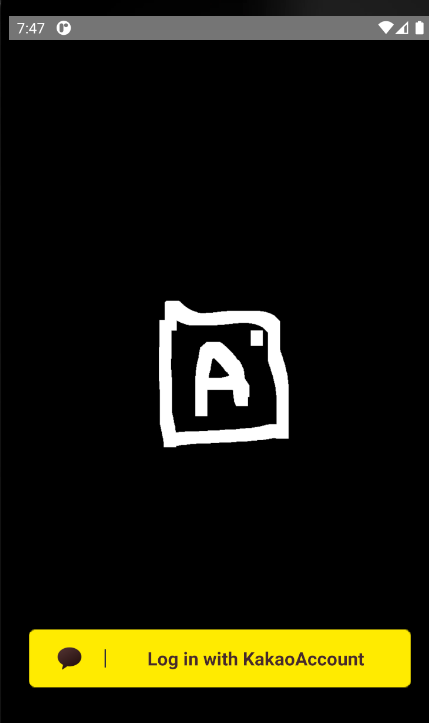
아, 참! 어플의 이름은 aintstagram인데 aint + instagram의 합성어이다. 말 그대로 가짜 인스타그램이라는 의미를 지니고 있다. 그래서 로고는 살짝 모양을 변형하여 대충 쓱 그려보았다. 이를 통해 실행되는 IntroActivity의 모습은 다음과 같다.
런처 아이콘 변경
기본 어플리케이션의 아이콘이 설정되어 있지 않은 상태이기 때문에 이를 설정하기 위해 아래의 블로그를 참고하였다.
Image Asset을 추가한 뒤 manifest를 수정해주면 된다.
<application
    android:allowBackup="true"
    android:icon="@mipmap/ic_launcher_aintstagram"
    android:label="@string/app_name"
    android:roundIcon="@mipmap/ic_launcher_aintstagram_round"
    android:supportsRtl="true"
    android:theme="@style/AppTheme">
xml파일이 ic_launcher_aintstagram이기 때문에 icon과 roundIcon을 다음과 같이 변경해주면 아래와 같이 변경되는 것을 확인할 수 있다.
![]()
액션바 숨기기
Empty Activity를 생성해도 윗 부분에 액션바가 존재한다. 실제 어플에서는 해당 부분이 존재하지 않기 때문에 이를 지워주고 싶었다. 방법은 간단했다. manifest에서 theme을 다음과 같이 변경해주면 된다.
android:theme="@style/Theme.AppCompat.Light.NoActionBar">
카메라 인텐트 구현하기
메인 엑티비티로 칭하는 페이지는 인스타그램의 로딩이 완료되면 나오는 창이다. 레이아웃을 짜야했는데 어떤 식으로 짜야될지에 대해서 정말 많은 고민을 하였다. 일단은 직관적인 방식으로 진행하기로 하였고 constraint layout을 활용하여 버튼에 대한 뷰를 만들었다. 그리고 대충 그린 이미지로 ImageButton을 채워서 뷰를 이렇게 구성해주었다.
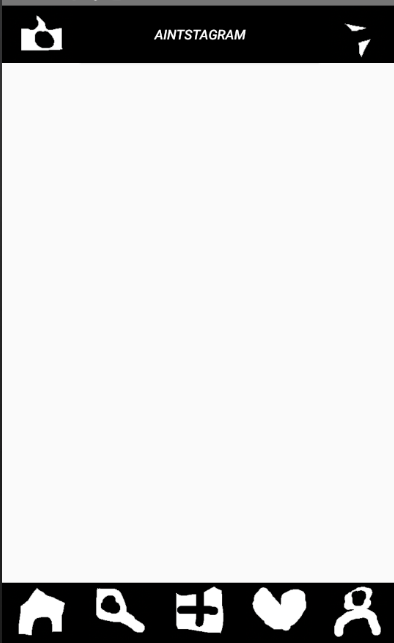
이제 버튼이 동작을 하도록 구현할 것인데 Intent를 활용하여 좌측 상단의 카메라 버튼을 클릭하면 카메라 창이 뜨도록 할 것이다. 이를 위해서는 여러가지 설정이 필요하다. 일단 만든 레이아웃은 다음과 같다.
<?xml version="1.0" encoding="utf-8"?>
<androidx.constraintlayout.widget.ConstraintLayout xmlns:android="http://schemas.android.com/apk/res/android"
    xmlns:app="http://schemas.android.com/apk/res-auto"
    xmlns:tools="http://schemas.android.com/tools"
    android:layout_width="match_parent"
    android:layout_height="match_parent"
    tools:context=".MainActivity">

    <androidx.constraintlayout.widget.Guideline
        android:id="@+id/guideline_top_menu"
        android:layout_width="wrap_content"
        android:layout_height="wrap_content"
        android:orientation="horizontal"
        app:layout_constraintTop_toTopOf="parent"
        app:layout_constraintLeft_toLeftOf="parent"
        app:layout_constraintRight_toRightOf="parent"
        app:layout_constraintGuide_begin="60dp"/>

    <androidx.constraintlayout.widget.Guideline
        android:id="@+id/guideline_bottom_menu"
        android:layout_width="wrap_content"
        android:layout_height="wrap_content"
        android:orientation="horizontal"
        app:layout_constraintBottom_toBottomOf="parent"
        app:layout_constraintLeft_toLeftOf="parent"
        app:layout_constraintRight_toRightOf="parent"
        app:layout_constraintGuide_end="60dp"/>

    <ImageButton
        android:id="@+id/button_to_camera"
        android:layout_width="0dp"
        android:layout_height="0dp"
        app:layout_constraintVertical_weight="1"
        app:layout_constraintHorizontal_weight="1"
        app:layout_constraintTop_toTopOf="parent"
        app:layout_constraintBottom_toTopOf="@id/guideline_top_menu"
        app:layout_constraintLeft_toLeftOf="parent"
        app:layout_constraintRight_toLeftOf="@id/button_logo"
        android:src="@drawable/camera"
        android:scaleType="fitCenter"
        android:background="@android:color/background_dark"
        tools:ignore="MissingConstraints" />

    <Button
        android:id="@+id/button_logo"
        android:layout_width="0dp"
        android:layout_height="0dp"
        app:layout_constraintVertical_weight="3"
        app:layout_constraintHorizontal_weight="3"
        app:layout_constraintTop_toTopOf="parent"
        app:layout_constraintBottom_toTopOf="@id/guideline_top_menu"
        app:layout_constraintLeft_toRightOf="@id/button_to_camera"
        app:layout_constraintRight_toLeftOf="@id/button_to_chat"
        android:text="Aintstagram"
        android:textColor="@android:color/white"
        android:textStyle="italic"
        android:background="@android:color/background_dark"
        tools:ignore="MissingConstraints" />

    <ImageButton
        android:id="@+id/button_to_chat"
        android:layout_width="0dp"
        android:layout_height="0dp"
        app:layout_constraintVertical_weight="1"
        app:layout_constraintHorizontal_weight="1"
        app:layout_constraintTop_toTopOf="parent"
        app:layout_constraintBottom_toTopOf="@id/guideline_top_menu"
        app:layout_constraintLeft_toRightOf="@id/button_logo"
        app:layout_constraintRight_toRightOf="parent"
        android:src="@drawable/sms"
        android:scaleType="fitCenter"
        android:background="@android:color/background_dark"
        tools:ignore="MissingConstraints" />

    <androidx.recyclerview.widget.RecyclerView
        android:id="@+id/story"
        android:layout_height="100dp"
        android:layout_width="match_parent"
        app:layout_constraintTop_toTopOf="@id/guideline_top_menu"
        app:layout_constraintBottom_toTopOf="@id/scroll"
        app:layout_constraintLeft_toLeftOf="parent"
        app:layout_constraintRight_toRightOf="parent"
        android:scrollbars="horizontal"
        tools:ignore="MissingConstraints" />

    <ImageButton
        android:id="@+id/button_to_home"
        android:layout_width="0dp"
        android:layout_height="0dp"
        app:layout_constraintVertical_weight="1"
        app:layout_constraintHorizontal_weight="1"
        app:layout_constraintTop_toBottomOf="@id/guideline_bottom_menu"
        app:layout_constraintBottom_toBottomOf="parent"
        app:layout_constraintLeft_toLeftOf="parent"
        app:layout_constraintRight_toLeftOf="@id/button_to_search"
        android:src="@drawable/home"
        android:scaleType="fitCenter"
        android:background="@android:color/background_dark"
        tools:ignore="MissingConstraints" />

    <ImageButton
        android:id="@+id/button_to_search"
        android:layout_width="0dp"
        android:layout_height="0dp"
        app:layout_constraintVertical_weight="1"
        app:layout_constraintHorizontal_weight="1"
        app:layout_constraintTop_toBottomOf="@id/guideline_bottom_menu"
        app:layout_constraintBottom_toBottomOf="parent"
        app:layout_constraintLeft_toRightOf="@id/button_to_home"
        app:layout_constraintRight_toLeftOf="@id/button_to_add"
        android:src="@drawable/search"
        android:scaleType="fitCenter"
        android:background="@android:color/background_dark"
        tools:ignore="MissingConstraints" />

    <ImageButton
        android:id="@+id/button_to_add"
        android:layout_width="0dp"
        android:layout_height="0dp"
        app:layout_constraintVertical_weight="1"
        app:layout_constraintHorizontal_weight="1"
        app:layout_constraintTop_toBottomOf="@id/guideline_bottom_menu"
        app:layout_constraintBottom_toBottomOf="parent"
        app:layout_constraintLeft_toRightOf="@id/button_to_search"
        app:layout_constraintRight_toLeftOf="@id/button_to_history"
        android:src="@drawable/add"
        android:scaleType="fitCenter"
        android:background="@android:color/background_dark"
        tools:ignore="MissingConstraints" />

    <ImageButton
        android:id="@+id/button_to_history"
        android:layout_width="0dp"
        android:layout_height="0dp"
        app:layout_constraintVertical_weight="1"
        app:layout_constraintHorizontal_weight="1"
        app:layout_constraintTop_toBottomOf="@id/guideline_bottom_menu"
        app:layout_constraintBottom_toBottomOf="parent"
        app:layout_constraintLeft_toRightOf="@id/button_to_add"
        app:layout_constraintRight_toLeftOf="@id/button_to_info"
        android:src="@drawable/heart"
        android:scaleType="fitCenter"
        android:background="@android:color/background_dark"
        tools:ignore="MissingConstraints" />

    <ImageButton
        android:id="@+id/button_to_info"
        android:layout_width="0dp"
        android:layout_height="0dp"
        app:layout_constraintVertical_weight="1"
        app:layout_constraintHorizontal_weight="1"
        app:layout_constraintTop_toBottomOf="@id/guideline_bottom_menu"
        app:layout_constraintBottom_toBottomOf="parent"
        app:layout_constraintLeft_toRightOf="@id/button_to_history"
        app:layout_constraintRight_toRightOf="parent"
        android:src="@drawable/userinfo"
        android:scaleType="fitCenter"
        android:background="@android:color/background_dark"
        tools:ignore="MissingConstraints" />

    <androidx.recyclerview.widget.RecyclerView
        android:id="@+id/scroll"
        android:layout_width="0dp"
        android:layout_height="0dp"
        app:layout_constraintTop_toBottomOf="@id/story"
        app:layout_constraintBottom_toBottomOf="@id/guideline_bottom_menu"
        app:layout_constraintRight_toRightOf="parent"
        app:layout_constraintLeft_toLeftOf="parent"
        android:scrollbars="vertical"/>

</androidx.constraintlayout.widget.ConstraintLayout>
아직 수정의 필요성이 보이긴 하지만 ImageButton과 RecyclerView를 활용하여 constraint Layout을 짜보았다. 카메라 기능을 활용하기 위해서는 Manifest에 아래의 조건을 추가해주어야 된다.
<uses-permission android:name="android.permission.CAMERA" />
<uses-feature android:name="android.hardware.camera" android:required="true" />
이제 MainActivity에서 버튼에 대한 부분을 처리해주어야 되는데 OnCreate부분에 이를 작성할 것이다.
public class MainActivity extends AppCompatActivity{
    private static final int REQUEST_IMAGE_CAPTRUE = 1;
    private ImageButton btn_camera;

    @Override
    protected void onCreate(Bundle savedInstanceState) {
        super.onCreate(savedInstanceState);
        setContentView(R.layout.activity_main);

        this.setBtn();

    }

    public void setBtn(){
        btn_camera = (ImageButton)findViewById(R.id.button_to_camera);

        View.OnClickListener Listener = new View.OnClickListener(){
            @Override
            public void onClick(View v) {
                switch (v.getId()) {
                    case R.id.button_to_camera:
                        int permissionCheck = ContextCompat.checkSelfPermission(MainActivity.this, Manifest.permission.CAMERA);
                        if(permissionCheck == PackageManager.PERMISSION_DENIED){
                            ActivityCompat.requestPermissions(MainActivity.this, new String[]{Manifest.permission.CAMERA},0);
                        } else {
                            Intent takePictureIntent = new Intent(MediaStore.ACTION_IMAGE_CAPTURE);
                            if (takePictureIntent.resolveActivity(getPackageManager()) != null) {
                                startActivityForResult(takePictureIntent, REQUEST_IMAGE_CAPTRUE);
                            }
                        }
                        break;
                    case R.id.button_to_home:
                        break;
                }
            }
        };

        btn_camera.setOnClickListener(Listener);
    }
}
setBtn이라는 함수를 생성하였는데 이 함수는 버튼들에 대한 초기화를 진행할 것이다. 함수가 호출이 되면 btn_camera라는 ImageButton이 생성되는데 이 버튼에 OnClickListener를 달아줄 것이다. OnclickListener를 정의해줄 Listener라는 변수를 생성하는데 이 변수는 내부에서 onClick을 오버라이딩해서 해당 이벤트 발생시의 동작을 재정의해준다. getId를 통해 어떤 버튼이 클릭 되었는지를 판별한 뒤 해당 버튼에 따라 case문을 수행해주는 것이다. button_to_camera가 onClick되면 takePictureIntent를 실행시켜줄 것인데 해당 인텐트는 카메라 작업을 위한 사전정의된 인텐트이다. 하지만 안드로이드 특정 버전 이상부터는 해당 기능에 대한 퍼미션 검사를 해주지 않으면 Permission 관련 에러가 발생하다. 그래서 이를 체크하기 위해서 requestPermission을 위와같이 진행해주어야 된다. 이렇게 코드를 작성하면 처음 카메라 버튼이 클릭되면 권한에 대한 요청이 수행되고 그 후에는 카메라 기능이 정상적으로 작동하게 된다.
자 이번에는 받아서 처리하는 부분을 설계해야되는데 Intent에 대한 결과를 받아오는 onActivityResult을 오버라이딩 해서 구현해 주어야 된다.
@Override
protected void onActivityResult(int requestCode, int resultCode, Intent data){
    super.onActivityResult(requestCode, resultCode, data);
    if(requestCode == REQUEST_IMAGE_CAPTRUE && resultCode == RESULT_OK && data.hasExtra("data")) {
        Bitmap bitmap = (Bitmap) data.getExtras().get("data");
    }
}
여기서 엄청난 시간을 낭비하였는데 startActivityForResult로 넘겨주는 인터넷 상의 많은 코드들이 bitmap을 가져오는 getExtras()에서 null 문제가 발생하였다. 삽질한 결과 activity를 넘겨주기 전에 putExtra로 URI 정보를 넘겨줄 경우에 이런 문제가 발생하였다. 후.. 어쨌든 지금 결과를 받아오는 곳에서 bitmap으로 찍은 사진에 대한 정보를 가져오는 것 까지 확인할 수 있었다. 또 그 과정에서 adb를 통해서 qemu내부에 접속을 시도하였는데 root권한을 획득하는 것이 안되었다. 이것도 qemu 안드 에뮬레이터 중에서 Google Play와 연관된 이미지를 사용하면 안되는 것이었다. 이를 위해서 다른 버전의 에뮬레이터를 추가로 설치하고서야 adb로 접속하여 내부 구조를 확인할 수 있었다. adb의 경우 android-studio의 sdk가 설치된 파일로 가서 platform-tools 폴더 내부에 설치되어있어서 따로 설치를 할 필요가 없다.
갤러리 인텐트 구현하기
카메라와 비슷한 방식으로 구현이 가능하다.
View.OnClickListener Listener = new View.OnClickListener() {
    @Override
    public void onClick(View v) {
        int permissionCheck;
        switch (v.getId()) {
            case R.id.button_to_camera:
                permissionCheck = ContextCompat.checkSelfPermission(MainActivity.this, Manifest.permission.CAMERA);
                if (permissionCheck == PackageManager.PERMISSION_DENIED) {
                    ActivityCompat.requestPermissions(MainActivity.this, PERMISSIONS, 0);
                } else {
                    Intent intent = new Intent(MediaStore.ACTION_IMAGE_CAPTURE);
                    if (intent.resolveActivity(getPackageManager()) != null) {
                        startActivityForResult(intent, REQUEST_IMAGE_CAPTRUE);
                    }
                }
                break;

            case R.id.button_to_add:
                permissionCheck = ContextCompat.checkSelfPermission(MainActivity.this, Manifest.permission.READ_EXTERNAL_STORAGE);
                if (permissionCheck == PackageManager.PERMISSION_DENIED) {
                    ActivityCompat.requestPermissions(MainActivity.this, PERMISSIONS, 0);
                } else {
                    Intent intent = new Intent();
                    intent.setAction(Intent.ACTION_GET_CONTENT);
                    intent.setData(MediaStore.Images.Media.EXTERNAL_CONTENT_URI);
                    intent.setType("image/*");
                    startActivityForResult(intent, REQUEST_TAKE_ALBUM);
                }
                break;
        }
    }
};
마찬가지로 정보를 가져오는 것이기 때문에 그에 상응하는 권한을 Manifest에 정의를 해주어야 되며 User로 부터 동의를 구해야 된다.
<uses-permission android:name="android.permission.WRITE_EXTERNAL_STORAGE"/>
<uses-permission android:name="android.permission.READ_EXTERNAL_STORAGE"/>
이렇게 해주면 갤러리로 부터 사진을 가져오는 것이 가능하다.
카카오 로그인 구현
사실 가장 기본적인 로직상 IntroActivity가 실행되고 나서 login여부에 따라 MainActivity로 메인 페이지로 이동시킬지 LoginActivity로 로그인 관련 로직을 처리할지를 결정지어야 된다. 현재의 흐름은 IntroActivity가 LoginActivity가 아닌 MainActivity로 바로 이동하기 때문에 이 부분에 대한 구현이 진행되어야 한다.
이번에는 카카오 api를 사용해서 로그인을 구현해보기로 하였다. 카카오 로그인을 사용하면 좋은 점이 여러가지 정보들에 대한 처리를 나의 서버가 아닌 카카오쪽에 전담할 수 있다. 계정에 대한 유출에 대한 고민을 줄일 수 있고 관련 DB에 처리를 부담하지 않을 수 있기 때문에 익숙해진다면 개발의 속도를 늘릴 수 있다.
이제 API를 사용해볼건데 이를 위해서는 Android용 SDK를 설치하여야 한다. 카카오 디벨로퍼에서 해당 sdk를 다운받거나 Gradle에 추가하는 방향으로 진행할 수 있다. Gradle은 프로젝트의 빌드에 사용되며 Maven을 통해 써드파티 라이브러리를 추가할 수 있다.
aintstagram/build/build.gradle 내부에 아래와 같이 라이브러리를 추가해준다.
subprojects {
    repositories {
        google()
        jcenter()
        maven { url 'https://devrepo.kakao.com/nexus/content/groups/public/' }
    }
}
그리고 app 아래의 build gradle에 implementation을 추가해준다.
dependencies {
    implementation fileTree(dir: 'libs', include: ['*.jar'])

    implementation 'androidx.appcompat:appcompat:1.1.0'
    implementation 'androidx.constraintlayout:constraintlayout:1.1.3'
    implementation 'androidx.recyclerview:recyclerview:1.1.0'
    testImplementation 'junit:junit:4.12'
    androidTestImplementation 'androidx.test.ext:junit:1.1.1'
    androidTestImplementation 'androidx.test.espresso:espresso-core:3.2.0'

    implementation group: 'com.kakao.sdk', name: 'usermgmt', version: '1.27.0'
    // 카카오톡
    implementation group: 'com.kakao.sdk', name: 'kakaotalk', version: '1.27.0'
    // 카카오링크
    implementation group: 'com.kakao.sdk', name: 'kakaolink', version: '1.27.0'
}
이제 Manifest에서 API에 대한 네이티브 키를 등록해주면 된다.
<meta-data
    android:name="com.kakao.sdk.AppKey"
    android:value="{NATIVE_APP_KEY}" />
해시에 대한 정보를 아래의 명령어를 입력하여 생성 후에 kakao.developer.com에 등록해준다.
Wizley:~/git/aintstagram # keytool -exportcert -alias androiddebugkey -keystore ~/.android/debug.keystore -storepass android -keypass android | openssl sha1 -binary | openssl base64
그리고 테스트를 위해서 빌드를 시키면 정상적으로 완료되는 것을 확인할 수 있다.
카카오의 로그인 서비스는 REST api를 통해 구현되며 토큰을 주고 받는 방식으로 진행된다고 한다. 로직을 보면 사용자가 정보를 요청하면 토큰을 발급해서 넘겨주는 방식인 것 같다. LoginActivity를 위한 레이아웃을 설계하였다.
<?xml version="1.0" encoding="utf-8"?>
<androidx.constraintlayout.widget.ConstraintLayout xmlns:android="http://schemas.android.com/apk/res/android"
    android:layout_width="match_parent"
    android:layout_height="match_parent"
    xmlns:app="http://schemas.android.com/apk/res-auto"
    xmlns:tools="http://schemas.android.com/tools"
    android:background="#000000"
    tools:context=".LoginActivity">>

    <androidx.constraintlayout.widget.Guideline
        android:id="@+id/guideline_top"
        android:layout_width="wrap_content"
        android:layout_height="wrap_content"
        android:orientation="horizontal"
        app:layout_constraintTop_toTopOf="parent"
        app:layout_constraintBottom_toTopOf="@id/logo"
        app:layout_constraintGuide_begin="100dp"/>

    <androidx.constraintlayout.widget.Guideline
        android:id="@+id/guideline_bottom"
        android:layout_width="wrap_content"
        android:layout_height="wrap_content"
        android:orientation="horizontal"
        app:layout_constraintTop_toBottomOf="@id/logo"
        app:layout_constraintBottom_toBottomOf="parent"
        app:layout_constraintGuide_end="100dp"/>

    <androidx.constraintlayout.widget.Guideline
        android:id="@+id/guideline_left"
        android:layout_width="wrap_content"
        android:layout_height="wrap_content"
        android:orientation="vertical"
        app:layout_constraintTop_toBottomOf="@id/guideline_top"
        app:layout_constraintBottom_toTopOf="@id/guideline_bottom"
        app:layout_constraintLeft_toLeftOf="parent"
        app:layout_constraintRight_toLeftOf="@id/logo"
        app:layout_constraintGuide_begin="30dp"/>


    <androidx.constraintlayout.widget.Guideline
        android:id="@+id/guideline_right"
        android:layout_width="wrap_content"
        android:layout_height="wrap_content"
        android:orientation="vertical"
        app:layout_constraintTop_toBottomOf="@id/guideline_top"
        app:layout_constraintBottom_toTopOf="@id/guideline_bottom"
        app:layout_constraintRight_toRightOf="parent"
        app:layout_constraintLeft_toRightOf="@id/logo"
        app:layout_constraintGuide_end="30dp"/>

    <ImageView
        android:id="@+id/logo"
        android:layout_width="200dp"
        android:layout_height="200dp"
        android:src="@drawable/aintstagram"
        app:layout_constraintBottom_toTopOf="@id/guideline_bottom"
        app:layout_constraintTop_toBottomOf="@id/guideline_top"
        app:layout_constraintLeft_toRightOf="@id/guideline_left"
        app:layout_constraintRight_toLeftOf="@id/guideline_right"/>

    <com.kakao.usermgmt.LoginButton
        android:id="@+id/login_button"
        android:layout_width="match_parent"
        android:layout_height="wrap_content"
        android:layout_marginLeft="20dp"
        android:layout_marginRight="20dp"
        android:layout_marginBottom="30dp"
        app:layout_constraintLeft_toLeftOf="parent"
        app:layout_constraintRight_toRightOf="parent"
        app:layout_constraintBottom_toBottomOf="parent" />

</androidx.constraintlayout.widget.ConstraintLayout>
기존의 introActivity에 카카오에서 제공하는 LoginButton을 추가하였다.
이를 핸들링하기 위한 LoginActivity.java 파일은 아래와 같다.
package com.ssg.aintstagram;

import android.app.Activity;
import android.content.Intent;
import android.os.Bundle;
import android.util.Log;
import androidx.annotation.Nullable;
import com.kakao.auth.ISessionCallback;
import com.kakao.auth.Session;
import com.kakao.util.exception.KakaoException;

public class LoginActivity extends Activity {

    private ISessionCallback sessionCallback = new ISessionCallback() {
        @Override
        public void onSessionOpened() {
            Intent intent = new Intent(LoginActivity.this, MainActivity.class);
            startActivity(intent);
        }

        @Override
        public void onSessionOpenFailed(KakaoException exception) {

        }
    };

    @Override
    protected void onCreate(@Nullable Bundle savedInstanceState) {
        super.onCreate(savedInstanceState);
        setContentView(R.layout.activity_login);

        Session.getCurrentSession().addCallback(sessionCallback);
    }

    @Override
    protected void onDestroy() {
        super.onDestroy();

        Session.getCurrentSession().removeCallback(sessionCallback);
    }

    @Override
    protected void onActivityResult(int requestCode, int resultCode, Intent data) {
        super.onActivityResult(requestCode, resultCode, data);

        if(Session.getCurrentSession().handleActivityResult(requestCode, resultCode, data)){
            return;
        }

        super.onActivityResult(requestCode, resultCode, data);
    }
}
해당 액티비티가 생성이 되면 activity_login으로 view가 생성이 되고 getCurrentSession()을 통해 세션에 대한 정보를 가져온다. 만약 존재하면 MainActivity를 호출하게 된다. 여기서 이를 처리하기 위한 sdk에 대한 코드를 생성해야 된다.
package com.ssg.aintstagram;

import android.app.Application;
import android.content.Context;
import com.kakao.auth.IApplicationConfig;
import com.kakao.auth.KakaoAdapter;
import com.kakao.auth.KakaoSDK;

public class MyKakaoAdapter extends Application {
    @Override
    public void onCreate() {
        super.onCreate();

        // SDK 초기화
        KakaoSDK.init(new KakaoAdapter() {

            @Override
            public IApplicationConfig getApplicationConfig() {
                return new IApplicationConfig() {
                    @Override
                    public Context getApplicationContext() {
                        return MyKakaoAdapter.this;
                    }
                };
            }
        });
    }
}
MyKakaoAdapter라는 KakaoAdapter를 application으로 생성해주면 된다. 이를 위해선 Manifest에 추가해주어야 된다.
<application
    android:name=".MyKakaoAdapter"
이제 테스트를 해보면 아이디/패스워드로 요청을 보내고 사용자의 동의를 얻으면 MainActivity로 이동하는 것을 확인할 수 있다.
generic_x86_arm:/data/data/com.ssg.aintstagram/shared_prefs # ls
3f5c6005c0954ba8a11e315b702a5442.xml WebViewChromiumPrefs.xml
at 3f5c6005c0954ba8a11e315b702a5442.xml
<?xml version='1.0' encoding='utf-8' standalone='yes' ?>
<map>
<string name="com.kakao.token.RefreshToken.ExpiresAt">{"value":1592044787261,"valueType":"long"}</string>
<string name="com.kakao.token.AccessToken.ExpiresAt">{"value":1586903987261,"valueType":"long"}</string>
<string name="com.kakao.token.RefreshToken">{"value":"something","valueType":"string"}</string>
<string name="com.kakao.token.AccessToken">{"value":"something","valueType":"string"}</string>
</map>
adb로 접속해서 확인해보면 Token에 대한 정보가 로컬 저장소에 정상적으로 저장된 것을 확인할 수 있었다. 여기서 조금 더 나아가 수정을 해보자. 현재까지 있던 문제로는 introActivity가 activityStack에 남아있다는 점과 MainActivity로 넘어간다는 점, 또 그리고 LoginActivity를 세션이 유지되어 있는 동안에는 굳이 띄울필요가 없다는 점을 들 수 있겠다. 해당 처리를 위해서 IntroActivity 부분과 IntroThread를 낭낭히 수정해보자.
package com.ssg.aintstagram;

import android.os.Message;
import android.os.Handler;
import com.kakao.auth.Session;

public class IntroThread extends Thread {
    private Handler handler;

    public IntroThread(Handler handler){
        this.handler = handler;
    }

    @Override
    public void run(){
        Message msg = new Message();

        try{
            Thread.sleep(2000);

            if(Session.getCurrentSession().isOpened()){
                msg.what = 1;
            }
            else{
                msg.what = 2;
            }
            handler.sendEmptyMessage(msg.what);
        } catch (Exception e){
            e.printStackTrace();
        }
    }
}
Introthread는 잠시 로고를 띄워주는 역할을 수행했었는데 한 가지 작업을 더 추가하였다.
위의 사이트의 Session 라이브러리를 보면 isOpened라는 메소드가 있다. 해당 메소드를 호출하여 세션에 대한 정보가 있는지를 확인한 뒤 연결되어 있는 상태이면 1을 아닐 경우 2를 넘겨준다.
@Override
public void handleMessage(Message msg){
    if(msg.what == 1){
        Intent intent = new Intent(IntroActivity.this, MainActivity.class);
        startActivity(intent);
    }
    else{
        Intent intent = new Intent(IntroActivity.this, LoginActivity.class);
        startActivity(intent);
    }
    finish();
}
IntroActivity는 해당 결과를 받아와 LoginActivity를 호출할지 MainActivity를 호출할지 결정해주기만 하면 된다. 그 후 onDestroy() 호출을 위해 finish를 해주면 된다.
카카오 로그인 정보로 계정 생성하기
카카오 API를 활용하여 로그인을 하기 때문에 그에 해당하는 DB를 설계해줘야 된다. 일단은 간단하게 아래와 같이 모델을 설계하였다.
from django.db import models


class UserModel(models.Model):
    name = models.CharField(max_length=100, unique=True, verbose_name="아이디")
    kakaoID = models.IntegerField(unique=True, verbose_name="카카오")
    date = models.DateTimeField(auto_now_add=True, verbose_name="가입날짜")

    def __str__(self):
        return self.name
가장 최소한의 정보로는 name으로 사용할 정보와 kakao 계정id 정보, 그리고 가입날짜가 되겠다. 물론 프로필 사진과 같은 정보들이 필요하겠지만 일단은 가장 최소화 형태로 구현하기로 한다.
graphQL을 사용할 것이기 때문에 해당 모델에 대한 정보를 제대로 가져오는지 테스트가 필요했다. 그래서 test라는 name으로 계정을 하나 생성하였다. 이제 graphQL이 제대로 정보를 가져오는지 테스트를 해봐야된다. 이를 위해서 아래와 같이 요청을 해보았다.
query {
    users{
        name
        kakaoID
        date
    }
}
해당 요청을 받은 api서버는 아래의 로직을 타게 된다.
class UserType(DjangoObjectType):
    class Meta:
        model = UserModel


class Query(graphene.ObjectType):
    users = graphene.List(UserType)

    def resolve_users(self, info):
        return UserModel.objects.all()
users로 들어온 UserType 즉, UserModel이라는 model에 대한 리스트를 리턴해준다. 결과를 확인해보면 아래와 같이 정상적으로 값을 가져온 것을 확인할 수 있었다.
{
    "data": {
        "users": [
            {
                "name": "test",
                "kakaoID": 0,
                "date": "2020-04-14T14:03:38.309435+00:00"
            }
        ]
    }
}
생성과 같은 경우에는 mutation을 아래처럼 사용하면 된다. 나의 경우 Output으로 UserType을 넘겨줬더니 여러 문제가 계속 발생해서 일단은 아래와 같이 해결하였다.
class CreateUser(graphene.Mutation):
    name = graphene.String()
    kakaoID = graphene.Int()
    date = graphene.DateTime()

    class Arguments:
        name = graphene.String(required=True)
        kakaoID = graphene.Int(required=True)

    def mutate(self, info, name, kakaoID):
        user = UserModel(name=name, kakaoID=kakaoID)
        user.save()
        return CreateUser(
            name=user.name,
            kakaoID=user.kakaoID,
            date=user.date
        )


class Mutation(graphene.ObjectType):
    create_user = CreateUser.Field()


schema = graphene.Schema(
    query=Query,
    mutation=Mutation
)
쿼리를 다음과 같이 날리면,
mutation {
    createUser (name: "wizley", kakaoID: 1234){
        name
        kakaoID
        date
    }
}
save가 되고 나면 다음과 같이 응답이 돌아온다.
{
    "data": {
        "createUser": {
            "name": "wizley",
            "kakaoID": 1234,
            "date": "2020-04-14T15:10:36.012405+00:00"
        }
    }
}
하지만 여기에서 아직 진행하지 않은 작업이 있다. 계정이 이미 존재하는지에 대한 검사를 수행하지 않은 것이다. 그래서 try문을 통해 기존 kakaoID 계정이 존재하는지를 확인하는 코드를 추가해주었다.
class CreateUser(graphene.Mutation):
    name = graphene.String()
    kakaoID = graphene.Int()
    date = graphene.DateTime()

    class Arguments:
        name = graphene.String(required=True)
        kakaoID = graphene.Int(required=True)

    def mutate(self, info, name, kakaoID):
        try:
            user = UserModel.objects.get(kakaoID=kakaoID)
        except:
            user = UserModel(name=name, kakaoID=kakaoID)
            user.save()
        return CreateUser(
            name=user.name,
            kakaoID=user.kakaoID,
            date=user.date
        )
Apollo graphql 적용하기
이제 해당 요청을 안드로이드에서 api서버로 해야되는데 찾아보니 apollo graphql이 있었다.
순서대로 따라해보면 root의 gradle에 아래를 추가해주어야 된다.
buildscript {
    repositories {
        jcenter()
    }
    dependencies {
        classpath("com.apollographql.apollo:apollo-gradle-plugin:1.4.4")
    }
}
그리고 app의 gradle에 아래와 같이 추가해준다.
apply plugin: 'com.apollographql.apollo'


dependencies {

    implementation("com.apollographql.apollo:apollo-runtime:1.4.4")
}
성공적으로 프로젝트에 대한 빌드가 진행되는 것을 확인할 수 있었다. 여기서 또 삽질의 시간이 왔다. schema.json을 생성해주어야 되는데 공식 사이트의 커맨드 라인이 정상적으로 작동하지 않았다. 나의 경우 아래와 같이 해결할 수 있었다.
Apollo graphQL client for Android
brew install apollo-cli
apollo-cli 패키지를 먼저 설치를 한다.
Wizley:~/git/aintstagram/app/src/main/graphql/com/ssg # apollo schema:download --endpoint=http://localhost:8000/graphql/ schema.json
  ✔ Loading Apollo Project
  ✔ Saving schema to schema.json
그 후 위와 같이 endpoint로 graphql 주소를 줘서 아래와 같은 schema.json을 만들 수 있었다.
{
  "__schema": {
    "queryType": {
      "name": "Query"
    },
    "mutationType": {
      "name": "Mutation"
    },
    "subscriptionType": null,
    "types": [
      {
        "kind": "OBJECT",
        "name": "Query",
        "description": null,
        "fields": [
          {
            "name": "users",
            "description": null,
            "args": [],
            "type": {
              "kind": "LIST",
              "name": null,
              "ofType": {
                "kind": "OBJECT",
                "name": "UserType",
                "ofType": null
              }
            },
            "isDeprecated": false,
            "deprecationReason": null
          }
        ],
        "inputFields": null,
        "interfaces": [],
        "enumValues": null,
        "possibleTypes": null
        // 생략
    }
}
무려 1112줄이나 된다. 이걸 직접 생성할려고 했으면 꽤나 힘들었을 것 같다. (다행히도 삽질을 통해서 자동생성할 수 있었음에 감사한다..) 자 여기서 또 엄청나게 삽질을 했다. 적용을 위해서는 아래와 같이 한번더 gradle에 추가가 필요하다.
apollo {
    generateKotlinModels.set(false)
}
app아래의 build.gradle에 추가해주면 되는데 false를 하면 java로 적용된다. 그리고 이것 뿐만 아니라 해당 build.gradle에 하나의 옵션을 더 주어야 되는데 이걸 주지 않으면 notNULL과 같은 패키지 오류가 발생한다.
implementation 'org.jetbrains:annotations:13.0'
여기까지 작성하면 정상적으로 작동한다.
mutation create_user($name:String!, $kakaoID:Int!){
    createUser (name: $name, kakaoID: $kakaoID){
        name
        kakaoID
        date
    }
}
api 서버로 쿼리 요청 및 응답받아오기
이번에는 graphql아래의 디렉토리에 createUser.graphql을 생성하였다. createUser는 schema.json에 있는 그 이름 그대로 써야되며 mutation 타입아래 서버의 createUser부분을 의미한다. 이제 요청을 보내는 부분을 아래와 같이 작성한다.
public void getUserInfo(){
        List<String> keys = new ArrayList<>();
        keys.add("properties.nickname");

        UserManagement.getInstance().me(keys, new MeV2ResponseCallback() {
            @Override
            public void onSessionClosed(ErrorResult errorResult) {

            }

            @Override
            public void onSuccess(MeV2Response result) {
                String Nickname = result.getNickname();
                int kakaoID = (int) result.getId();
                Log.e("LOG HERE", "requestMe onSuccess message : " + Nickname + " " + kakaoID);

                String base_URL = "http://10.0.2.2:8000/graphql/";
                OkHttpClient okHttpClient = new OkHttpClient.Builder().build();
                ApolloClient apolloClient = ApolloClient.builder().serverUrl(base_URL).okHttpClient(okHttpClient).build();

                final Create_userMutation userCreation = Create_userMutation.builder().name(Nickname).kakaoID(kakaoID).build();

                apolloClient.mutate(userCreation).enqueue(new ApolloCall.Callback<Create_userMutation.Data>() {
                    @Override
                    public void onResponse(Response<Create_userMutation.Data> response) {
                        Intent intent = new Intent(LoginActivity.this, MainActivity.class);
                        startActivity(intent);

                    }

                    @Override
                    public void onFailure(ApolloException e) {
                        Log.e("grapql", e.getLocalizedMessage());
                    }
                });
            }
        });
    }
카카오 api가 정상적으로 값을 가져와서 onSuccess가 호출이 되면 OkHttpClient와 ApolloClient를 통해서 graphql endpoint로 쿼리를 전송한다. apolloClient.query는 쿼리를 위한 요청이고 위의 mutate는 mutation을 위한 요청이다. onResponse를 통해 결과로 Data가 돌아오는데 response.data().createUser.kakaoID 와 같은 형식으로 값을 가져오는게 가능하다. 하지만 해당 기능을 구현하는데 자꾸 onFailure가 호출되었다.
2020-04-15 22:10:02.094 15908-16050/com.ssg.aintstagram D/GRAPHQL: Failed to execute http call
찾아보니 AVD에서는 10.0.2.2로 localhost와 통신을 한다는데 브라우저를 통해 접속하면 접속이 되도 앱에서 쏘면 작동을 하지 않고 위와 같은 에러가 발생하였다. 많은 고민끝에 해결했는데 아마 아래의 한 줄을 매니패스트에 추가해주면서 해결이 된 것 같다.
<application
    android:usesCleartextTraffic="true"
로컬을 https가 아닌 http로 통신을 하도록 설정을 했기 때문에 프로토콜에 의한 접근 제한을 당한것 같다. 이렇게 해결하면 정상적으로 서버로부터 응답이 오는 것을 확인할 수 있었다.
aintstagram | [15/Apr/2020 22:18:10] "POST /graphql/ HTTP/1.1" 200 130
aintstagram | [15/Apr/2020 22:19:00] "POST /graphql/ HTTP/1.1" 200 130
aintstagram | [15/Apr/2020 22:19:30] "POST /graphql/ HTTP/1.1" 200 130
aintstagram | [15/Apr/2020 22:22:13] "POST /graphql/ HTTP/1.1" 200 130
aintstagram | [15/Apr/2020 22:26:08] "POST /graphql/ HTTP/1.1" 200 130
이렇게 graphql과 통신을 하는 방법에 대해서 익힐 수 있었다.
DB 구성하기
백엔드 쪽과 뷰를 짜기 위해서는 모델에 대한 설계가 필요하다. 기능들을 세분화하여서 모델의 구조를 아래의 그림과 같이 만들었다.
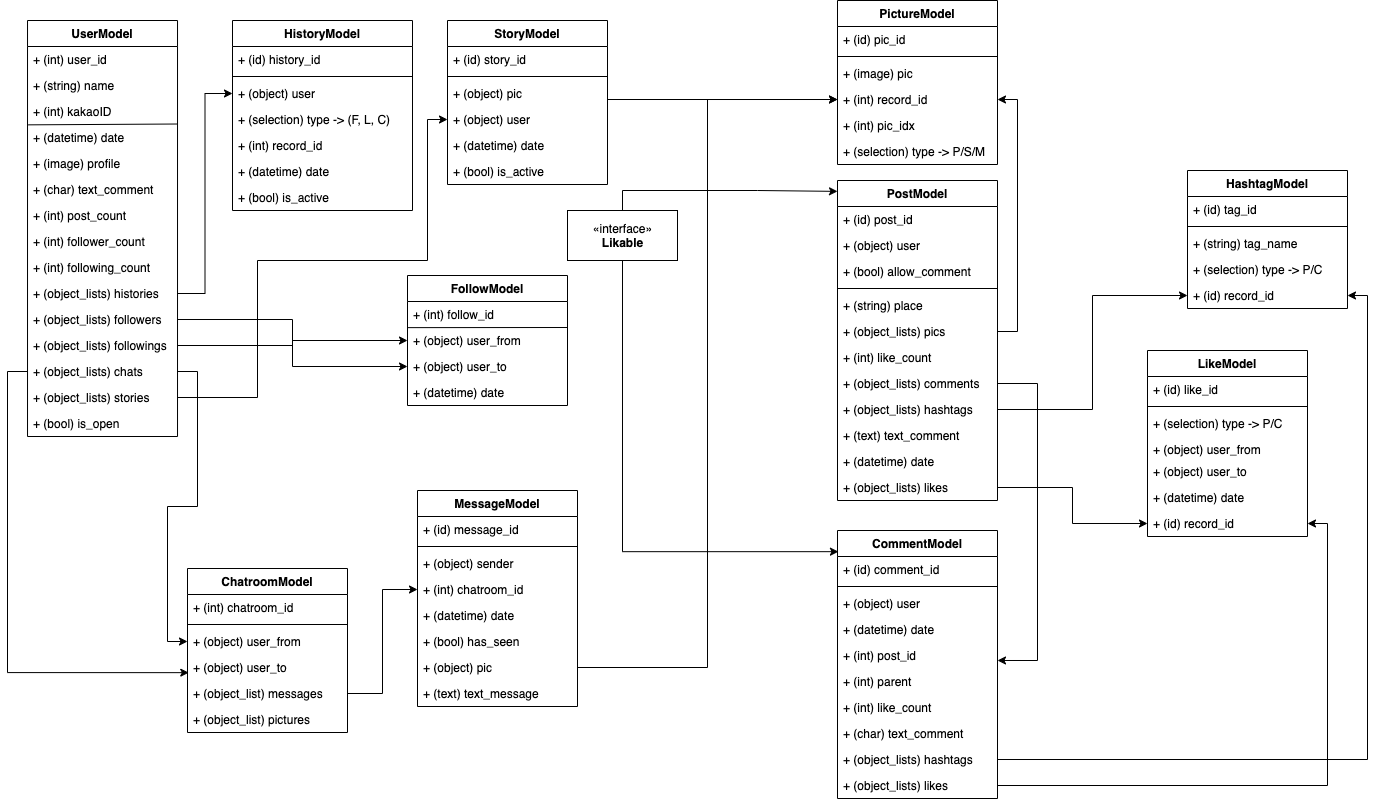
그리고 이에 따라 models.py를 구성해보면 아래와 같다.
from django.db import models


class UserModel(models.Model):
    user_id = models.AutoField(primary_key=True)
    name = models.CharField(max_length=100, unique=True, verbose_name="아이디")
    kakaoID = models.IntegerField(unique=True, verbose_name="카카오")
    date = models.DateTimeField(auto_now_add=True, verbose_name="가입날짜")
    profile = models.ImageField(upload_to="pictures/profile", verbose_name="프로필사진")
    text_comment = models.CharField(max_length=30, verbose_name="코멘트")
    post_count = models.IntegerField(verbose_name="포스트", default=0)
    follower_count = models.IntegerField(verbose_name="팔로워", default=0)
    following_count = models.IntegerField(verbose_name="팔로잉", default=0)
    is_open = models.BooleanField(verbose_name="공개 여부", default=True)

    def __str__(self):
        return self.name


class HistoryModel(models.Model):
    history_id = models.AutoField(primary_key=True)
    user = models.ForeignKey(UserModel, verbose_name="사용자", on_delete=models.CASCADE)
    selection = (
        ('F', 'Follow'),
        ('L', 'Like'),
        ('C', 'Comment'),
    )
    type = models.CharField(max_length=1, verbose_name="타입", choices=selection, default='C')
    record_id = models.IntegerField(verbose_name="번호")
    date = models.DateTimeField(auto_now_add=True, verbose_name="생성날짜")
    is_active = models.BooleanField(verbose_name="노출 여부", default=True)


class PictureModel(models.Model):
    pic_id = models.AutoField(primary_key=True)
    pic = models.ImageField(upload_to="pictures/pic", verbose_name="사진")
    record_id = models.IntegerField(verbose_name="번호")
    pic_idx = models.IntegerField(verbose_name="인덱스")
    selection = (
        ('P', 'Post'),
        ('S', 'Story'),
        ('M', 'Message')
    )
    type = models.CharField(max_length=1, verbose_name="타입", choices=selection, default='P')


class StoryModel(models.Model):
    story_id = models.AutoField(primary_key=True)
    pic = models.ForeignKey(PictureModel, verbose_name="사진", on_delete=models.CASCADE)
    user = models.ForeignKey(UserModel, verbose_name="유저", on_delete=models.CASCADE)
    date = models.DateTimeField(auto_now_add=True, verbose_name="생성날짜")
    is_active = models.BooleanField(verbose_name="활성화 여부", default=True)


class FollowModel(models.Model):
    follow_id = models.AutoField(primary_key=True)
    user_from = models.ForeignKey(UserModel, verbose_name="요청", related_name="follow_user_from", on_delete=models.CASCADE)
    user_to = models.ForeignKey(UserModel, verbose_name="응답", related_name="follow_user_to", on_delete=models.CASCADE)
    date = models.DateTimeField(auto_now_add=True, verbose_name="생성날짜")


class MessageModel(models.Model):
    message_id = models.AutoField(primary_key=True)
    sender = models.ForeignKey(UserModel, verbose_name="보낸이", on_delete=models.CASCADE)
    chatroom_id = models.IntegerField(verbose_name="번호")
    date = models.DateTimeField(auto_now_add=True, verbose_name="생성날짜")
    has_seen = models.BooleanField(verbose_name="확인여부", default=False)
    pic = models.ForeignKey(PictureModel, verbose_name="사진", on_delete=models.CASCADE)
    text_message = models.CharField(max_length=50, verbose_name="메시지")


class ChatroomModel(models.Model):
    chatroom_id = models.AutoField(primary_key=True)
    user_from = models.ForeignKey(UserModel, verbose_name="생성자", related_name="chatroom_user_from", on_delete=models.CASCADE)
    user_to = models.ForeignKey(UserModel, verbose_name="초대받은자", related_name="chatroom_user_to", on_delete=models.CASCADE)


class HashtagModel(models.Model):
    tag_id = models.AutoField(primary_key=True)
    tag_name = models.CharField(max_length=8, verbose_name="태그")
    selection = (
        ('P', 'Post'),
        ('C', 'Comment'),
    )
    type = models.CharField(max_length=1, verbose_name="타입", choices=selection, default='P')
    record_id = models.IntegerField(verbose_name="번호")


class LikeModel(models.Model):
    like_id = models.AutoField(primary_key=True)
    selection = (
        ('P', 'Post'),
        ('C', 'Comment'),
    )
    type = models.CharField(max_length=1, verbose_name="타입", choices=selection, default='P')
    user_from = models.ForeignKey(UserModel, verbose_name="준 이", related_name="like_user_from", on_delete=models.CASCADE)
    user_to = models.ForeignKey(UserModel, verbose_name="받은 이", related_name="like_user_to", on_delete=models.CASCADE)
    date = models.DateTimeField(auto_now_add=True, verbose_name="생성날짜")
    record_id = models.IntegerField(verbose_name="번호")


class PostModel(models.Model):
    post_id = models.AutoField(primary_key=True)
    user = models.ForeignKey(UserModel, verbose_name="유저", on_delete=models.CASCADE)
    allow_comment = models.BooleanField(default=True, verbose_name="코멘트 활성화여부")
    place = models.CharField(max_length=14, verbose_name="장소")
    like_count = models.IntegerField(default=0, verbose_name="좋아요 개수")
    text_comment = models.CharField(max_length=100, verbose_name="코멘트")
    date = models.DateTimeField(auto_now_add=True, verbose_name="작성일자")


class CommentModel(models.Model):
    comment_id = models.AutoField(primary_key=True)
    user = models.ForeignKey(UserModel, verbose_name="유저", on_delete=models.CASCADE)
    date = models.DateTimeField(auto_now_add=True, verbose_name="작성일자")
    post_id = models.IntegerField(verbose_name="포스트 번호")
    parent = models.IntegerField(null=True)
    like_count = models.IntegerField(default=0, verbose_name="좋아요 개수")
    text_comment = models.CharField(max_length=100, verbose_name="코멘트")
이 과정에서 ImageField를 사용하기 위해서는 Pillow를 설치하여야 되는데 설치가 잘 되지 않아 아래의 명령어로 설치를 하였다.
pip3 install --user git+https://github.com/python-imaging/Pillow
이제 구성한 다이어그램을 기준으로 코드를 작성하면 될 것 같다.
graphql Query문 변형
이번에는 프로필 정보를 가져오기 위해서 정보를 추가하여 보자. 대략적으로 kakaoID를 기반으로 가져오는 것과 user의 이름으로 가져오는 것 두 분류만 있으면 될 것같다.
class Query(graphene.ObjectType):
    users = graphene.List(UserType,
                          kakaoID=graphene.Int(),
                          username=graphene.String(),
                          )

    def resolve_users(self, info, kakaoID=None, username=None):
        query = UserModel.objects.all()

        if kakaoID:
            return UserModel.objects.filter(kakaoID=kakaoID)

        elif username:
            return UserModel.objects.filter(name=username)

        else:
            return query
방법은 위와 같다. List에 kakaoID와 username이라는 필드를 추가한 뒤 해당 필드가 존재할 경우에 그에 따른 filter 결과를 돌려주면 된다.
query {
    users (username:"Wizley"){
        name
        kakaoID
    }
}
이제 이렇게 명시적으로 요청을 하면 아래와 같이 정보를 확인하여 돌려주는 것을 확인할 수 있다. 만약 filter의 결과가 존재하지 않으면 []를 리턴해준다.
{
    "data": {
        "users": [
            {
                "name": "Wizley",
                "kakaoID": 1111111111
            }
        ]
    }
}
이제 해당 부분을 토대로 사용자의 정보를 profile 탭에서 뿌려주는 부분을 구현해 볼 것이다. 이를 위해서는 schema.json의 위와 같이 다시 만들어야 된다. 그리고 아래와 같이 java파일 하나를 추가하였다.
query userType($name:String, $kakaoID:Int){
    users (username: $name, kakaoID: $kakaoID){
        name
        kakaoID
        textComment
        postCount
        followerCount
        followingCount
        profile
        isOpen
    }
}
Query문을 위해 사용되며 userType Object에 대하여 users로 username 또는 KakaoID를 기반으로 조회하여 결과를 돌려준다. 위의 요청이 가면 아래의 형태로 응답이 돌아오게된다.
{
    "data": {
        "users": [
            {
                "name": "Wizley",
                "kakaoID": 11111,
                "textComment": "Hello Wizley!",
                "postCount": 0,
                "followerCount": 0,
                "followingCount": 0,
                "profile": "pictures/profile/kiki.png"
            }
        ]
    }
}
자바에서 해당 부분을 보내는 코드는 다음과 같다.
 String base_URL = "http://10.0.2.2:8000/graphql/";
                OkHttpClient okHttpClient = new OkHttpClient.Builder().build();
                ApolloClient apolloClient = ApolloClient.builder().serverUrl(base_URL).okHttpClient(okHttpClient).build();

                final UserTypeQuery u = UserTypeQuery.builder().kakaoID(kakaoID).build();

                apolloClient.query(u).enqueue(new ApolloCall.Callback<UserTypeQuery.Data>() {
                    @Override
                    public void onResponse(@NotNull Response<UserTypeQuery.Data> response) {
                        post_cnt = response.data().users().get(0).postCount;
                        follower_cnt = response.data().users().get(0).followerCount;
                        following_cnt = response.data().users().get(0).followingCount;
                        is_open = response.data().users().get(0).isOpen;
                        final String profile_img = getString(R.string.media_url) + response.data().users().get(0).profile;
Mutation과 거의 동일한데 UserTypeQuery와 같이 명시된 형태를 사용해야 한다는 점에서 약간의 차이가 있다. 결과에 대해서는 List 형으로 돌아오기 때문에 인덱스를 기반으로 값을 가져와야 된다.
Django MEDIA URL 설정
이미지에 대한 링크가 response로 돌아오기 때문에 해당 url을 기반으로 이미지를 받아와야 된다. 이를 위해서 다음과 같이 세팅을 해주었다.
MEDIA_URL = '/media/'
MEDIA_ROOT = os.path.join(BASE_DIR, 'media')
settings.py에서 이미지를 저장할 위치를 BASE_DIR를 기준으로 설정을 해주었다. 그리고 url을 통해 접근하기 위해서 main app의 urls.py에 아래와 같이 한줄을 추가하였다.
urlpatterns += static(settings.MEDIA_URL, document_root=settings.MEDIA_ROOT)
이렇게 추가를 해주면 url을 통해 해당 정보에 접근이 가능하다. 이제 java에서 이 정보를 토대로 화면에 그려주는 작업을 수행해볼 것이다. 먼저 고정된 주소를 여러 activity에서 사용할 것이기 때문에 res 내부의 strings.xml에 아래와 같이 정보를 추가해준다.
<resources>
    <string name="app_name">aintstagram</string>
    <string name="media_url">http://10.0.2.2:8000/media/</string>
</resources>
이렇게 등록을 해두게 되면 getString을 통해 아래와 같이 해당 문자열을 가져오는게 가능하다. 물론 윗 부분에 포맷스트링을 사용하여 builder로 생성하는 것 또한 가능하다.
final String profile_img = getString(R.string.media_url) + response.data().users().get(0).profile;

Thread mThread = new Thread() {
    @Override
    public void run() {
        try {
            URL img_url = new URL(profile_img);
            HttpURLConnection conn = (HttpURLConnection) img_url.openConnection();
            conn.setDoInput(true);
            conn.connect();

            InputStream is = conn.getInputStream();
            bitmap = BitmapFactory.decodeStream(is);

            runOnUiThread(new Runnable(){
                public void run(){
                    ImageView v_profile = (ImageView)findViewById(R.id.user_profile);
                    v_profile.setImageBitmap(bitmap);
                }
            });
        } catch(
        MalformedURLException e) {
            e.printStackTrace();

        } catch (IOException e) {
            e.printStackTrace();
        }
    }
};

mThread.start();
네트워크 작업을 수행하기 위해 Thread를 만들었는데 thread는 실행되면 url로부터 bitmap 형태로 이미지를 가져오게 된다. 이 과정에서 주의해야 될 것이 있는데 view에 대한 설정은 MainThread에서만 수행되기 때문에 원할한 처리를 위해서 runOnUiThread를 사용하여 ImageView의 setImageBitmap을 처리해주어야 된다. 이와 같이 처리를 하고 나면 정상적으로 이미지가 ImageView 화면에 그려진다.
CircleImageView 추가
인스타그램의 프로필 사진이 동그랗게 생겼기 때문에 해당 부분에 대한 구현을 고민해보았는데 역시나 누군가가 이미 만든 라이브러리가 있었다. 해당 라이브러리를 사용해주면 쉽게 그리는 것이 가능하다.
implementation 'de.hdodenhof:circleimageview:3.1.0'
build.gradle에 Implementation을 추가한 뒤 아래와 같이 layout에서 구현을 해주면 된다.
<de.hdodenhof.circleimageview.CircleImageView
    android:id="@+id/user_profile"
    android:layout_height="150dp"
    android:layout_width="0dp"
    app:layout_constraintVertical_weight="1"
    app:layout_constraintHorizontal_weight="1.5"
    app:layout_constraintTop_toTopOf="@id/guideline_top_menu"
    app:layout_constraintBottom_toTopOf="@id/user_comment"
    app:layout_constraintLeft_toLeftOf="parent"
    app:layout_constraintRight_toLeftOf="@id/user_posts"
    app:civ_border_width="2dp"
    app:civ_border_color="@android:color/white"
    tools:ignore="MissingConstraints" />
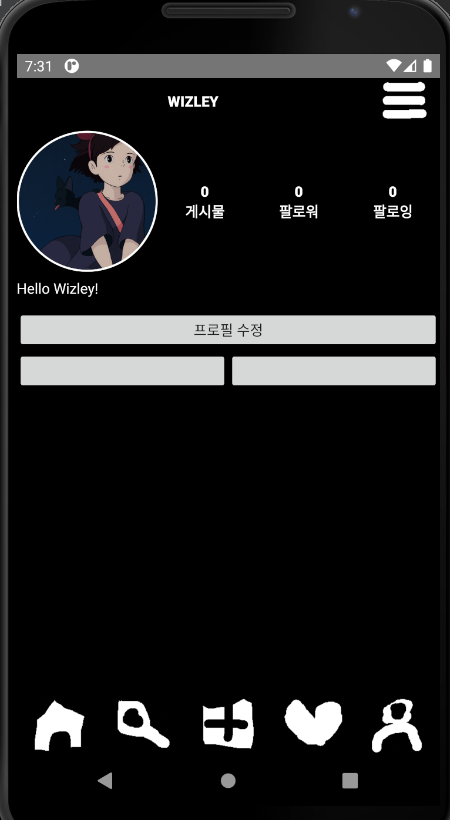
이렇게 구현을 한 뒤 확인을 해보면 나름 비슷한 화면이 구현된 것을 확인할 수 있다.
카메라로 찍은 사진을 Public Directory에 저장하기
안드로이드의 보안 정책이 바뀜에 따라 FileProvider를 사용해서 앱 내부에 저장하는 방식이 권장되도록 변경되었다고 한다. 하지만 내가 만드는 앱이 저장할 이미지는 앱이 삭제된 후에도 남아있길 원하기 때문에 PublicDirectory에 저장을 해야 했다. 하지만 여기서 Uri와 관련해서 문제가 발생했고 아주 많은 시간을 구현에 할당해서 고칠 수 밖에 없었다.
코드는 대략적으로 두 부분으로 나뉜다. 파일을 해당 디렉토리에 생성하는 과정이 첫 번째이고, 그 다음은 CameraIntent를 통해 찍은 사진을 해당 파일로 저장하는 과정이다.
    String imageFilePath;
    private File mFile;
    private File createImageFile() throws IOException {
        String timeStamp =
                new SimpleDateFormat("yyyyMMdd_HHmmss",
                        Locale.getDefault()).format(new Date());
        String imageFileName = "IMG_" + timeStamp + "_";
        // File storageDir = getExternalFilesDir(Environment.DIRECTORY_PICTURES);

        File storageDir  = new File(Environment.getExternalStoragePublicDirectory(Environment.DIRECTORY_DCIM), "aintstagram");
        if(!storageDir.exists()) storageDir.mkdirs();

        mFile = File.createTempFile(
                imageFileName,  /* prefix */
                ".jpg",         /* suffix */
                storageDir      /* directory */
        );

        imageFilePath = mFile.getAbsolutePath();
        Log.e("PATH", imageFilePath);
        return mFile;
    }
createImageFile은 현재 시간을 기준으로 timestamp를 찍어 IMG_timestamp_의 형식으로 이름을 만들어 준다. 그 후 getExternalStoragePublicDirectory를 통해 DIRECTORY_DCIM에 aintstagram이라는 폴더를 생선한다. 그 뒤 mFile 부분인 createTempFile을 통해 jpg 확장자의 파일 크기 0인 파일을 생성한 뒤 imageFilePath에 해당 절대 경로를 넣어주는 작업을 수행한다.
case R.id.button_to_camera:
    permissionCheck = ContextCompat.checkSelfPermission(MainActivity.this, Manifest.permission.CAMERA);
    if (permissionCheck == PackageManager.PERMISSION_DENIED) {
        ActivityCompat.requestPermissions(MainActivity.this, PERMISSIONS, 0);
    } else {
        Intent intent = new Intent(MediaStore.ACTION_IMAGE_CAPTURE);
        if (intent.resolveActivity(getPackageManager()) != null) {
            File photoFile = null;
            try {
                photoFile = createImageFile();
            } catch (IOException e) {
                e.printStackTrace();
            }

            if(photoFile != null){
                // Uri photoUri = FileProvider.getUriForFile(MainActivity.this, "com.ssg.aintstagram.fileprovider", photoFile);
                intent.setFlags(Intent.FLAG_GRANT_READ_URI_PERMISSION);
                Uri photoUri = Uri.fromFile(photoFile);
                intent.putExtra(MediaStore.EXTRA_OUTPUT, photoUri);
                startActivityForResult(intent, REQUEST_IMAGE_CAPTURE);
            }
        }
    }
    break;
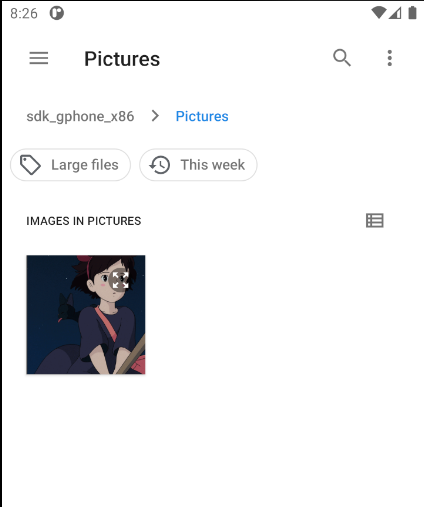
처리부분에서는 해당 함수를 호출한 결과를 photoFile로 지정한 뒤 Uri.fromFile을 통해 카메라로 찍은 사진이 해당 값에 저장되도록 설정한다. 그 후 사진을 찍게 되면 해당 폴더에 저장되는 것을 확인 가능하다.
하지만 여기서 문제가 있었다. 위의 코드만 적을 경우 경로에 대한 문제가 발생하여서 exception이 발생했다. 많은 삽질끝에 아래의 두 줄을 onCreate 부분에 넣어서 해결할 수 있었다.
StrictMode.VmPolicy.Builder builder = new StrictMode.VmPolicy.Builder();
StrictMode.setVmPolicy(builder.build());
해당 부분은 안드로이드가 여러 상황에 대해 분석을 하는데 Uri 관련된 부분에 대한 문제를 제기하지 않도록 함으로써 해결하는 것이다. 물론 해당 라인이 보안적인 측면에서 문제가 있을 확률이 아주 높지만 일단 지금 시점에서는 구현을 목표로 하기 때문에 위의 코드를 삽입하였다.
기존의 fileProvider를 사용하는 방법은 다음과 같다.
<?xml version="1.0" encoding="utf-8"?>
<paths xmlns:android="http://schemas.android.com/apk/res/android">
    <external-path name="aint_image"
        path="Android/data/com.ssg.aintstagram/files/Pictures" />
</paths>
경로를 담은 xml 파일을 만들어주고 해당 파일을 참조하는 fileProvider를 manifest 부분에 선언해주어야 된다.
<provider
    android:name="androidx.core.content.FileProvider"
    android:authorities="com.ssg.aintstagram.fileprovider"
    android:exported="false"
    android:grantUriPermissions="true">
    <meta-data
        android:name="android.support.FILE_PROVIDER_PATHS"
        android:resource="@xml/filepaths" />
</provider>
filepaths가 위의 external-path의 정보를 담은 resource파일의 이름이며 FileProvider를 호출함으로써 fileProvider가 파일에 대한 처리를 수행한다.
Uri photoUri = FileProvider.getUriForFile(MainActivity.this, "com.ssg.aintstagram.fileprovider", photoFile);
이 경우 위와 같이 FileProvider를 Uri로 넘겨주는 방식으로 사용하면 된다. 이렇게 저장된 이미지는 해당 앱의 내부에 저장되기 때문에 원칙적인 경우에 다른 앱에서 접근이 불가능하며 앱이 삭제되면 같이 삭제되는 특징이 있다.
django-request-logging
graphql 관련 패킷이 400을 리턴하였었는데 이를 해결하기 위해서 내용을 확인하고 싶었다. 하지만 전송을 하는 주체가 httpclient를 사용한 방식이 아니기 때문에 안드로이드 스튜디오를 통해서를 모니터링이 잘 안되었다.
해당 middleware를 추가해주면 아래와 같이 요청에 대한 정보를 확인가능하다.
aintstagram | [24/Apr/2020 03:13:30] "POST /graphql/ HTTP/1.1" 200 251
aintstagram | GET /media/pictures/profile/IMG_20200424_031302_4311095808617875937.jpg
aintstagram | {'HTTP_USER_AGENT': 'Dalvik/2.1.0 (Linux; U; Android R Build/RPP2.200227.014.A1)', 'HTTP_HOST': '10.0.2.2:8000', 'HTTP_CONNECTION': 'Keep-Alive', 'HTTP_ACCEPT_ENCODING': 'gzip'}
aintstagram | GET /media/pictures/profile/IMG_20200424_031302_4311095808617875937.jpg - 200
설정 방법도 간단하다. pip을 통해 설치한 뒤 settings.py의 middleware 부분에 추가해주면 된다.
MIDDLEWARE = (
    ...,
    'request_logging.middleware.LoggingMiddleware',
    ...,
)
이를 통해 아래에 적을 file upload 기능이 요청이 정상적으로 전달되었음에도 서버쪽에서 문제가 있다는 점을 알게 되었고 수정할 수 있었다.
graphql file upload 구현하기
이미지를 업로드 하기 위해서는 아래의 프레임워크를 하나 더 추가적으로 설치를 해야 한다.
root@f4e2834b513b:/code# pip install graphene-file-upload
Collecting graphene-file-upload
  Downloading graphene_file_upload-1.2.2-py3-none-any.whl (9.1 kB)
Requirement already satisfied: six>=1.11.0 in /usr/local/lib/python3.8/site-packages (from graphene-file-upload) (1.14.0)
Installing collected packages: graphene-file-upload
Successfully installed graphene-file-upload-1.2.2
그 후 이점이 중요하다 !!! 바로 urls.py 부분을 변경해주어야 된다.
urlpatterns = [
    path('admin/', admin.site.urls),
    # path('graphql/', csrf_exempt(GraphQLView.as_view(graphiql=True))),
    path('graphql/', csrf_exempt(FileUploadGraphQLView.as_view(graphiql=True))),
]
해당 부분에 FileUploadGraphQLView로 변경을 해주지 않으면 multipart/form을 통해 정상적으로 이미지가 전송이 되었음에도 불구하고 400 Bad Request를 리턴해버린다. (이걸 해결하는데 시간이 엄청 오래 걸렸다..)
from graphene_file_upload.scalars import Upload

class UploadProfile(graphene.Mutation):
    success = graphene.Boolean()

    class Arguments:
        kakaoID = graphene.Int(required=True)
        img = Upload(required=True)

    def mutate(self, info, kakaoID, img):
        User = UserModel.objects.get(kakaoID=kakaoID)
        img.name = str(kakaoID) + "_" + img.name
        User.profile.delete()
        User.profile = img
        User.save()
        return UploadProfile(success=True)
schema.py 부분에는 다음과 같이 mutate를 추가해준다. Upload라는 타입을 통해 img를 받아온 뒤 User를 kakaoID 기반으로 검색하여 기존의 프로필 사진을 삭제한 뒤 업로드 요청 된 img를 저장해준다.
이제 java로 클라이언트 쪽을 짜주면 되는데 이를 위해서는 약간의 세팅이 필요하다.
apollo {
    customTypeMapping = [
            "Upload" : "com.apollographql.apollo.api.FileUpload"
    ]
    generateKotlinModels.set(false)
}
gradle 부분에 Upload를 추가해줄건데 이 부분은 schema에 대한 graphql 파일 작성에 사용된다. schema.json을 아래의 명령으로 최신화 해준다.
apollo schema:download --endpoint=http://localhost:8000/graphql/ schema.json
이번에는 처리를 위한 mutation을 작성해주는데 방식은 동일하다. 다만 Upload를 사용한다는 점만 차이가 있다.
mutation upload_profile($img:Upload!, $kakaoID:Int!){
    uploadProfile (img: $img, kakaoID: $kakaoID){
        success
    }
}
java코드도 기존과 동일하다. 조금 다른 점이 있다면 FileUpload 타입으로 image를 지정해주어야 된다. 이 때 File에 대한 인자로 imageFilePath가 들어가게 되는데 절대경로를 따서 넣어주면 된다. 이렇게 요청을 보내면 정상적으로 처리가 될 경우 profile에 대한 정보가 최신화 되는 것을 확인할 수 있다.
OkHttpClient okHttpClient = new OkHttpClient.Builder().build();
ApolloClient apolloClient = ApolloClient.builder().serverUrl(getString(R.string.api_url)).okHttpClient(okHttpClient).build();

// bitmap 처리 부분
final Upload_profileMutation uploadProfile = Upload_profileMutation.builder().img(new FileUpload("image/jpg", new File(imageFilePath))).kakaoID(1111).build();
Log.e("FilePath ", imageFilePath);
Log.e("LOG", uploadProfile.toString());
apolloClient.mutate(uploadProfile).enqueue(new ApolloCall.Callback<Upload_profileMutation.Data>() {
    @Override
    public void onResponse(@NotNull Response<Upload_profileMutation.Data> response) {
        Log.e("HEY", "WORLD");
    }

    @Override
    public void onFailure(@NotNull ApolloException e) {
        e.printStackTrace();
        Log.e("HEY", "WORLD2");
    }
    });
아무래도 java - graphql 도 드문 조합이고 graphql - django 도 드물기 때문에 레퍼런스가 거의 없어서 어떤 문제가 생기면 처리하는 것이 쉽지가 않았다. 하지만 스트레스를 받으면서도 계속 방법을 찾다보면 언젠가는 답을 찾게 된다. 그리고 결국 기본 구현을 완성을 하였고 다시금 여기서부터 기록을 남기도록 하겠다.
Fragment로 사용자 이미지 RecyclerView 처리하기
안드로이드에서는 액티비티 내부에 프래그먼트라는 것을 둘 수가 있다. 이를 직관적으로 설명해보자면 렌즈와 같다. 액티비티라는 큰 틀을 가진 하나의 안경틀에 색깔이 다른 프래그먼트를 끼움으로써 다른 기능을 수행하도록 할 수 있는 것이다. 액티비티 내부에 FrameLayout을 설정하고 조건에 따라 프래그먼트를 스위치하면서 다른 역할을 하는 여러 창들을 하나의 Activity에 바인딩하는 것이 가능하다. 그리고 이런 프래그먼트들은 각각 Fragment Life Cycle을 가지며 이는 액티비티와 비슷하게 동작한다.
RecyclerView는 ScrollView와 ListView를 적절하게 섞어놓은 새로운 View 개념인데 기존의 단점을 보완한 형태이다. 사용해본 결과 장점을 2개를 뽑아보자면 기존의 ListView와 달리 Layout을 세로 가로 등의 형태로 구현이 가능하다는 점과 ViewHolder를 의무로 사용해야 되므로 ViewHolder에 대한 재활용을 통하여 많은 양의 데이터를 사용하더라도 ListView보다 성능면에서 우위를 점한다는 점이었다. 처음 개발해본 입장에서 onClick 이벤트등을 처리하는 방법에 대한 메뉴얼이 잘 보이지 않아서 많이 헤매었지만 한 번 성공한 뒤로는 비슷한 디자인 패턴으로 활용을 하다보니 쉽게 활용이 가능했다. 가장 좋았던 것은 아이템 뷰의 방향을 가로뿐만 아니라 세로로도 지정할 수 있다는 점을 들 수 있겠다.
implementation 'androidx.recyclerview:recyclerview:1.1.0'
사용을 위해서는 dependencies에 위와 같이 recyclerview를 추가해주어야 된다. 그리고 recyclerView에서 사용할 adapter는 다음과 같다.
public class ProfileRecyclerAdapter extends RecyclerView.Adapter<ProfileRecyclerAdapter.ItemViewHolder>  {
    private Context context;
    private ArrayList<Album> albums;
    private OnPostListener onPostListener;

    public ProfileRecyclerAdapter(ArrayList<Album> albums, Context context, OnPostListener onPostListener){
        this.albums = albums;
        this.context = context;
        this.onPostListener = onPostListener;
    }

    public static class ItemViewHolder extends RecyclerView.ViewHolder implements View.OnClickListener {
        ImageView imageView;

        OnPostListener onPostListener;

        public ItemViewHolder(View itemView, OnPostListener onPostListener){
            super(itemView);

            imageView = (ImageView) itemView.findViewById(R.id.imgview_picture);

            this.onPostListener = onPostListener;
            itemView.setOnClickListener(this);

        }

        @Override
        public void onClick(View v) {
            onPostListener.onPostClick(getAdapterPosition());
        }
    }

    public ItemViewHolder onCreateViewHolder(@NonNull ViewGroup parent, int viewType){
        View view = LayoutInflater.from(parent.getContext()).inflate(R.layout.layout_post_img,parent,false);
        return new ItemViewHolder(view, onPostListener);
    }

    @Override
    public void onBindViewHolder(@NonNull ItemViewHolder holder, int position){
        holder.imageView.setImageBitmap(albums.get(position).getImg());
    }

    @Override
    public int getItemCount(){
        return albums.size();
    }

    public void setItems(ArrayList<Album> albums){
        this.albums = albums;
    }

    public interface OnPostListener{
        void onPostClick(int pos);
    }
}
위의 어댑터는 Profile 정보를 뿌려주기 위해 사용되는데 onCreateViewHolder가 호출이 되면 ItemViewHolder의 생성자가 호출이 되면서 layout_post_img 레이아웃 상에 존재하는 뷰에 대한 할당을 진행한다. 위의 예제에서는 imageView에 대한 정보를 가져온 뒤, itemView 자체에 onClickListener를 추가해준다. 그리고 이 onClick이벤트는 OnPostListener 인터페이스에 정의된 onPostClick 이벤트를 발생시키는데 getAdapterPostion의 결과를 넘김으로써 adapter에서 몇 번째 viewHolder를 가리키는지를 결과로 돌려준다. Bind 될 시 onBindViewHolder가 호출이 되면서 생성시 정의된 imageView의 이미지를 바꿔주는 역할을 수행한다.
public class ProfileFragment extends Fragment {
    RecyclerView v_recycle;
    ProfileRecyclerAdapter adapter;
    ArrayList<Album> albums = new ArrayList<>();
    ArrayList<String> album_urls = new ArrayList<>();
    ArrayList<Integer> records = new ArrayList<>();
    private String Token;
    int cnt;

    @Nullable
    @Override
    public View onCreateView(@NonNull LayoutInflater inflater, @Nullable ViewGroup container, @Nullable Bundle savedInstanceState) {
        super.onCreateView(inflater, container, savedInstanceState);
        View view = inflater.inflate(R.layout.fragment_profile, container, false);
        return view;
    }

    @Override
    public void onViewCreated(@NonNull View view, @Nullable Bundle savedInstanceState) {
        super.onViewCreated(view, savedInstanceState);

        v_recycle = (RecyclerView) view.findViewById(R.id.recycle_pic);

        LinearLayoutManager linearLayoutManager = new GridLayoutManager(getActivity(), 4);
        v_recycle.setLayoutManager(linearLayoutManager);

        album_urls = new ArrayList<>();

        final OkHttpClient okHttpClient2 = new OkHttpClient.Builder().build();
        ApolloClient apolloClient2 = ApolloClient.builder().serverUrl(getString(R.string.api_url)).okHttpClient(okHttpClient2).build();

        Token = Session.getCurrentSession().getTokenInfo().getAccessToken();
        final PictureTypeQuery p = PictureTypeQuery.builder().accessToken(Token).build();

        apolloClient2.query(p).enqueue(new ApolloCall.Callback<PictureTypeQuery.Data>() {
            @Override
            public void onResponse(@NotNull Response<PictureTypeQuery.Data> response) {
                cnt = response.data().pics().size();

                for (int i = 0; i < cnt; i++) {
                    String album_url = getString(R.string.media_url) + response.data().pics().get(i).pic;
                    Integer record_idx = response.data().pics().get(i).recordId;
                    album_urls.add(album_url);
                    records.add(record_idx);
                }

                try {
                    addAlbum();
                } catch (ExecutionException e) {
                    e.printStackTrace();
                } catch (InterruptedException e) {
                    e.printStackTrace();
                }

                Thread mThread = new Thread() {
                    public void run() {
                        try {
                            getActivity().runOnUiThread(new Runnable() {
                                public void run() {
                                    ProfileRecyclerAdapter.OnPostListener mPostListener = new ProfileRecyclerAdapter.OnPostListener() {
                                        @Override
                                        public void onPostClick(int pos) {
                                            int record = albums.get(pos).getRecord();
                                            String username = ((ProfileActivity)getActivity()).username;
                                            Intent userPostIntent = new Intent(getActivity(), UserPostActivity.class);
                                            userPostIntent.putExtra("username", username);
                                            userPostIntent.putExtra("pos", pos);
                                            userPostIntent.putExtra("record", record);
                                            startActivity(userPostIntent);
                                        }
                                    };

                                    adapter = new ProfileRecyclerAdapter(albums, getContext(), mPostListener);
                                    v_recycle.setAdapter(adapter);
                                }
                            });
                        } catch (Exception e) {
                        }
                    }
                };

                mThread.start();
            }


            @Override
            public void onFailure(@NotNull ApolloException e) {

            }
        });
    }

    @Override
    public void onStart() {
        super.onStart();
    }

    @Override
    public void onActivityCreated(@Nullable Bundle savedInstanceState) {
        super.onActivityCreated(savedInstanceState);
    }

    @Override
    public void onResume() {
        super.onResume();
    }

    private void addAlbum() throws ExecutionException, InterruptedException {
        for(int i=0; i<cnt; i++) {
            String album_url = album_urls.get(i);
            Bitmap bitmap = Glide
                    .with(getActivity())
                    .asBitmap()
                    .load(album_url)
                    .submit().get();
            albums.add(new Album(bitmap, records.get(i)));
        }
    }
}
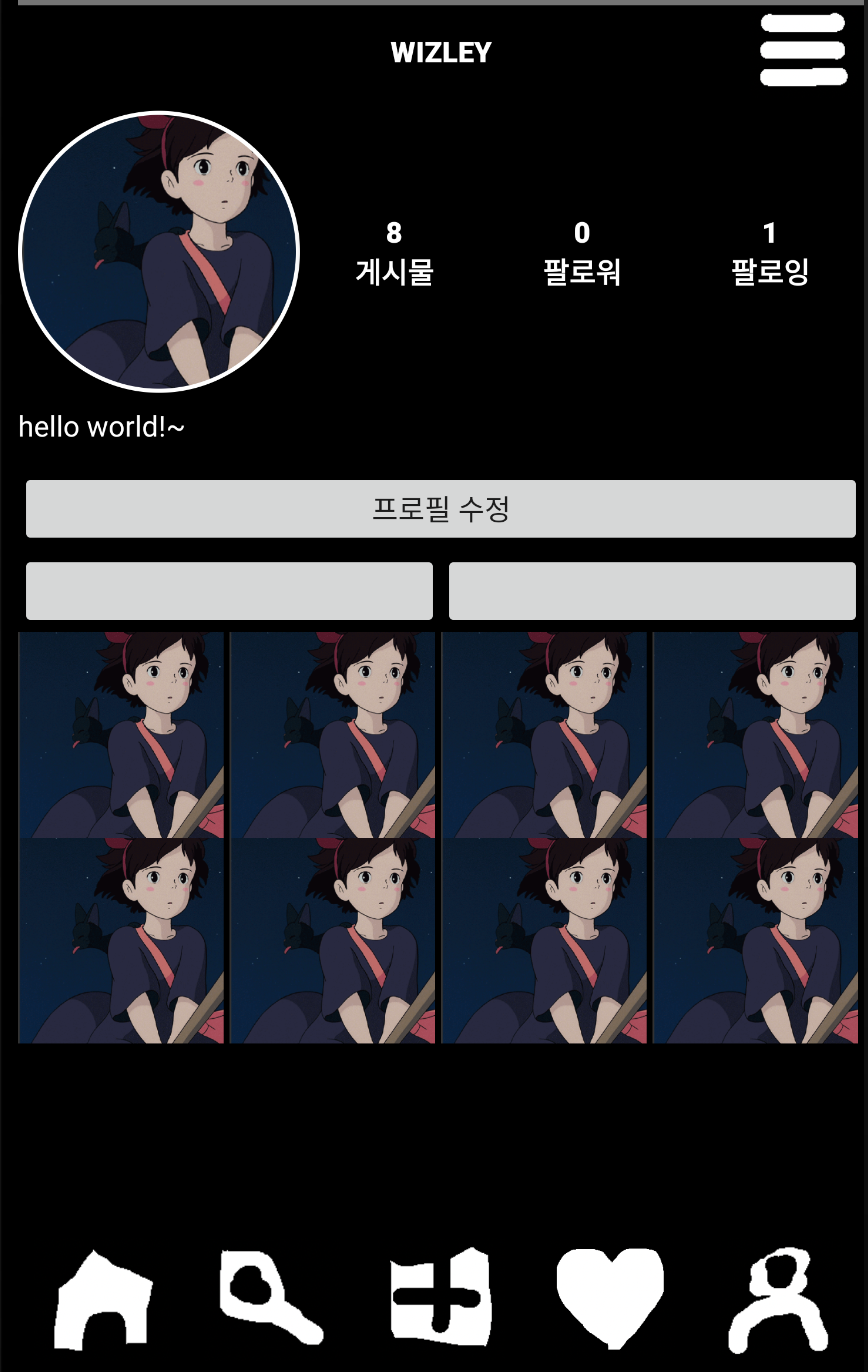
위의 Fragment는 ProfileActivity내부에서 동작할 프래그먼트에 대한 정의로 onCreate부터 시작하는 Activity와 다르게 onCreateView부터 라이프 사이클이 시작하게 된다. 마찬가지로 layout을 가져와 inflate를 진행한 뒤 onViewCreated에 생성시 진행할 동작을 정의한다. 이 부분에서 recyclerView에 대한 처리가 이루어지는데 해당 부분이 그에 해당된다.
v_recycle = (RecyclerView) view.findViewById(R.id.recycle_pic);

LinearLayoutManager linearLayoutManager = new GridLayoutManager(getActivity(), 4);
v_recycle.setLayoutManager(linearLayoutManager);
v_recycle은 리사이클러뷰를 가져온 것이며 linearLayoutManager로 선언된 해당 부분을 통해 어떤식으로 RecyclerView를 표현할 것인지를 정하게 된다. 해당 예제에서는 Grid 형태로 한 줄에 4개의 아이템만을 가지도록 설정을 한 것이며 다른 조건을 넣게 되면 가로 또는 세로의 형태로 리스트 뷰를 생성할 수 있다. 이렇게 생성된 레이아웃 매니저를 v_recycle에 붙힘으로써 표현하는 방법에 대한 정의가 끝나게 된다. apolloclient 부분에서는 서버로부터 정보를 가져와 처리하는 부분으로 뷰처리를 하는 부분은 다음과 같다.
ProfileRecyclerAdapter.OnPostListener mPostListener = new ProfileRecyclerAdapter.OnPostListener() {
    @Override
    public void onPostClick(int pos) {
        int record = albums.get(pos).getRecord();
        String username = ((ProfileActivity)getActivity()).username;
        Intent userPostIntent = new Intent(getActivity(), UserPostActivity.class);
        userPostIntent.putExtra("username", username);
        userPostIntent.putExtra("pos", pos);
        userPostIntent.putExtra("record", record);
        startActivity(userPostIntent);
    }
};

adapter = new ProfileRecyclerAdapter(albums, getContext(), mPostListener);
v_recycle.setAdapter(adapter);
onClickEvent를 발생시키기 위해서 OnPostListener 인터페이스를 생성하였었다. onPostClick은 사용자가 RecyclerView의 특정 위치의 아이템을 눌렀을 때 처리할 절차를 정의하기 위해 사용되는데 pos라는 파라미터가 getAdapterPosition의 결과로 몇 번째 인덱스에서 클릭 이벤트가 발생하였는지를 알려준다. 해당 인덱스를 기준으로 처리할 내용을 구현하였는데 record 번호를 가져와 해당 Post 정보를 보여주는 액티비티를 실행하는데 사용된다.
이렇게 mPostListener가 정의가 되면 adapter를 생성하는데 앞서 정의한 adapter를 RecyclerView에 추가하기만 하면 된다.
public class ProfileActivity extends FragmentActivity {
    private FragmentManager fragmentManager;
    private ProfileFragment fragmentA;
    private FragmentTransaction transaction;

    private RecyclerView v_recycle;
    private ProfileRecyclerAdapter adapter;

    String[] PERMISSIONS = {
            android.Manifest.permission.CAMERA,
            android.Manifest.permission.READ_EXTERNAL_STORAGE,
            android.Manifest.permission.WRITE_EXTERNAL_STORAGE
    };

    @SuppressLint("StringFormatInvalid")
    @Override
    protected void onCreate(@Nullable Bundle savedInstanceState) {
        super.onCreate(savedInstanceState);
        setContentView(R.layout.activity_profile);

        setBtn();

        fragmentManager = getSupportFragmentManager();
        fragmentA = new ProfileFragment();
        transaction = fragmentManager.beginTransaction();
        transaction.replace(R.id.frame_A, fragmentA).commitAllowingStateLoss();

    }
Fragment의 경우 Activity에서 FragmentManager를 생성한 뒤 beginTransaction을 통해 화면에 표현할 수 있다. 그리고 replace를 통해 Fragment을 갈아끼우는 것이 가능하다.
검색기능 구현하기
검색 기능은 다른 사용자의 닉네임을 검색함으로써 존재하는지 여부를 쿼리하여 뿌려주는 부분을 의미하는데 해당 부분을 구현을 위해 SearchResultFrament를 추가하였다.
public class SearchResultFragment extends Fragment{
    RecyclerView v_recycle;
    private SearchRecyclerAdapter adapter;
    private ArrayList<SearchCard> cards = new ArrayList<>();
    private String Token;
    private int cnt;

    @Nullable
    @Override
    public View onCreateView(@NonNull LayoutInflater inflater, @Nullable ViewGroup container, @Nullable Bundle savedInstanceState) {
        super.onCreateView(inflater, container, savedInstanceState);
        View view = inflater.inflate(R.layout.fragment_search_result, container, false);
        return view;
    }

    @Override
    public void onViewCreated(@NonNull View view, @Nullable Bundle savedInstanceState) {
        super.onViewCreated(view, savedInstanceState);
        v_recycle = (RecyclerView) view.findViewById(R.id.recycle_card);

    }

    public void RenewView(String input){
        LinearLayoutManager linearLayoutManager = new LinearLayoutManager(getActivity(), LinearLayoutManager.VERTICAL, false);;
        v_recycle.setLayoutManager(linearLayoutManager);

        cards.clear();

        final OkHttpClient okHttpClient2 = new OkHttpClient.Builder().build();
        ApolloClient apolloClient = ApolloClient.builder().serverUrl(getString(R.string.api_url)).okHttpClient(okHttpClient2).build();
        Token = Session.getCurrentSession().getTokenInfo().getAccessToken();
        final UserTypeQuery p = UserTypeQuery.builder().name(input).accessToken(Token).search(1).build();

        apolloClient.query(p).enqueue(new ApolloCall.Callback<UserTypeQuery.Data>() {
            @Override
            public void onResponse(@NotNull Response<UserTypeQuery.Data> response) {
                cnt = response.data().users().size();

                for (int i = 0; i < cnt; i++) {
                    String profile_url = getString(R.string.media_url) + response.data().users().get(i).profile;
                    String name =  response.data().users().get(i).name;
                    String comment = response.data().users().get(i).textComment;
                    Bitmap bitmap = null;
                    try {
                        bitmap = Glide
                                .with(getActivity())
                                .asBitmap()
                                .load(profile_url)
                                .submit().get();
                    } catch (Exception e) {
                        bitmap = ((BitmapDrawable)getResources().getDrawable(R.drawable.userinfo)).getBitmap();
                    }
                    cards.add(new SearchCard(bitmap, name, comment));
                }

                Thread mThread = new Thread() {
                    public void run() {
                        try {
                            getActivity().runOnUiThread(new Runnable() {
                                public void run() {
                                    SearchRecyclerAdapter.OnCardListener mCardListener = new SearchRecyclerAdapter.OnCardListener() {
                                        @Override
                                        public void onCardClick(int pos) {
                                            String name = cards.get(pos).getName();

                                            Intent profileIntent = new Intent(getContext().getApplicationContext(), SearchResultProfileActivity.class);
                                            profileIntent.putExtra("username", name);
                                            startActivity(profileIntent);

                                        }
                                    };

                                    adapter = new SearchRecyclerAdapter(cards, getContext(), mCardListener);
                                    v_recycle.setAdapter(adapter);
                                }
                            });
                        } catch (Exception e) {
                        }
                    }
                };

                mThread.start();

            }

            @Override
            public void onFailure(@NotNull ApolloException e) {

            }
        });
    }
}
전체적인 그림은 Profile쪽과 비슷한데 UserTypeQery를 사용해서 해당 이름이 포함되어있는 유저에 대한 List를 돌려받아 cards에 추가해 준뒤 click이벤트와 함께 정의해주었다. 이제 문제는 어떻게 query할 이름정보를 가져오는가에 달려있다.
public class SearchActivity extends FragmentActivity {
    private static final int REQUEST_TAKE_ALBUM = 2;
    private ImageButton btn_add;
    private ImageButton btn_profile;
    private ImageButton btn_home;
    private ImageButton btn_search;
    private ImageButton btn_history;
    private Button btn_cancel;
    private EditText searchBar;

    private FragmentManager fragmentManager;
    private SearchResultFragment fragmentB;
    private FragmentTransaction transaction;

    @Override
    protected void onCreate(@Nullable Bundle savedInstanceState) {
        super.onCreate(savedInstanceState);
        setContentView(R.layout.activity_search);

        fragmentManager = getSupportFragmentManager();
        fragmentB = new SearchResultFragment();
        transaction = fragmentManager.beginTransaction();
        transaction.replace(R.id.frame_search, fragmentB).commitAllowingStateLoss();

        searchBar = (EditText) findViewById(R.id.search_bar);
        searchBar.setOnFocusChangeListener(new View.OnFocusChangeListener() {
            @Override
            public void onFocusChange(View v, boolean hasFocus) {
                Button cancel = (Button) findViewById(R.id.button_cancel);
                if(hasFocus){
                    cancel.setVisibility(VISIBLE);
                } else {
                    cancel.setVisibility(View.INVISIBLE);
                }
            }
        });

        searchBar.addTextChangedListener(new TextWatcher() {
            @Override
            public void beforeTextChanged(CharSequence s, int start, int count, int after) {
                // 입력 전
            }

            @Override
            public void onTextChanged(CharSequence s, int start, int before, int count) {
                fragmentB.RenewView(s.toString());
                // 입력되는 중
            }

            @Override
            public void afterTextChanged(Editable s) {
                // 입력 완료
            }
        });

        setBtn();
    }
}
Fragment의 본체가 되는 Activity 부분을 보면 EditText인 searchBar 부분에 TextWatcher를 추가하였다. 이를 통하여 입력 이벤트가 발생할 때마다 fragment의 RenewView 메소드가 호출이 되며 그 인자 값으로 사용자의 입력값 데이터가 넘어가서 graphql로의 쿼리가 전송된다. 이를 통해 실시간으로 사용자의 입력 결과를 토대로 사용자조회가 가능하다.
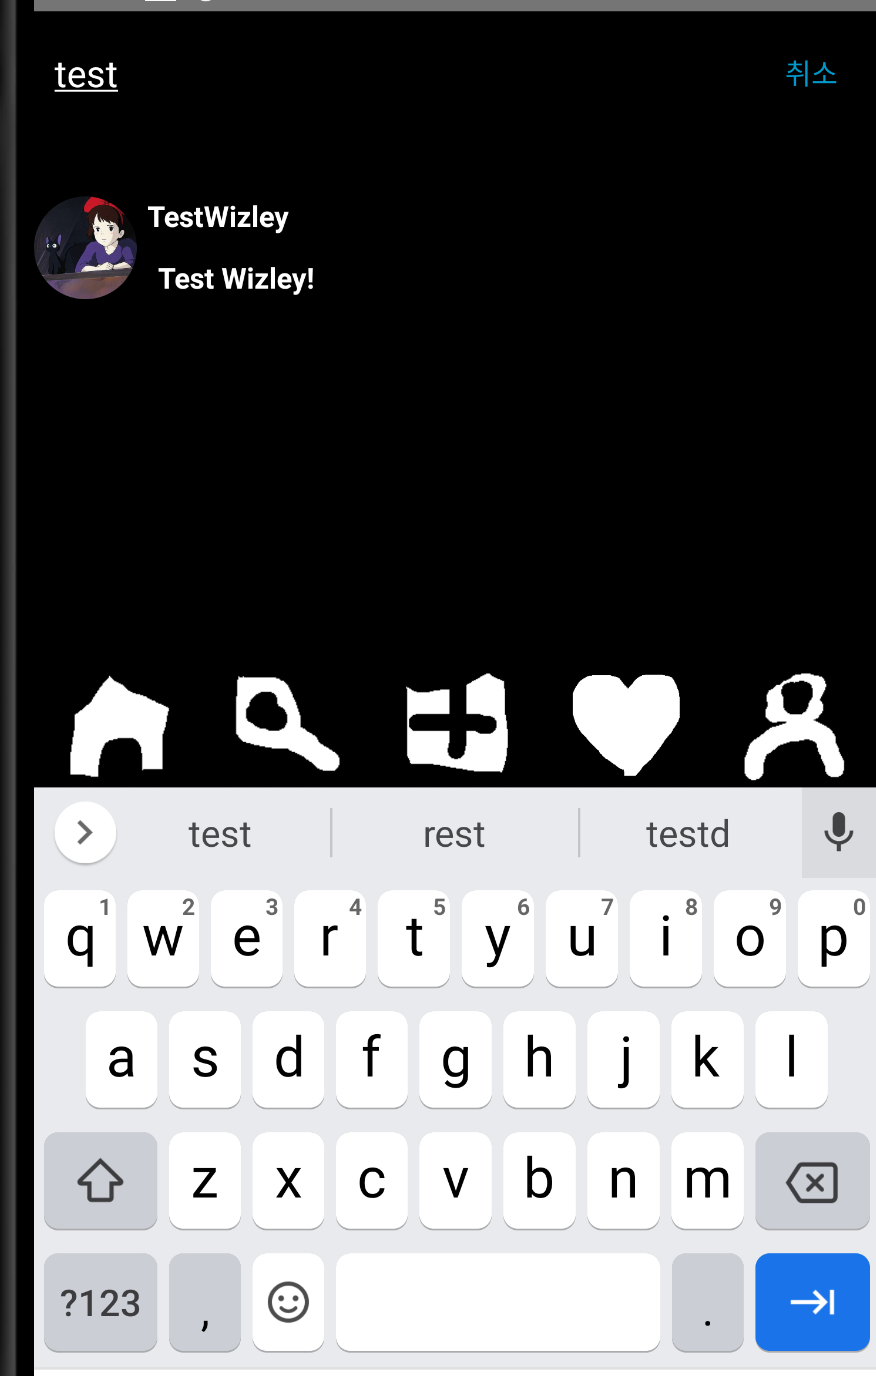
이렇게 가져온 정보를 입력하면 다음과 같이 해당 유저의 정보를 확인할 수 있다.
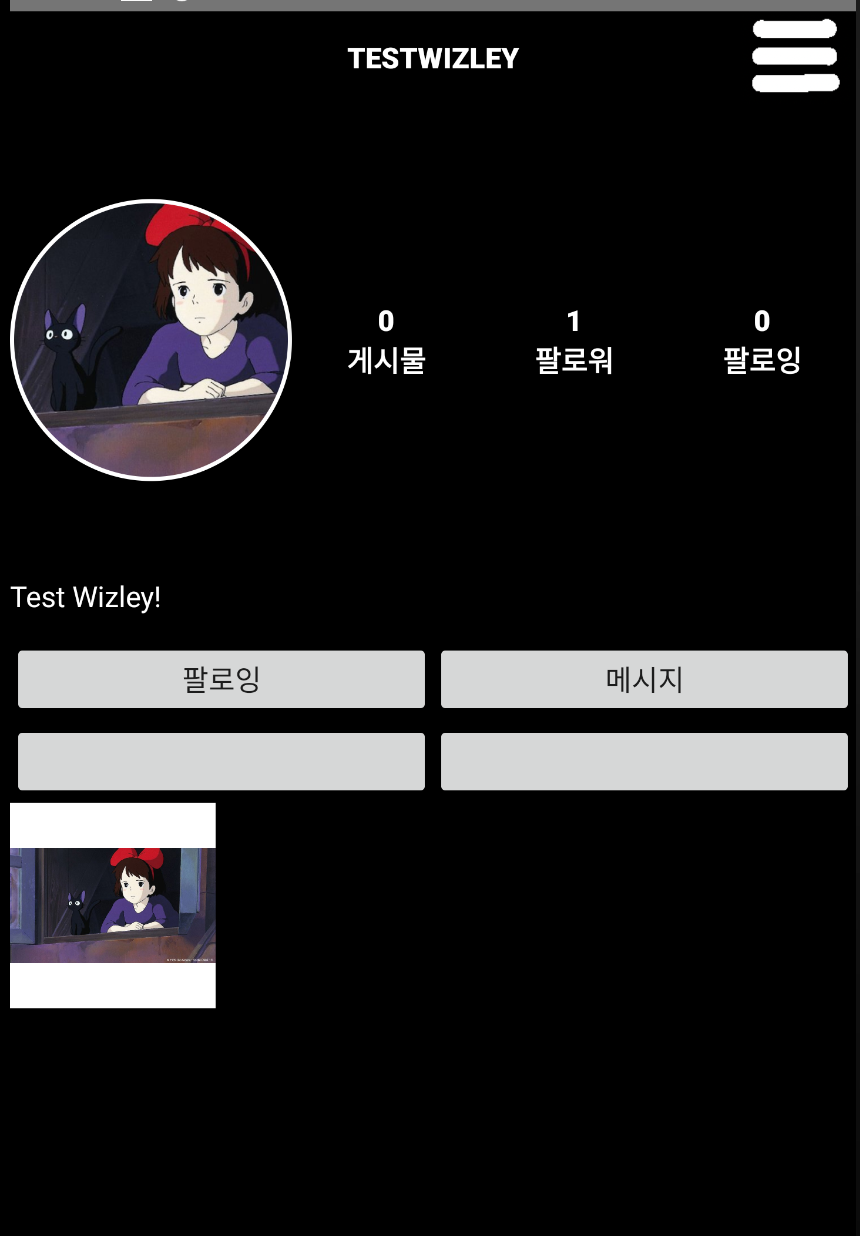
RecyclerView에 OnClick 인터페이스 구현하기
위의 코드에서 언급이 되긴 하였지만 이를 구현하는데 시간을 꽤 소모하였기에 다시 한번 남기자면 RecyclerView에 사용할 adapter를 생성하는 과정에서 onClickListener를 추가할 수 있다.
View.OnClickListener listener = new View.OnClickListener(){
    @Override
    public void onClick(View v) {
        switch (v.getId()){
            case R.id.btn_edit_post:
                onPostListener.onPostClick(getAdapterPosition(), 1);
                break;
            case R.id.btn_heart:
                onPostListener.onPostClick(getAdapterPosition(), 2);
                break;
            case R.id.btn_comment:
            case R.id.comments:
                onPostListener.onPostClick(getAdapterPosition(), 3);
                break;
            case R.id.btn_message:
                onPostListener.onPostClick(getAdapterPosition(), 4);
                break;
            case R.id.post_img:
                onPostListener.onPostClick(getAdapterPosition(), 5);
        }
    }
        };
하지만 여기서 구현의 핵심은 Activity 또는 Fragment에서 해당 이벤트에 대한 처리를 진행하기 위해서는 포지션에 대한 정보를 알고 있어야 한다는 점이다. 이를 위해서 내부적으로 getAdapterPosition을 호출한 결과를 넘겨주어야 되는데 이를 어떤식으로 넘겨줄까에 대한 고민을 많이 하였었다.
public interface OnPostListener{
    void onPostClick(int pos, int choice);

    void onCommentTyped(int pos, Editable value);
}
생각한 방법은 인터페이스를 구현하는 것이다. 인터페이스를 구현하여 그 처리부분에 대한 정의를 Activity 또는 Fragment에서 정의해주면 되는 것이었다.
PostRecyclerAdapter.OnPostListener onPostListener = new PostRecyclerAdapter.OnPostListener() {
    @Override
    public void onPostClick(final int pos, int choice) {
        switch(choice){
            case 0:
                String name = posts.get(pos).getName();
                Intent profileIntent = new Intent(getApplicationContext(), SearchResultProfileActivity.class);
                profileIntent.putExtra("username", name);
                startActivity(profileIntent);
                break;
            case 1:

                break;
            case 2:

                break;
            case 3:

                break;
            case 4:

                break;
            case 5:
                break;
            default:
                throw new IllegalStateException("Unexpected value: " + choice);
        }
    }

    @Override
    public void onCommentTyped(int pos, Editable value) {
        int record = posts.get(pos).get_post_id();
        addComment(record, String.valueOf(value));
    }
};

adapter = new PostRecyclerAdapter(posts, getApplicationContext(), onPostListener);
v_recycle.setAdapter(adapter);
위와 같이 adapter에 추가해주기 전에 인터페이스의 메소드들을 구현해주게 되면 activity에서 position의 정보를 가진 pos 파라미터와 어떤 이벤트로 인해 들어왔는지를 알려주는 choice라는 정보를 토대로 작업을 수행할 수 있다. 작업의 예로는 어떤 버튼에 대한 처리를 구현한다던지, 다른 인텐트를 수행한다던지 하는 것들이 포함된다고 할 수 있다.
Constraint Layout 동적으로 VISIBILITY 설정하기
이 부분은 같은 레이아웃을 사용하는데 본인인 경우와 본인이 아닌 경우에 버튼 등에 대한 레이아웃을 변경해야 될 경우 사용되었다. 아래의 예제는 ProfileActivity에서 본인일 경우 프로필 수정 버튼을 표시하지만 그 외의 사용자의 경우 팔로우 버튼을 표시하도록 변경하는 것이다.
runOnUiThread(new Runnable(){
    public void run(){
        ImageView v_profile = (ImageView)findViewById(R.id.user_profile);
        v_profile.setImageBitmap(bitmap);

        if(myKakaoId != searchKakaoId) {
            btn_follow = (Button) findViewById(R.id.button_follow);
            btn_follow.setVisibility(View.VISIBLE);
            btn_msg = (Button) findViewById(R.id.button_message);
            btn_msg.setVisibility(View.VISIBLE);
            btn_edit = (Button) findViewById(R.id.button_edit_profile);
            btn_edit.setVisibility(View.GONE);
            ConstraintSet constraintSet = new ConstraintSet();
            ConstraintLayout constraintLayout = findViewById(R.id.profile);
            constraintSet.clone(constraintLayout);
            constraintSet.connect(R.id.my_pics, ConstraintSet.TOP, R.id.button_follow, ConstraintSet.BOTTOM, 0);
            constraintSet.connect(R.id.others_pics, ConstraintSet.TOP, R.id.button_message, ConstraintSet.BOTTOM, 0);
            constraintSet.applyTo(constraintLayout);

            setRenewedButton();
            getFollowInfo();
        }

    }
});
레이아웃에 대한 처리는 UI Thread에서만 진행하여야 하기 때문에 runOnUiThread를 호출하여 수행하며 위와 같이 ConstraintSet을 정의하여 connect 등의 함수로 재정의 하는 과정을 수행하면 된다.
팔로우/언팔로우 기능 구현하기
팔로우와 언팔로우 기능을 구현하기 위해서는 graphql에 Mutation 엔드포인트를 추가해주어야 된다. addFollow, unFollow라는 이름의 클래스를 생성하였다.
class addFollow(graphene.Mutation):
    success = graphene.Boolean()

    class Arguments:
        accessToken = graphene.String(required=True)
        fkakaoID = graphene.Int(required=True)

    def mutate(self, info, accessToken, fkakaoID):
        kakaoID = get_kakaoID(accessToken)
        if kakaoID is None:
            return addFollow(success=False)

        if kakaoID == fkakaoID:
            return addFollow(success=False)

        try:
            user_from = UserModel.objects.get(kakaoID=kakaoID)
            user_to = UserModel.objects.get(kakaoID=fkakaoID)
        except:
            return addFollow(success=False)

        history = FollowModel.objects.filter(user_from__kakaoID=kakaoID, user_to__kakaoID=fkakaoID)
        if history.exists():
            return addFollow(success=False)

        else:
            follow = FollowModel(user_from=user_from, user_to=user_to)
            follow.save()

            addHistory = HistoryModel(user=user_to, type='F', record_id=follow.follow_id)
            addHistory.save()

            user_to.follower_count += 1
            user_to.save()

            user_from.following_count += 1
            user_from.save()
            return addFollow(success=True)
addFollow의 경우 인자로 accessToken과 fkakaoID를 받는데 accessToken을 토대로 사용자가 존재하는지를 검사한 뒤 타 사용자의 kakaoID와 비교하여 본인일 경우에는 success를 false로 돌려주며 끝내게 된다. 만약 FollowModel 정보가 존재하지 않을 경우 팔로우 정보를 추가해주며 상대방의 follower_count 정보를 더해주고 본인의 following_count 정보를 업데이트한다.
class unFollow(graphene.Mutation):
    success = graphene.Boolean()

    class Arguments:
        accessToken = graphene.String(required=True)
        fkakaoID = graphene.Int(required=True)
        choice = graphene.Int()

    def mutate(self, info, accessToken, fkakaoID, choice=None):
        kakaoID = get_kakaoID(accessToken)
        if kakaoID is None:
            return addFollow(success=False)

        if kakaoID == fkakaoID:
            return addFollow(success=False)

        try:
            if choice == None:
                user_from = UserModel.objects.get(kakaoID=kakaoID)
                user_to = UserModel.objects.get(kakaoID=fkakaoID)
                history = FollowModel.objects.filter(user_from__kakaoID=kakaoID, user_to__kakaoID=fkakaoID)
                if not history.exists():
                    return addFollow(success=False)
            else:
                user_from = UserModel.objects.get(kakaoID=fkakaoID)
                user_to = UserModel.objects.get(kakaoID=kakaoID)
                history = FollowModel.objects.filter(user_from__kakaoID=fkakaoID, user_to__kakaoID=kakaoID)
                if not history.exists():
                    return addFollow(success=False)
        except:
            return addFollow(success=False)

        else:
            history.delete()

            user_to.follower_count -= 1
            user_to.save()

            user_from.following_count -= 1
            user_from.save()
            return addFollow(success=True)
unFollow도 addFollow와 비슷한 패턴인데 choice 정보에 따라 follow 또는 following 정보를 지우며 성공할 경우 정보를 업데이트 하고 success를 참으로 리턴해준다.
mutation add_follow($fkakaoID:Int!, $accessToken:String!){
    addFollow (fkakaoID:$fkakaoID, accessToken:$accessToken){
        success
    }
}
graphql에는 다음과 같이 추가해주고 아래와 같이 사용하면 된다.
public void setRenewedButton(){
    View.OnClickListener mListener = new View.OnClickListener() {
        @SuppressLint("IntentReset")
        @Override
        public void onClick(View v) {
            switch(v.getId()){
                case R.id.button_follow:
                    if(btn_follow.getText() == "팔로우"){
                        final OkHttpClient okHttpClient = new OkHttpClient.Builder().build();
                        final ApolloClient apolloClient = ApolloClient.builder().serverUrl(getString(R.string.api_url)).okHttpClient(okHttpClient).build();
                        final Add_followMutation f = Add_followMutation.builder().accessToken(Token).fkakaoID(searchKakaoId).build();
                        apolloClient.mutate(f).enqueue(new ApolloCall.Callback<Add_followMutation.Data>() {
                            @Override
                            public void onResponse(@NotNull Response<Add_followMutation.Data> response) {
                                getUserProfile();
                                runOnUiThread(new Runnable() {
                                    public void run() {
                                        Toast.makeText(getApplicationContext(), "요청을 완료하였습니다.", Toast.LENGTH_LONG).show();
                                    }
                                });
                            }

                            @Override
                            public void onFailure(@NotNull ApolloException e) {

                            }
                        });
                    } else {
                        final OkHttpClient okHttpClient2 = new OkHttpClient.Builder().build();
                        final ApolloClient apolloClient2 = ApolloClient.builder().serverUrl(getString(R.string.api_url)).okHttpClient(okHttpClient2).build();
                        final Un_followMutation u = Un_followMutation.builder().accessToken(Token).fkakaoID(searchKakaoId).build();
                        apolloClient2.mutate(u).enqueue(new ApolloCall.Callback<Un_followMutation.Data>() {
                            @Override
                            public void onResponse(@NotNull Response<Un_followMutation.Data> response) {
                                getUserProfile();
                                runOnUiThread(new Runnable() {
                                    public void run() {
                                        Toast.makeText(getApplicationContext(), "요청을 완료하였습니다.", Toast.LENGTH_LONG).show();
                                    }
                                });
                            }

                            @Override
                            public void onFailure(@NotNull ApolloException e) {

                            }
                        });
                    }
                    break;
            }
        }
    };
    btn_follow.setOnClickListener(mListener);
};
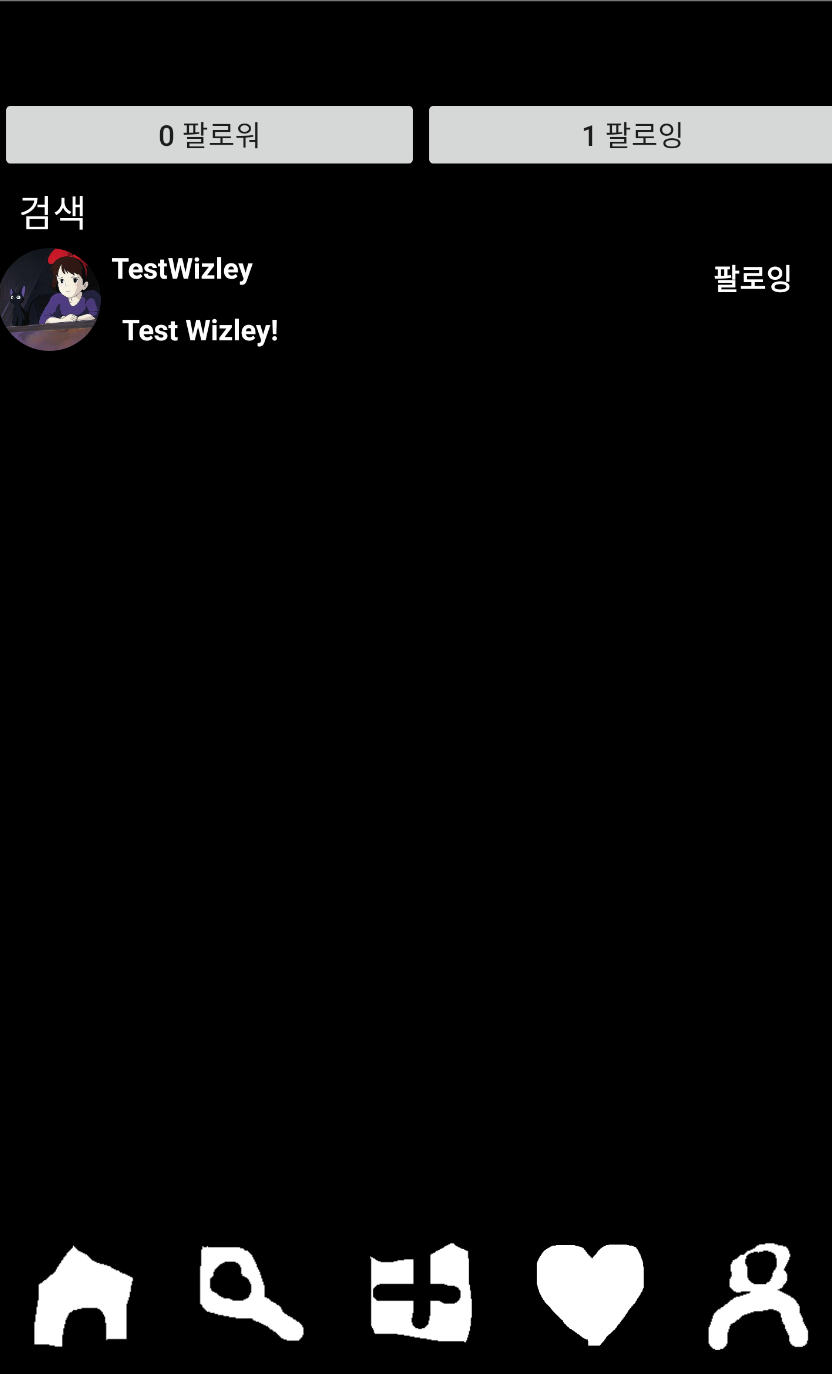
Filterable 인터페이스 Recyclerview에 적용하기
Filterable은 RecyclerView에서 특정 키워드로 검색을 하기 위하여 사용되었으며 Follower/Following 리스트에서 특정 키워드로 검색하는 기능을 위해 추가되었다.
public class FollowingRecyclerAdapter extends RecyclerView.Adapter<FollowingRecyclerAdapter.ItemViewHolder> implements Filterable {
    private Context context;
    private ArrayList<FollowCard> cards;
    private OnCardListener onCardListener;

    ArrayList<FollowCard> unFilteredlist;
    ArrayList<FollowCard> filteredList;

    ... 생략 ...

    @Override
    public Filter getFilter() {
        return new Filter() {
            @Override
            protected FilterResults performFiltering(CharSequence constraint) {
                String charString = constraint.toString();
                if(charString.isEmpty()) {
                    filteredList = unFilteredlist;
                } else {
                    ArrayList<FollowCard> filteringList = new ArrayList<>();
                    for(int i=0; i<unFilteredlist.size(); i++) {
                        if(unFilteredlist.get(i).getName().toLowerCase().contains(charString.toLowerCase())) {
                            filteringList.add(unFilteredlist.get(i));
                        }
                    }
                    filteredList = filteringList;
                }
                FilterResults filterResults = new FilterResults();
                filterResults.values = filteredList;
                return filterResults;
            }

            @Override
            protected void publishResults(CharSequence constraint, FilterResults results) {
                filteredList = (ArrayList<FollowCard>)results.values;
                setItem(filteredList);
                notifyDataSetChanged();
            }
        };
    }

}
adapter에 Filterable 인터페이스를 추가하여 getFilter 부분을 오버라이딩 하였다. constraint로 들어온 문자열을 토대로 getName()을 한 값에 해당 문자열이 포함되어 있을 경우에 filteringList에 추가해주며 작업이 완료되면 해당 결과를 setItem한 뒤 notifyDataChanged를 호출하여 RecyclerView가 최신화되도록 한다.
searchBar = (EditText) findViewById(R.id.search_bar);

searchBar.addTextChangedListener(new TextWatcher() {
    @Override
    public void beforeTextChanged(CharSequence s, int start, int count, int after) {
        // 입력 전
    }

    @Override
    public void onTextChanged(CharSequence s, int start, int before, int count) {
        switch(choice){
            case 1:
                followerFragment.filterSeq(s);
                break;
            case 2:
                followingFragment.filterSeq(s);
        }

    }

    @Override
    public void afterTextChanged(Editable s) {
    }
});
EditText부분에 사용자 검색과 마찬가지로 onTextChanged 부분을 오버라이딩 하여 filterSeq를 호출하면 된다.
Post의 정보 업데이트 하기
Post부분을 구현하기 위해서는 사용자가 follow하는 모든 사용자의 Post 정보를 시간순으로 가져와야 된다. 그리고 그와 연관된 Like, Comment등에 대한 정보를 graphql에 요청하여 가져와야 된다.
public void getPosts(){
    posts = new ArrayList<>();
    threads = new ArrayList<>();

    final OkHttpClient okHttpClient = new OkHttpClient.Builder().build();
    final ApolloClient apolloClient = ApolloClient.builder().serverUrl(getString(R.string.api_url)).okHttpClient(okHttpClient).build();
    Token = Session.getCurrentSession().getTokenInfo().getAccessToken();

    final PostTypeQuery q = PostTypeQuery.builder().accessToken(Token).build();

    apolloClient.query(q).enqueue(new ApolloCall.Callback<PostTypeQuery.Data>() {
        @RequiresApi(api = Build.VERSION_CODES.O)
        @Override
        public void onResponse(@NotNull Response<PostTypeQuery.Data> response) {
            int cnt = response.data().posts().size();

            for(int i=0; i<cnt; i++){
                String name = response.data().posts().get(i).user().name;
                String place = response.data().posts().get(i).place;
                String profile = getString(R.string.media_url) + response.data().posts().get(i).user().profile;
                Integer postId = Integer.parseInt(response.data().posts().get(i).postId);
                int likes = response.data().posts().get(i).likeCount;
                int comments = response.data().posts().get(i).commentCount;
                String textComment = response.data().posts().get(i).textComment;
                String dt = response.data().posts().get(i).date.toString();
                ZonedDateTime zdt = ZonedDateTime.parse(dt);
                ZonedDateTime now = ZonedDateTime.now(ZoneId.of("Asia/Seoul"));
                long days = Duration.between(zdt ,now).toDays();
                long hours = Duration.between(zdt, now).toHours();
                long mins = Duration.between(zdt, now).toMinutes();

                if(days>=1) {
                    posts.add(new Post(name, place, postId, textComment, likes, String.valueOf(days) + " 일", comments));
                } else if(hours>=1){
                    posts.add(new Post(name, place, postId, textComment, likes, String.valueOf(hours) + " 시간", comments));
                } else {
                    posts.add(new Post(name, place, postId, textComment, likes, String.valueOf(mins) + " 분", comments));
                }

                threads.add(new ImgUrlThread(i, postId, profile));
            }
getPosts는 서버로부터 Post에 대한 정보를 가져오는데 PostModel은 해당 사용자의 이미지를 주지 않으며 보는 사용자가 해당 게시글에 좋아요를 눌렀는지 등에 대한 정보를 주지 않는다.
posts = PostModel.objects.filter(user__name=UserModel.objects.get(kakaoID=kakaoID))
for following in list(FollowModel.objects.filter(user_from__kakaoID=kakaoID).values("user_to_id")):
    posts |= PostModel.objects.filter(user__name=UserModel.objects.get(user_id=following["user_to_id"]))
return posts.order_by('date').reverse()
그리하여 이를 처리하기 위해서는 추가적인 작업이 필요하다. 이를 위해 Runnable 인터페이스를 implements한 커스텀 쓰레드를 생성하였다. 커스텀으로 생성함으로 가질 수 있는 이점은 Thread가 업데이트 해야될 index에 대한 정보를 가질 수 있다는 점이며 백그라운드에서 작업을 수행할 수 있다는 점을 들 수 있다.
public class ImgUrlThread implements Runnable {
    private String url;
    private String profile_url;
    private int idx;
    private Integer record;

    public ImgUrlThread(int idx, Integer record, String profile_url){
        this.idx = idx;
        this.record = record;
        this.profile_url = profile_url;
    }

    @Override
    public void run() {
        getImageUrl(record);

        try {
            addPostProfileImage(profile_url);
        } catch (ExecutionException e) {
            e.printStackTrace();
        } catch (InterruptedException e) {
            e.printStackTrace();
        }

        checkLike();
        checkPostUser();
    }

    private void getImageUrl(int record) {
        final OkHttpClient okHttpClient = new OkHttpClient.Builder().build();
        final ApolloClient apolloClient = ApolloClient.builder().serverUrl(getString(R.string.api_url)).okHttpClient(okHttpClient).build();

        final PictureTypeQuery q = PictureTypeQuery.builder().accessToken(Token).record(record).build();

        apolloClient.query(q).enqueue(new ApolloCall.Callback<PictureTypeQuery.Data>() {
            @Override
            public void onResponse(@NotNull Response<PictureTypeQuery.Data> response) {
                url = "http://10.0.2.2:8000/media/" + response.data().pics().get(0).pic;
                try {
                    addPostImage(url);

                } catch (ExecutionException e) {
                    e.printStackTrace();
                } catch (InterruptedException e) {
                    e.printStackTrace();
                }
            }

            @Override
            public void onFailure(@NotNull ApolloException e) {

            }
        });
    }

    private void addPostImage(String url) throws ExecutionException, InterruptedException {
        Bitmap bitmap = Glide
                .with(getApplicationContext())
                .asBitmap()
                .load(url)
                .submit().get();

        posts.get(idx).set_post_img(bitmap);

        NotifyRunnable runnable = new NotifyRunnable();
        runnable.setIdx(idx);
        runOnUiThread(runnable);
    }

    private void addPostProfileImage(String url) throws ExecutionException, InterruptedException {
        Bitmap bitmap = null;
        try {
            bitmap = Glide
                    .with(getApplicationContext())
                    .asBitmap()
                    .load(url)
                    .submit().get();
        } catch (Exception e) {
            bitmap = ((BitmapDrawable)getResources().getDrawable(R.drawable.userinfo)).getBitmap();
        }

        posts.get(idx).set_profile_img(bitmap);

        NotifyRunnable runnable = new NotifyRunnable();
        runnable.setIdx(idx);
        runOnUiThread(runnable);
    }

    private void checkLike() {
        final OkHttpClient okHttpClient = new OkHttpClient.Builder().build();
        final ApolloClient apolloClient = ApolloClient.builder().serverUrl(getString(R.string.api_url)).okHttpClient(okHttpClient).build();

        final LikeTypeQuery l = LikeTypeQuery.builder().accessToken(Token).typeinfo("P").record(record).build();
        apolloClient.query(l).enqueue(new ApolloCall.Callback<LikeTypeQuery.Data>() {
            @Override
            public void onResponse(@NotNull Response<LikeTypeQuery.Data> response) {
                if(response.data().likes().size() == 1) {
                    posts.get(idx).set_like_status(true);
                } else {
                    posts.get(idx).set_like_status(false);
                }
                runOnUiThread(new Runnable() {
                    @Override
                    public void run() {
                        adapter.notifyItemChanged(idx);
                    }
                });
            }

            @Override
            public void onFailure(@NotNull ApolloException e) {

            }
        });
    }

    private void checkPostUser(){
        final OkHttpClient okHttpClient = new OkHttpClient.Builder().build();
        final ApolloClient apolloClient = ApolloClient.builder().serverUrl(getString(R.string.api_url)).okHttpClient(okHttpClient).build();

        final PostTypeQuery p = PostTypeQuery.builder().accessToken(Token).record(record).build();
        apolloClient.query(p).enqueue(new ApolloCall.Callback<PostTypeQuery.Data>() {
            @Override
            public void onResponse(@NotNull Response<PostTypeQuery.Data> response) {
                if(response.data().posts().size() >= 1) {
                    posts.get(idx).setMine(true);
                } else {
                    posts.get(idx).setMine(false);
                }
                runOnUiThread(new Runnable() {
                    @Override
                    public void run() {
                        adapter.notifyItemChanged(idx);
                    }
                });
            }

            @Override
            public void onFailure(@NotNull ApolloException e) {

            }
        });
    }
}
ImgUrlThread는 여러가지 작업을 처리하는데 그 순서를 간략하게 정리하자면 다음과 같다. Post를 올린 사용자의 프로필 정보를 받아와 set_profile_img를 호출하여 최신화 한다. checkLike를 호출하여 본인이 해당 게시글에 좋아요를 누른 상태인지를 확인한 뒤 누른 상태이면 하트의 색상을 변경한다. 해당 Post를 업로드한 본인이라면 포스트의 수정 또는 삭제를 하기 위해 누르게 되는 버튼에 대한 VISIBILITY를 처리한다.
그리고 작업이 끝나면 adapter에 notifyItemChanged를 호출함으로써 정보를 업데이트 하게 된다. 해당 코드를 작성하는 과정에서 imgUrlThread에 대한 ArrayList를 생성하여 처리하였는데 만약 그 과정에서 레이스 컨디션이 발생하면 null 에러가 발생할 수 있다. 그리하여 위의 코드는 그리 좋은 예제라고는 할 수 없지만 안드로이드를 처음하는 지금의 입장에서 고치기보다는 좀 더 익숙해지게 되면 다시 돌아와 고치는 편이 더 좋을 것 같다. 아직도 갈 길이 멀다..
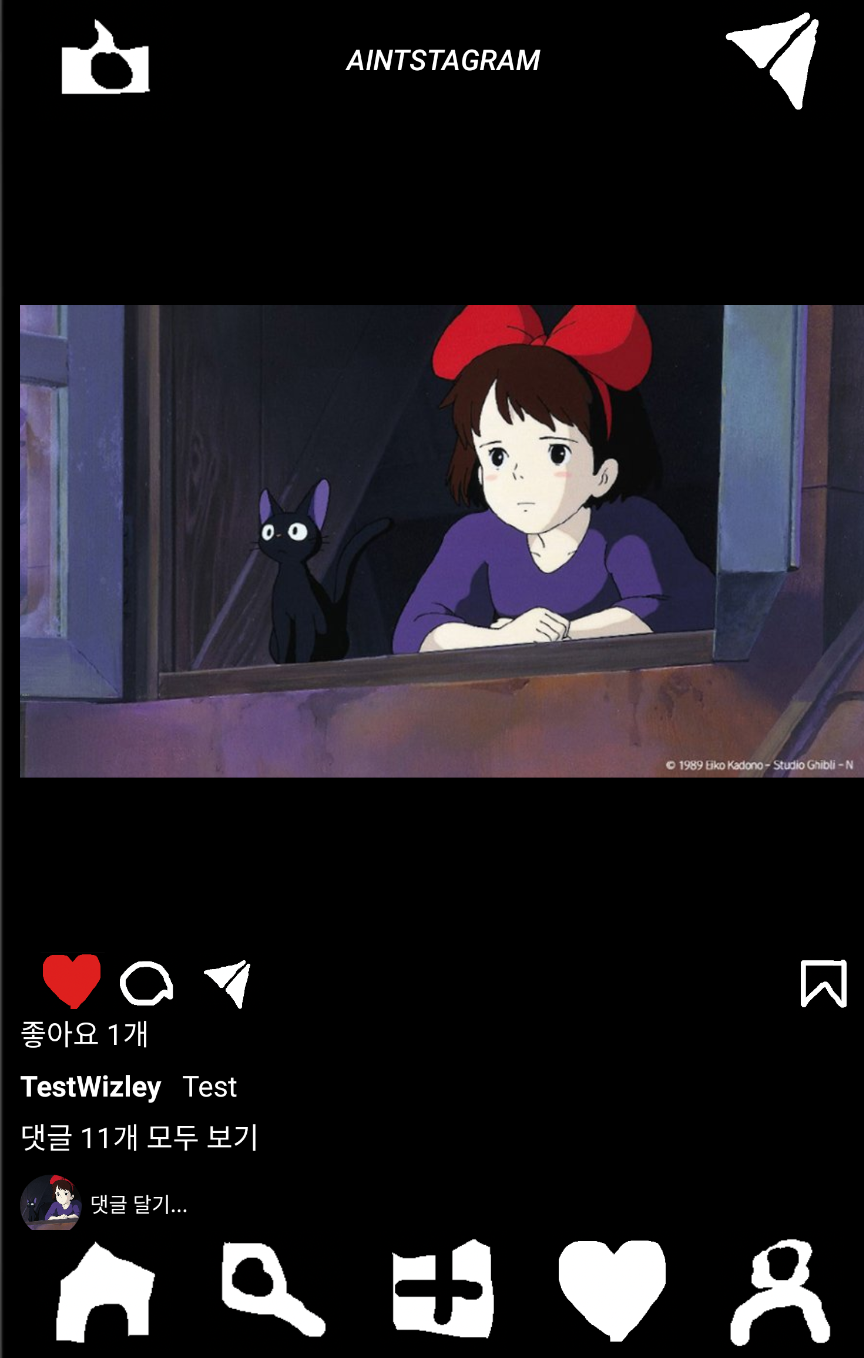
RecyclerView 특정 위치로 이동시키기
ProfileActivity에서 사용자의 특정 사진을 클릭하면 해당 사용자의 Post만을 담고 있는 RecyclerView의 특정 부분으로 이동하게 된다. 이를 어떻게 구현하면 될까 고민을 했었는데 다음과 같이 해결이 가능하다.
adapter = new PostRecyclerAdapter(posts, getApplicationContext(), onPostListener);
v_recycle.setAdapter(adapter);
v_recycle.scrollToPosition(post_pos);
scrollToPosition으로 해결하엿다!
CommentActivity 구현하기
댓글 부분에서는 대부분 받아오고 서버로 요청하는 부분이 대부분이기 때문에 특별히 다른 점을 찾아보라면 OnKeyListener를 들 수 있겠다. 사용자가 댓글을 작성을 완료하면 해당 event의 콜백부분을 수행하는 과정에서 서버로 요청을 하게 하면 된다.
new_comment.setOnKeyListener(new ReplyCommentListener(parent));
new_comment.requestFocus();
new_comment라는 이름의 EditText에 ReplyCommentListener를 달아주는데 OnKeyListener를 커스터마이징 한 클래스이다.
 public class ReplyCommentListener implements View.OnKeyListener{
        Integer parent;

        public ReplyCommentListener(Integer parent){
            this.parent = parent;
        }

        @Override
        public boolean onKey(View v, int keyCode, KeyEvent event) {
            if ((event.getAction() == KeyEvent.ACTION_DOWN) && (keyCode == KeyEvent.KEYCODE_ENTER)) {
                String comment = String.valueOf(new_comment.getText());
                if (comment.substring(0) != "\n") {
                    OkHttpClient okHttpClient = new OkHttpClient.Builder().build();
                    ApolloClient apolloClient = ApolloClient.builder().serverUrl(getString(R.string.api_url)).okHttpClient(okHttpClient).build();

                    String Token = Session.getCurrentSession().getTokenInfo().getAccessToken();
                    if(this.parent == null){
                        final Add_commentMutation addComment = Add_commentMutation.builder().accessToken(Token).record(comments.get(0).get_post_id()).text(comment).build();
                        apolloClient.mutate(addComment).enqueue(new ApolloCall.Callback<Add_commentMutation.Data>() {
                            @Override
                            public void onResponse(@NotNull Response<Add_commentMutation.Data> response) {
                                if (response.data().addComment.success) {
                                    new_comment.getText().clear();

                                    runOnUiThread(new Runnable() {
                                        @Override
                                        public void run() {
                                            new_comment.clearFocus();
                                        }
                                    });

                                    InputMethodManager imm = (InputMethodManager) getApplicationContext().getSystemService(Activity.INPUT_METHOD_SERVICE);
                                    imm.hideSoftInputFromWindow( new_comment.getWindowToken(), 0);

                                    getCommentsList();
                                }
                            }

                            @Override
                            public void onFailure(@NotNull ApolloException e) {
                                e.printStackTrace();
                                Toast.makeText(getApplicationContext(), "알 수 없는 이유로 실패하였습니다.", Toast.LENGTH_LONG).show();
                            }
                        });
                    } else {
                        final Add_commentMutation addComment = Add_commentMutation.builder().accessToken(Token).record(comments.get(0).get_post_id()).parent(this.parent).text(comment).build();
                        apolloClient.mutate(addComment).enqueue(new ApolloCall.Callback<Add_commentMutation.Data>() {
                            @Override
                            public void onResponse(@NotNull Response<Add_commentMutation.Data> response) {
                                if (response.data().addComment.success) {
                                    new_comment.getText().clear();

                                    runOnUiThread(new Runnable() {
                                        @Override
                                        public void run() {
                                            new_comment.clearFocus();
                                        }
                                    });

                                    InputMethodManager imm = (InputMethodManager) getApplicationContext().getSystemService(Activity.INPUT_METHOD_SERVICE);
                                    imm.hideSoftInputFromWindow( new_comment.getWindowToken(), 0);

                                    getCommentsList();
                                }
                            }

                            @Override
                            public void onFailure(@NotNull ApolloException e) {
                                e.printStackTrace();
                                Toast.makeText(getApplicationContext(), "알 수 없는 이유로 실패하였습니다.", Toast.LENGTH_LONG).show();
                            }
                        });
                    }
                    return true;
                }
                return false;
            }
            return false;
        }
    }
Comment에서 parent는 답글에 대한 답글인지를 판단하는 여부이기 떄문에 해당 값이 null인 경우 게시물 자체에 대한 댓글로 간주한다. onKey이벤트가 발생하면 사용자가 작성한 댓글을 parent와 같은 값을 토대로 build하여 전송한다. 만약 해당 요청이 성공하여 success값이 참으로 돌아온 경우 new_comment에 적혀있는 글을 clear한 뒤, clearFocus를 수행하고 keyboard를 숨기고 Comment에 대한 정보를 최신화해주는 getCommentsList를 호출하게 된다.
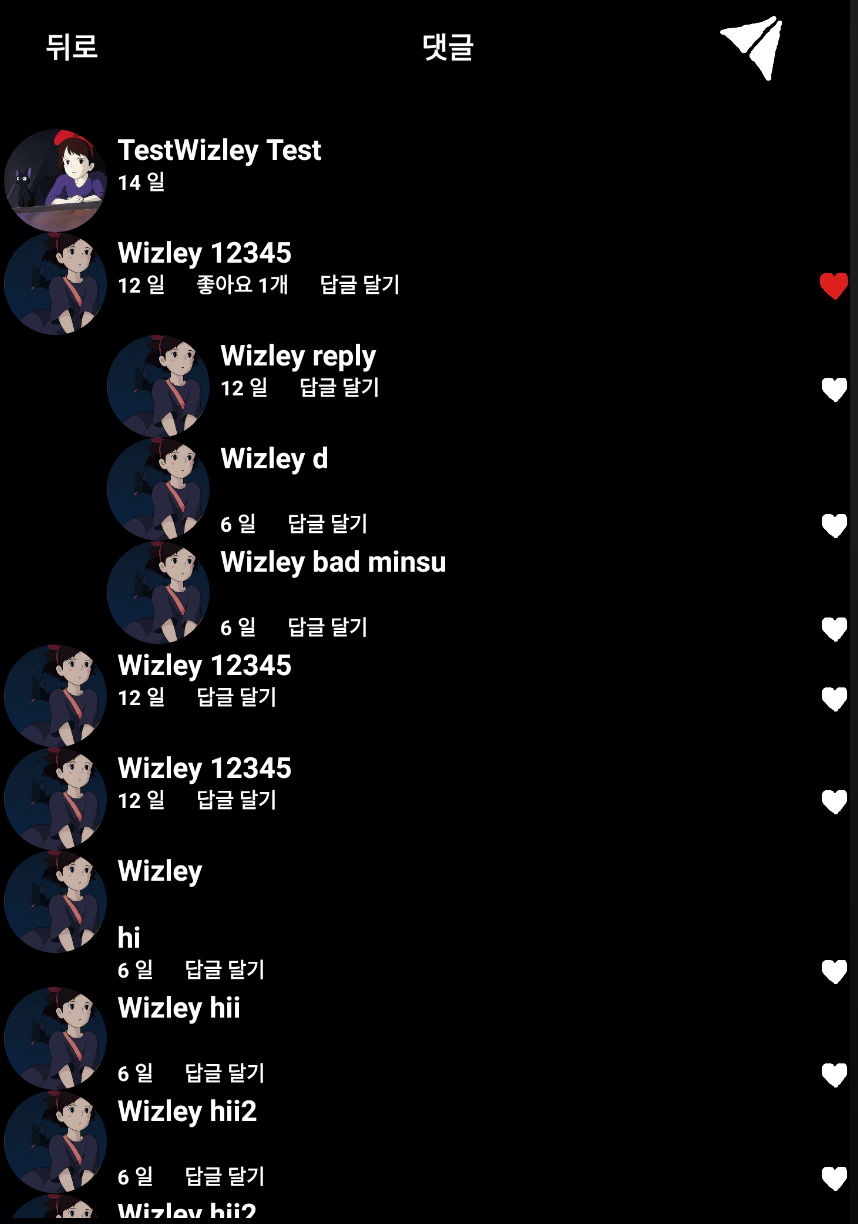
History 서비스 구현하기
History는 팔로우/팔로잉/좋아요/댓글 등의 이벤트가 발생하면 사용자에게 알림을 주기 위해 필요한 기능이다. 백그라운드에서 지속적으로 돌아야 되기 때문에 Service로 구현을 하였다.
public class HistoryService extends Service implements Runnable{
    private NotificationManager mNM;

    private int NOTIFICATION = 5;

    public class LocalBinder extends Binder {
        HistoryService getService(){
            return HistoryService.this;
        }
    }

    @RequiresApi(api = Build.VERSION_CODES.O)
    @Override
    public void onCreate() {
        super.onCreate();

        mNM  = (NotificationManager) getSystemService(NOTIFICATION_SERVICE);
        showNotification("Welcome to aintstagram");

        Thread mThread = new Thread(this);
        mThread.start();
    }

    @Override
    public int onStartCommand(Intent intent, int flags, int startId) {
        return super.onStartCommand(intent, flags, startId);
    }

    @Override
    public void onDestroy() {
        mNM.cancel(NOTIFICATION);
    }

    @Nullable
    @Override
    public IBinder onBind(Intent intent) {
        return mBinder;
    }

    private final IBinder mBinder = new LocalBinder();

    @RequiresApi(api = Build.VERSION_CODES.O)
    private void showNotification(CharSequence text){
        PendingIntent intent = PendingIntent.getActivity(this, 0, new Intent(this, MainActivity.class), 0);

        NotificationChannel channel = new NotificationChannel("aintstagram", text, IMPORTANCE_DEFAULT);
        mNM.createNotificationChannel(channel);

        Notification notification = new Notification.Builder(this, "aintstagram")
                .setSmallIcon(R.drawable.aintstagram)
                .setTicker(text)  // the status text
                .setWhen(System.currentTimeMillis())  // the time stamp
                .setContentTitle("aintstagram")  // the label of the entry
                .setContentText(text)  // the contents of the entry
                .setContentIntent(intent)
                .build();

        mNM.notify(NOTIFICATION, notification);
    }

    public void updateHistory(int record){
        final OkHttpClient okHttpClient = new OkHttpClient.Builder().build();
        final ApolloClient apolloClient = ApolloClient.builder().serverUrl(getString(R.string.api_url)).okHttpClient(okHttpClient).build();
        String Token = Session.getCurrentSession().getTokenInfo().getAccessToken();

        final Update_history_seenMutation uh = Update_history_seenMutation.builder().accessToken(Token).record(record).build();
        apolloClient.mutate(uh).enqueue(new ApolloCall.Callback<Update_history_seenMutation.Data>() {
            public void onResponse(@NotNull Response<Update_history_seenMutation.Data> response) {

            }

            @Override
            public void onFailure(@NotNull ApolloException e) {

            }
        });
    }

    public void checkHistory(){
        final OkHttpClient okHttpClient = new OkHttpClient.Builder().build();
        final ApolloClient apolloClient = ApolloClient.builder().serverUrl(getString(R.string.api_url)).okHttpClient(okHttpClient).build();
        String Token = Session.getCurrentSession().getTokenInfo().getAccessToken();

        final HistoryTypeQuery h = HistoryTypeQuery.builder().accessToken(Token).build();
        apolloClient.query(h).enqueue(new ApolloCall.Callback<HistoryTypeQuery.Data>() {
            @RequiresApi(api = Build.VERSION_CODES.O)
            @Override
            public void onResponse(@NotNull Response<HistoryTypeQuery.Data> response) {
                int cnt = response.data().histories.size();
                for(int i=0; i<cnt; i++){
                    Integer record = Integer.parseInt(response.data().histories.get(i).historyId);
                    if (!response.data().histories.get(i).seen) {
                        switch (response.data().histories.get(i).type){
                            case C:
                                showNotification("새로운 댓글이 있습니다.");
                                updateHistory(record);
                                break;
                            case F:
                                showNotification("새로운 팔로우가 추가되었습니다.");
                                updateHistory(record);
                                break;
                            case L:
                                showNotification("새로운 좋아요 정보가 있습니다.");
                                updateHistory(record);
                                break;
                            case $UNKNOWN:
                                break;
                        }
                    }


                }
            }

            @Override
            public void onFailure(@NotNull ApolloException e) {

            }
        });
    }

    @Override
    public void run() {
        while(true){
            try{
                checkHistory();
                Thread.sleep(10000);
            } catch(Exception e){

            }
        }
    }

}
서비스도 라이프 사이클을 가지고 있는데 onCreate로부터 시작이 되는 것은 Activity와 동일하다. 서비스는 백그라운드에서 작업을 하며 브로드캐스트와 다르게 메모리에 대한 정리가 필요한 경우 종료되기도 한다.
mNM  = (NotificationManager) getSystemService(NOTIFICATION_SERVICE);
showNotification("Welcome to aintstagram");
해당 부분은 사용자에게 Welcome to aintstagram이라는 메시지 알람을 띄우는 부분이며 서비스가 실행되는 동안에는 한 번만 호출이 된다.
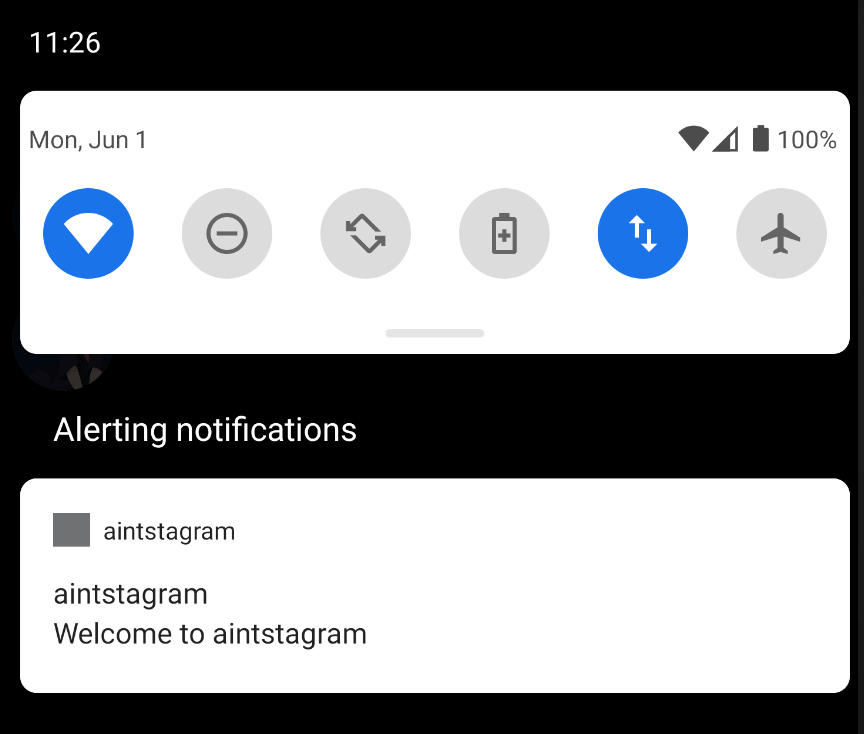
showNotification 부분에서는 알림에 대한 이름 등의 설정을 진행하게 되며 run 부분을 통해 Thread는 10초마다 checkHistory를 실행하게 된다.
checkHistory는 서버로부터 새로 알려야 할 History 정보가 존재하는지 요청하게 되는데 만약 존재할 경우 해당 타입에 대한 정보를 토대로 알림을 보낸 뒤 updateHistory를 요청하게 된다. updateHistory는 알림을 수행하였다는 결과를 서버에 알려주기 위함이며 해당 요청이 서버로 전달이 되게 되면 checkHistory에서 더 이상 같은 레코드 값이 넘어오지 않게 된다.
Intent historyService = new Intent(getApplicationContext(), HistoryService.class);
startService(historyService);
service도 Intent를 통해 실행할 수 있으며 startService로 호출을 하는 순간 실행되게 된다.

SMS 최신화
타 사용자와 메시지를 주고 받는 경우에는 나로 인해 발생하는 변화와 상대방으로 발생하는 변화를 모두 캐치할 수 있어야 된다. 나로 인해 발생하는 전송/메시지 삭제의 경우 안드로이드가 알 수 있기 때문에 바로 최신화를 수행하면 되지만 상대방으로 인해 발생한 변화에 대해서는 서버에 요청하여 알아내는 과정이 필요하다.
어떤 방식으로 구현할 수 있을지에 대해 고민을 하다가 다음과 로직을 생각했다. 첫 번째는 누군가 특정 메시지를 삭제한 뒤 요청한 쿼리의 경우 메시지의 총량이 다르다는 점이다. 두 번째로는 만약 메시지를 삭제한 동시에 새로운 메시지가 추가되어 총량이 같은 경우에는 마지막에 추가된 메시지의 레코드 번호는 반드시 다르다는 것이다. 삭제된 만큼 추가가 되었음에도 마지막 레코드의 값이 같은 경우는 존재할 수 없기 때문이다. 이런 특징을 이용하여 Thread를 구현하였다. Thread는 2초마다 diffMessage를 호출하는데 MessageType을 쿼리하여 총량이 다르거나 마지막 레코드의 번호가 다른 경우에 update를 수행하도록 하였다.
class MessageDiffThread extends Thread implements Runnable {
        private String username;
        private int chatId;
        private int last_idx;
        private int prev_cnt;
        private int cur_cnt;

        public MessageDiffThread(int chatId, String username, int last_idx, int prev_cnt){
            this.chatId = chatId;
            this.username = username;
            this.last_idx = last_idx;
            this.prev_cnt = prev_cnt;
        }

        @Override
        public void run() {
            while(true) {
                diffMessage();
                try {
                    Thread.sleep(2000);
                } catch (InterruptedException e) {
                    e.printStackTrace();
                }
            }
        }

        private void diffMessage(){
            final OkHttpClient okHttpClient = new OkHttpClient.Builder().build();
            final ApolloClient apolloClient = ApolloClient.builder().serverUrl("http://10.0.2.2:8000/graphql/").okHttpClient(okHttpClient).build();
            String Token = Session.getCurrentSession().getTokenInfo().getAccessToken();

            final MessageTypeQuery m = MessageTypeQuery.builder().accessToken(Token).username(username).build();

            apolloClient.query(m).enqueue(new ApolloCall.Callback<MessageTypeQuery.Data>() {
                @Override
                public void onResponse(@NotNull Response<MessageTypeQuery.Data> response) {
                    cur_cnt = response.data().messages().size();
                    int new_last_idx = Integer.parseInt(response.data().messages().get(cur_cnt-1).messageId);

                    if(prev_cnt != cur_cnt){
                        getMessages();
                        prev_cnt = cur_cnt;
                        last_idx = new_last_idx;
                    }

                    else if(new_last_idx != last_idx){
                        getMessages();
                        last_idx = new_last_idx;
                    }
                }

                @Override
                public void onFailure(@NotNull ApolloException e) {
                }
            });
        }
    }

GITHUB LINK
사실 여기까지 진행하는데 딱 2달이라는 시간이 걸렸다. 안드로이드 프로젝트가 처음이었고 자바프로그래밍이 처음이었으며 graphql 또한 처음이었다. 개발을 진행하는 동안 수많은 문제에 봉착하였으며 해결하기 위해 많은 노력을 기울였다. 그리고 그 과정에서 스스로 해결해야 되는 문제들도 존재했으며 공식 문서를 봤지만 전혀 모르겠었던 문제들도 존재하였다. 그리고 구현이 완료된 지금도 해결하지 못하고 있는 여러 이슈들이 존재한다. 하지만 그 과정에서 많은 것을 배울 수 있었고 가장 유명한 어플을 스스로 도움없이 구현할 수 있었다는 점에서 이번 프로젝트는 성공하였다고 생각한다. 다만 안드로이드 개발을 더 잘하고 싶은 욕심이 생겨서 아마 다른 사람이 개발한 어떤 앱의 코드를 그대로 따라하며 나와 어떤 방식이 다른지에 대한 연구를 해보고자 한다.
안드로이드를 개발하면서 가장 힘들었던 부분이 비동기 처리를 하는 부분이었다. null 관련 에러가 발생하기 쉬운 환경이기 때문에 속도 및 로직에 대한 부분에서 많은 실수가 있었고 이를 해결하는게 쉽지 않았다. 그래도 익숙해질수록 비슷한 구현이 필요한 부분에 대한 구현 속도가 빨라진다는 점에서 숙련도가 늘고 있다는 것을 체감할 수 있었다. 클론 코딩으로 진행하기에 좀 어렵지 않았나라는 생각을 했지만 결국 구현이 가능하다는 것을 이렇게 증명할 수 있어서 한편으로는 좋았던 프로젝트 주제였다고 생각한다.
포스팅에는 생략된 부분이 정말 많았지만 구현을 하는 동안 정말 많은 코드를 작성하였다. 그리고 그 기록에 대한 부분은 아래의 깃링크에서 확인이 가능하다. 각각의 커밋에 대해서 설명을 달아놨으니 참고해보면 좋을 듯 하다.