
Django + REST + SQLite @ docker로 Eaten_Away 서비스 개발하기
게시일:
Overview
방금 PHP 개발 프로젝트를 마무리하고 바로 시작하게 된 다음 프로젝트는 요즘 젤 잘 나가는 강력한 프레임워크인 Django를 사용한다. 그리고 이전 포스팅은 간단한 게시판을 구현한 정도였다면 이번에는 하나의 서비스를 개발한다는 생각으로 진행할 예정이다. 이번에도 docker를 사용할 것인데 도커 이외에 Django + REST + SQLite라는 또다시 나에게 생소한 조합으로 개발을 진행하고자 한다.
이번에 서비스의 주제로 정한 키워드는 “음식”이다. 내 일과를 생각해보았을 때, 아침, 점심, 저녁에 뭘 먹을지에 대한 고민이 꽤 큰 비율을 차지한다. 그래서 이번 프로젝트는 다음의 기능을 가지고 있는 서비스를 개발하고자 한다.
- RANDOM으로 추천메뉴를 가져온 뒤 선택할 시 메뉴에 대한 상세 정보 및 상점의 리스트를 사용자에게 보여주는 기능
- 먹고 싶은 메뉴를 검색하여 조회
- 개개인이 먹은 메뉴 정보를 저장하여 특정 주기동안 임의의 음식을 몇번이나 또는 얼마만의 주기마다 먹었는지를 확인하여 그래프 등으로 표시하는 기능
그리고 해당 개념을 토대로 구현하고자 하는 세부적인 목표를 정하자면 다음과 같다.
- 회원가입 / 로그인 -> 메일 인증 기능
- 음식관련 개인정보 열람(본인에 의하여/타인에 의하여) 및 수정
- 게시물의 댓글 + 대댓글 기능 구현
- 맵 관련 api 연동
- 실시간 대화 or 1:1 대화방 구현
약간 배달 어플과 흡사한 기능을 가지고 있다고 볼 수도 있을 것 같다. 어쩌면 거의 같을지도 모르겠다. 적는 지금 생각을 해보니 음식점에 대한 정보를 업데이트 하기 위해서 DB에서 사용자에 대한 정보를 다음과 같이 세분화 할 수 있을 것 같다. 점주 부분의 경우 추가하지 않을 수도 있음!
- 사용자
- 점주
- 관리자
세부적인 사항은 DB를 설계하게 되면 그 때 더 심층적으로 고민을 해보도록 하고 지금해야할 것은 REST api와 Docker에 대해 이해하는 것과 그에 따라 docker-compose파일을 작성하는 것이다. 그러면 먼 여정을 시작해보도록 하자.
(중간중간 생략된 값들이 있기 때문에 필자의 깃허브를 통해 코드를 확인하기를 추천하는 바이다.)
Settings
Django
장고는 MVT 구조를 채택하고 있다. 아래의 링크를 통해 해당 부분을 공부할 수 있다.
장고는 python 기반으로 구현되었기 때문에 python 문법을 알면 개발이 가능하다는 특장점이 있으며, 정해진 규칙에 의거하여 개발을 진행해야 하기 때문에 딴 사람의 코드에 대한 이해가 쉽고 개발을 오래하여 구현에 익숙해지면 쉽다는 장점이 있다.
REST FrameWork
이 주제도 아래의 링크에 잘 설명되어 있다.
얘를 왜 쓰고싶었냐면 안드로이드/웹 등의 멀티 플랫폼 개발에서 효율적으로 사용될 뿐만 아니라 POST/GET 등의 HTTP 메소드를 통해 API를 구현하기 때문에 형식적이고 간단하다는 느낌이 들었다. 아직 제대로 활용을 안해봤기 때문에 사용하면서 느껴봐야 할 것 같다.
Dockerfile
이번에는 Docker에 Django 세팅이 필요하다. python2의 지원이 만료되는 시점에서 python3를 사용하는게 좋을것같기에 Ubuntu 이미지 내부에 Django 및 REST framework를 설치하는 방식을 사용하기로 하였다. 자 그럼 도커파일을 먼저 만들어야 되는데 Django같은 경우 Ubuntu 또는 Python 이미지를 베이스로 생성을 한다. python3 이미지를 사용하면 pip / python3에 대한 버전관리가 되며 이미지 용량이 Ubuntu보다 가볍기 때문에 Python 이미지를 베이스로 사용하는 것이 좋을 것 같았다.
그래서 다음과 같이 초기 Dockerfile을 만들었다.
FROM python:3

MAINTAINER Wizley <wizley@kakao.com>

WORKDIR /code

RUN pip3 install \
	django \
	django-cors-headers \
	djangorestframework \
	djangorestframework-jwt

ENTRYPOINT \
	django-admin startproject eatenAway  \
	python3 $(pwd)/eatenAway/manage.py makemigrations && \
	python3 $(pwd)/eatenAway/manage.py migrate && \
	echo "from django.contrib.auth import get_user_model; User = get_user_model(); User.objects.create_superuser('root', 'wizley@github.com', 'alpine')" | python3 $(pwd)/eatenAway/manage.py shell && \
	python3 $(pwd)/eatenAway/manage.py runserver 0.0.0.0:8000
이제 아래의 명령어로 image를 생성한다.
Wizley:~/Project/Django/eatenAway # docker build --tag django:1.0 .
Successfully built 18300e8ec004
Successfully tagged django:1.0

Wizley:~/Project/Django/eatenAway # docker images
REPOSITORY          TAG                 IMAGE ID            CREATED             SIZE
django              1.0                 18300e8ec004        2 minutes ago       976MB
확인을 하기 위해서 container로 해당 이미지를 올려볼 것이다. 일단은 테스트이기 때문에 abc라는 이름으로 컨테이너를 올린 뒤 접속해보았다.
Wizley:~/Project/Django/eatenAway # docker run -it -d --name abc -p 8000:8000 django
fd826b9f72a23f08d2c7755e2bca48d46397d6ea28e9f154ff9e233d7ea15c2c

Wizley:~/Project/Django/eatenAway # docker ps -a
CONTAINER ID        IMAGE               COMMAND                  CREATED             STATUS                     PORTS               NAMES
fd826b9f72a2        django                "/bin/sh -c 'django-…"   7 seconds ago       Exited (2) 6 seconds ago                       abc
Exited 상태가 떴다. 예감이 안좋다. 명령어상에 문제가 없어서 docker logs 명령어로 문제의 발생지점을 찾아보았다.
Wizley:~/Project/Django/eatenAway # docker logs abc
usage: django-admin startproject [-h] [--template TEMPLATE]
                                 [--extension EXTENSIONS] [--name FILES]
                                 [--version] [-v {0,1,2,3}]
                                 [--settings SETTINGS]
                                 [--pythonpath PYTHONPATH] [--traceback]
                                 [--no-color] [--force-color]
                                 name [directory]
django-admin startproject: error: unrecognized arguments: /code/eatenAway/manage.py makemigrations
arguments 결과가 잘못들어간 것을 확인할 수 있었다!! 적는 과정에서 startproject뒷 부분에 &&을 까먹고 넣지 않았던 것이다. 해당 부분을 수정하고 다시 빌드를 한 뒤 같은 명령어로 실행시켜보았다.
Wizley:~/Project/Django/eatenAway # docker run -it -d --name abc -p 8000:8000 django:1.0
310f35fcfdb2743a4616f7d0a38f8d7a3a73c06b99e9162db9129cd5872e8873

Wizley:~/Project/Django/eatenAway # docker ps -a
CONTAINER ID        IMAGE               COMMAND                  CREATED             STATUS                     PORTS                    NAMES
310f35fcfdb2        django:1.0          "/bin/sh -c 'django-…"   3 seconds ago       Up 2 seconds               0.0.0.0:8000->8000/tcp   abc
제대로 올라간 것을 확인가능하다. 이제 shell을 붙어서 상태를 확인해보겠다.
root@310f35fcfdb2:/code/eatenAway# ps -ef
UID        PID  PPID  C STIME TTY          TIME CMD
root         1     0  0 11:07 pts/0    00:00:00 /bin/sh -c django-admin startproject eatenAway && ?python3 $(pwd)/eate
root        20     1  0 11:07 pts/0    00:00:00 python3 /code/eatenAway/manage.py runserver 0.0.0.0:8000
root        22    20  5 11:07 pts/0    00:00:03 /usr/local/bin/python3 /code/eatenAway/manage.py runserver 0.0.0.0:808
root        25     0  0 11:08 pts/1    00:00:00 /bin/bash
root        36    25  0 11:09 pts/1    00:00:00 ps -ef
이제 localhost:8000을 접속해보도록 하자.
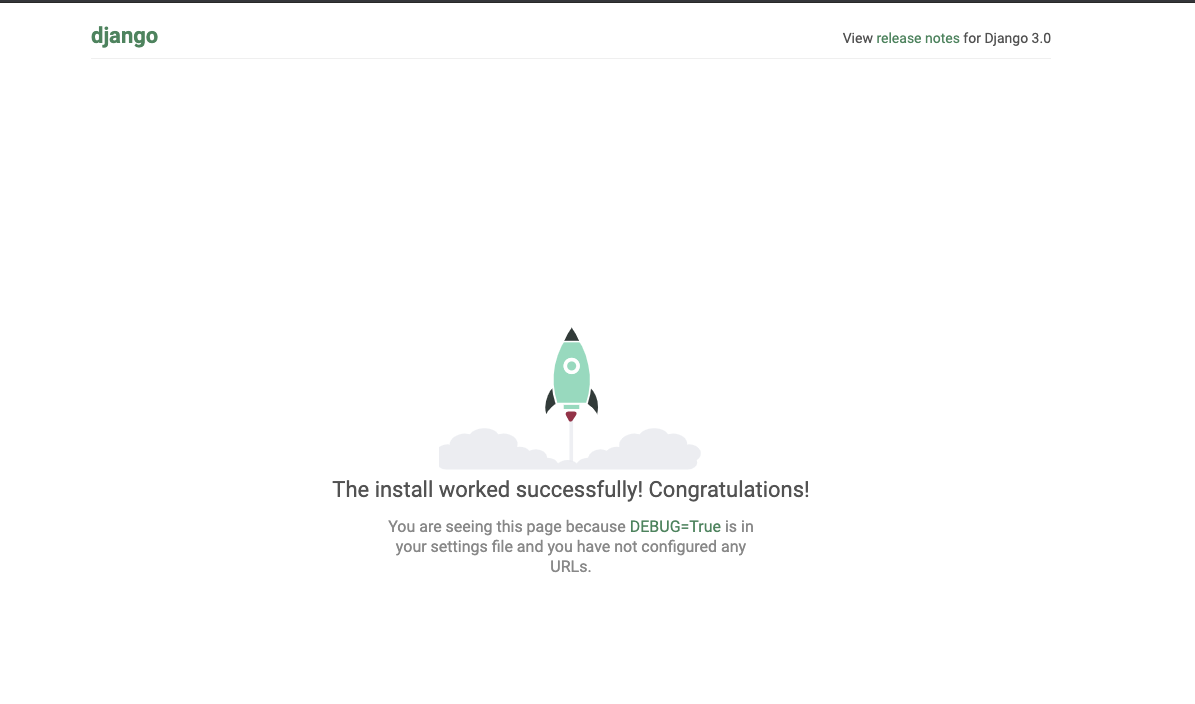
빙고! 장고 프로젝트가 정상적으로 시작된 것을 확인할 수 있다. 여기서 끝내지 않고 조금 더 나아가서 requirements.txt로 패키지의 내용들을 분리한 뒤 실행하여 설치하는 방식으로 수정하도록 하겠다.
requirements.txt
pip의 freeze라는 명령어를 사용하면 설치된 패키지를 알파벳 순으로 출력하는 것이 가능하다. 이를 통해 버전에 대한 정보를 가져올 수 있다.
root@de8d3ccac6db:/code# pip3 freeze > requirements.txt
root@de8d3ccac6db:/code# ls
eatenAway  requirements.txt
root@de8d3ccac6db:/code# cat requirements.txt
asgiref==3.2.3
attrs==19.3.0
coverage==5.0.3
Django==3.0.3
django-cors-headers==3.2.1
djangorestframework==3.11.0
djangorestframework-jwt==1.11.0
more-itertools==8.2.0
packaging==20.1
pluggy==0.13.1
py==1.8.1
PyJWT==1.7.1
pyparsing==2.4.6
pytest==5.3.5
pytest-cov==2.8.1
pytz==2019.3
six==1.14.0
sqlparse==0.3.0
wcwidth==0.1.8
이제 도커를 다음과 같이 변경을 한다. 이제 requirements.txt를 바탕으로 패키지에 대한 설치가 진행되도록 한 것이다.
FROM python:3

MAINTAINER Wizley <wizley@kakao.com>

WORKDIR /code
COPY ./requirements.txt /code

RUN pip3 install -r ./requirements.txt

ENTRYPOINT \
	django-admin startproject eatenAway && \
	python3 $(pwd)/eatenAway/manage.py makemigrations && \
	python3 $(pwd)/eatenAway/manage.py migrate && \
	echo "from django.contrib.auth import get_user_model; User = get_user_model(); User.objects.create_superuser('root', 'wizley@github.com', 'alpine')" | python3 $(pwd)/eatenAway/manage.py shell && \
	python3 $(pwd)/eatenAway/manage.py runserver 0.0.0.0:8000
이제 다시 image를 빌드한 뒤 run을 시키게 되면 기본 container를 돌릴 수 있다.
docker-compose
자 이제는 compose 파일을 만들차례이다. 이번에는 PHP 프로젝트와 달리 일단은 하나의 컨테이너만을 사용할 예정이기 때문에 network 설정은 하지 않도록 한다. (여기서 엄청나게 삽질을 시작하였다…)
지금까지 ENTRYPOINT로 호출했었는데 한번만 startproject가 실행되어야 하므로 결론적으로 Dockerfile을 다음과 같이 변경하였다.
FROM python:3

MAINTAINER Wizley <wizley@kakao.com>

WORKDIR /code
COPY ./requirements.txt /code
COPY ./docker-entrypoint.sh /code

RUN pip3 install -r ./requirements.txt
그리고 docker-compose를 다음과 같이 작성하였다.
version: '3'

services:
 django:
  container_name: django_eatenAway
  image: django:1.0
  environment:
    - DJANGO_DEBUG=true
  volumes:
    - ./code:/code
  ports:
    - "8000:8000"
  tty: true
  command: python3 ./eatenAway/manage.py runserver 0:8000
맨처음에는 command가 없이 실행을 한 뒤 code 내부에 옮겨둔 docker-entrypoint.sh를 실행시킨다.
django-admin startproject eatenAway
python $(pwd)/eatenAway/manage.py makemigrations
python $(pwd)/eatenAway/manage.py migrate
echo "from django.contrib.auth import get_user_model; User = get_user_model(); User.objects.create_superuser('root', 'wizley@github.com', 'alpine')" | python3 $(pwd)/eatenAway/manage.py shell
그 후에 command를 추가하는 방식으로 진행하면 빌드에 성공할 수 있다. 자 이제 다시 명령어를 입력한다.
docker build --tag django:1.0 . ; docker-compose up

Recreating django_eatenAway ... done
Attaching to django_eatenAway
django_eatenAway | Python 3.8.1 (default, Feb  2 2020, 08:37:37)
django_eatenAway | [GCC 8.3.0] on linux
django_eatenAway | Type "help", "copyright", "credits" or "license" for more information.
그리고 컨테이너 내부로 접속한다.
Wizley:~/Project/Django/eatenAway # cat shell.sh
docker exec -it django_eatenAway /bin/bash
Wizley:~/Project/Django/eatenAway # sh shell.sh
root@f7aadb20f3c1:/code#
code에 넣어둔 docker-entrypoint.sh 파일을 실행시키게 되면
root@f7aadb20f3c1:/code# sh docker-entrypoint.sh
No changes detected
Operations to perform:
  Apply all migrations: admin, auth, contenttypes, sessions
Running migrations:
  Applying contenttypes.0001_initial... OK
  Applying auth.0001_initial... OK
  Applying admin.0001_initial... OK
  Applying admin.0002_logentry_remove_auto_add... OK
  Applying admin.0003_logentry_add_action_flag_choices... OK
  Applying contenttypes.0002_remove_content_type_name... OK
  Applying auth.0002_alter_permission_name_max_length... OK
  Applying auth.0003_alter_user_email_max_length... OK
  Applying auth.0004_alter_user_username_opts... OK
  Applying auth.0005_alter_user_last_login_null... OK
  Applying auth.0006_require_contenttypes_0002... OK
  Applying auth.0007_alter_validators_add_error_messages... OK
  Applying auth.0008_alter_user_username_max_length... OK
  Applying auth.0009_alter_user_last_name_max_length... OK
  Applying auth.0010_alter_group_name_max_length... OK
  Applying auth.0011_update_proxy_permissions... OK
  Applying sessions.0001_initial... OK

root@f7aadb20f3c1:/code# ls -al
total 8
drwxr-xr-x 4 root root  128 Feb 26 14:36 .
drwxr-xr-x 1 root root 4096 Feb 26 14:35 ..
-rw-r--r-- 1 root root  319 Feb 26 14:15 docker-entrypoint.sh
drwxr-xr-x 5 root root  160 Feb 26 14:36 eatenAway
project로 eatenAway가 생성되는 것을 확인할 수 있다. 이제 컴포즈에 윗 부분의 runserver를 추가하면 아래와 같이 up을 통하여 서버를 구동할 수 있다.
Wizley:~/Project/Django/eatenAway # docker-compose up
Recreating django_eatenAway ... done
Attaching to django_eatenAway
django_eatenAway | Watching for file changes with StatReloader
django_eatenAway | Performing system checks...
django_eatenAway |
django_eatenAway | System check identified no issues (0 silenced).
django_eatenAway | February 26, 2020 - 14:37:39
django_eatenAway | Django version 3.0.3, using settings 'eatenAway.settings'
django_eatenAway | Starting development server at http://0:8000/
django_eatenAway | Quit the server with CONTROL-C.
이제 기본적인 docker 세팅이 끝났다.
django help
Django를 python2버전을 사용해서 동아리 신입생 지원사이트를 만들어본 뒤로 건드려본 적이 없기 때문에 가물가물한 기억에 의존해서 개발을 하는 것보다 처음 접한다는 생각으로 공부에 접근하고자 한다. 이에는 아래의 사이트가 많은 도움이 되 줄 것이다.
superuser
프레임워크의 help를 보면 어떤 기능이 존재하는지 대략적으로 알아낼 수 있다. 그렇기에 help 명령어를 통해 사용가능한 옵션을 확인해보았다.
root@50a2c9a1cf4b:/code/eatenAway# python manage.py help

Type 'manage.py help <subcommand>' for help on a specific subcommand.

Available subcommands:

[auth]
    changepassword
    createsuperuser

[contenttypes]
    remove_stale_contenttypes

[django]
    check
    compilemessages
    createcachetable
    dbshell
    diffsettings
    dumpdata
    flush
    inspectdb
    loaddata
    makemessages
    makemigrations
    migrate
    sendtestemail
    shell
    showmigrations
    sqlflush
    sqlmigrate
    sqlsequencereset
    squashmigrations
    startapp
    startproject
    test
    testserver

[sessions]
    clearsessions

[staticfiles]
    collectstatic
    findstatic
    runserver
auth 카테고리는 superuser를 추가하거나 password 변경에 사용하는 것 같고 초기에 docker-entrypoint.sh를 통해 root / alpine이라는 superuser를 생성했었다. localhost:8000/admin/ 페이지에서 해당 정보로 로그인을 시도하여 성공하는 것을 통해 정상적으로 계정이 등록되었음으로 확인할 수 있다.
이제 여기서 하나의 궁금증이 생겼다. 그렇다면 이렇게 등록한 superuser는 어디에 저장이 되는걸까?
django.contrib.auth.models import User 명령어를 통해 User정보를 가져오며 그 내부에 is_superuser라는 값이 존재한다고 한다. 눈으로 직접 있는지 확인을 하기 위해서 찾아 들어가보자.
root@50a2c9a1cf4b:/code/eatenAway# python -m site
sys.path = [
    '/code/eatenAway',
    '/usr/local/lib/python38.zip',
    '/usr/local/lib/python3.8',
    '/usr/local/lib/python3.8/lib-dynload',
    '/usr/local/lib/python3.8/site-packages',
]
USER_BASE: '/root/.local' (doesn't exist)
USER_SITE: '/root/.local/lib/python3.8/site-packages' (doesn't exist)
ENABLE_USER_SITE: True
python 명령어로 package의 위치를 파악한다. 그리고 내부로 들어가보았다.
root@50a2c9a1cf4b:/usr/local/lib/python3.8/site-packages/django/contrib/auth# ls
__init__.py  apps.py	   checks.py		    decorators.py  hashers.py  middleware.py  models.py		      templates  validators.py
__pycache__  backends.py   common-passwords.txt.gz  forms.py	   locale      migrations     password_validation.py  tokens.py  views.py
admin.py     base_user.py  context_processors.py    handlers	   management  mixins.py      signals.py	      urls.py
여기에 models.py가 존재한다.
def create_superuser(self, username, email=None, password=None, **extra_fields):
    extra_fields.setdefault('is_staff', True)
    extra_fields.setdefault('is_superuser', True)

    if extra_fields.get('is_staff') is not True:
        raise ValueError('Superuser must have is_staff=True.')
    if extra_fields.get('is_superuser') is not True:
        raise ValueError('Superuser must have is_superuser=True.')

    return self._create_user(username, email, password, **extra_fields)
내부에서 create_superuser 부분을 보면 is_superuser라는 field를 설정하는 것을 확인할 수 있다. 그리고 이 값은 어디에 저장되는고 하고 보니 sqlite3의 db안에서 찾을 수 있었다.

is_superuser필드가 1인 상태로 저장되어 있다. 이렇게 django에서는 User 인스턴스에 대한 관리를 수행한다는 것을 눈으로 확인할 수 있었다.
stale contenttype
stale contenttype이 먼지 잘 모르겠어서 찾아봤더니 만약 어떤 model이 deleted된 상태일 때 그 모델과 관련된 권한(permission)과 같은 정보들을 stale contenttpye이라고 하는 것 같다. 그래서 해당 명령어를 통해 명시한 더이상 필요하지 않은 정보들을 정리하는 역할을 수행하는 것 같다. 해당 옵션은 optional이기 때문에 이를 위해서는 추가적인 세팅이 필요하다.
check
django-admin check를 통해 실행되는 명령어인데 주로 데이터베이스 변경 등의 상황에서 검사를 위해 사용되는 것 같다.
createcachetable
데이터베이스 캐시 테이블을 생성할 때 사용하는 명령어인것 같다.
그 외의 나머지 명령어들에 대한 설명이 해당 블로그에 잘 되어 있어서 대체하도록 하겠다.
Django project/app
project
젤 처음에 eatenAway라는 프로젝트를 생성하였었고 그로 인하여 eatenAway라는 새로운 폴더가 생성이 되었다. 현재 시점에서 해당 구조를 확인해보면 아래와 같이 나타나는 것을 확인할 수 있다.
root@50a2c9a1cf4b:/code# tree eatenAway/
eatenAway/
├── db.sqlite3
├── eatenAway
│   ├── __init__.py
│   ├── __pycache__
│   │   ├── __init__.cpython-38.pyc
│   │   ├── settings.cpython-38.pyc
│   │   ├── urls.cpython-38.pyc
│   │   └── wsgi.cpython-38.pyc
│   ├── asgi.py
│   ├── settings.py
│   ├── urls.py
│   └── wsgi.py
└── manage.py

2 directories, 11 files
장고 프레임워크는 Project과 App으로 구분할 수 있는데 프로젝트는 개발 대상이 되는 통짜의 전체 프로그램을 의미하고 프로젝트 내부의 세부적인 서브 프로그램들을 어플리케이션으로 표현한다고 한다. 즉 각각의 부분을 서브 프로그램인 앱으로 개발을 한 뒤에 프로젝트 레벨에서 통합을 한 모습이 장고라고 할 수 있다.
내부를 보면 asgi.py, settings.py, urls.py wsgi.py가 eatenAway라는 하위 디렉토리 안에 존재하는데 각각은 다음과 같은 역할을 수행한다.
1) asgi.py : ASGI 프로토콜과 연결을 위한 설정 파일 2) settings.py : 프로젝트 설정 파일 3) urls.py : URL패턴을 설정하는 최상위 파일(하위 디렉토리 내에도 urls.py 존재) 4) wsgi.py : 상용 웹 서버와 물리기 위한 설정 파일
app
자 이제 user에 대한 관리를 수행할 앱을 만들어보자. 이름으로 정말 많은 시간 고민을 했는데 걍 user를 쓰기로 하였다.
django-admin startapp user
이제 tree로 확인을 해보면 아래와 같이 user내부에 여러개의 파일이 생성된 것을 확인할 수 있다.
.
├── db.sqlite3
├── eatenAway
│   ├── __init__.py
│   ├── __pycache__
│   │   ├── __init__.cpython-38.pyc
│   │   ├── settings.cpython-38.pyc
│   │   ├── urls.cpython-38.pyc
│   │   └── wsgi.cpython-38.pyc
│   ├── asgi.py
│   ├── settings.py
│   ├── urls.py
│   └── wsgi.py
├── manage.py
└── user
    ├── __init__.py
    ├── admin.py
    ├── apps.py
    ├── migrations
    │   └── __init__.py
    ├── models.py
    ├── tests.py
    └── views.py
메인 앱과는 다르게 django의 MVT 모델로 활용되는 models.py와 views.py가 추가된 것을 확인할 수 있다.
settings.py
장고의 많은 부분과 연관된 값들이 저장되 있는 settings.py를 보면 DB, language, APP list 그리고 SECRET_KEY 값들이 존재한다. 배포 시에 여러가지를 신경써야겠지만 SECRET_KEY 꼭 고려를 해야되는 부분이다.
SECRET_KEY
장고의 settings.py 부분을 보면 SECRET_KEY가 존재한다.
# SECURITY WARNING: keep the secret key used in production secret!
SECRET_KEY = '78bpynx(+e(1(c-=@_!3-l1@xi)_)v4w=3+n=%$9=z28-u9inz'
아래의 블로그에는 해당 값에 내용이 잘 설명되어 있다.
Django - settings.py 의 SECRET_KEY 변경 및 분리하기
이 값을 설정하는 방법에는 환경변수와 비밀파일 2가지가 존재하는데 비밀파일 방식을 적용해보고자 한다. json파일을 생성하여 50자리의 임의의 값을 설정한 뒤 해당 값을 가져오도록 코드를 변경하면 된다고 한다.
root@50a2c9a1cf4b:/code/eatenAway/eatenAway# cat secret.json
{
    "SECRET_KEY" : "wizleywizleywizleywizleywizleywizleywizleywizleysw"
}
위와 같이 secret.json으로 SECRET_KEY의 값을 가지고 있는 임의의 파일을 생성하였다. 이제 블로그를 참조해서 SECRET_KEY의 값을 가져오는 코드를 추가하면 된다.
import os, json
from django.core.exceptions import ImproperlyConfigured

# Build paths inside the project like this: os.path.join(BASE_DIR, ...)
BASE_DIR = os.path.dirname(os.path.dirname(os.path.abspath(__file__)))

# My custom secretKey is in secret.json file
secret_file = os.path.join(BASE_DIR, 'eatenAway/secret.json')

with open(secret_file) as f:
    secret = json.loads(f.read())

def get_secretKey(setting, secret=secret):
    try:
        return secret[setting]
    except KeyError:
        error_msg = "Set the {} environment variable".format(setting)
        raise ImproperlyConfigured(error_msg)

# SECURITY WARNING: keep the secret key used in production secret!
SECRET_KEY = get_secretKey("SECRET_KEY")
자 이제 SECRET_KEY를 custom하게 가져오게 되었다. github에 공유할 때 .gitignore를 통해 secret.json 파일을 제외해주면 된다.
user app 개발
벌써 3월이다. 저번에 만들어만 뒀던 user 어플리케이션을 구현해보도록 하자. user 앱에서 구현하고자 하는 기능은 크게 다음과 같다.
- 회원가입/회원탈퇴
- 로그인/로그아웃
- 아이디/패스워드 찾기 및 변경
- 인증기능(이메일)
PHP로 구현했었던 게시판에 들어갔었던 기능의 대부분이 해당 범주에 있다. 역시나 django에서도 MVT에 기반하여 개발후에 HelloWorld를 찍는 부분부터 진행을 하도록 하겠다.
HelloWorld 출력
from django.http import HttpResponse

def index(request):
    return HttpResponse("HelloWorld from user!")
제일 먼저 views.py 부분에 다음과 같이 작성을 한다. 이 index를 호출하기 위해서는 URL 정보를 등록하여야 한다.
from django.urls import path
from . import views

urlpatterns = [
    path('/', views.index, name='index'),
]
위와같이 urlpatterns 정보를 user/urls.py를 생성하여 적어준다. 해당 url 패턴을 타기 위해서는 project의 메인 프로젝트의 urls.py에 해당 정보를 추가해주어야 한다.
from django.contrib import admin
from django.urls import path, include

urlpatterns = [
    path('admin/', admin.site.urls),
    path('user/', include('user.urls')),
]
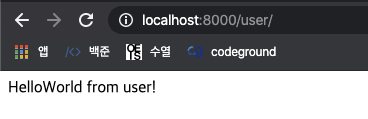
위와 같이 eatenAway/urls.py에 user를 path로 추가해주었다. 이렇게 되면 main App에서 localhost:8000/user/ 라는 url이 입력이 되면 urlpatterns에서 추가된 부분의 루틴에 따라 user/urls.py 내부의 urlpatterns을 확인하게 된다. 그리고 user/urls.py의 정보에 의하여 / 루트에 대하여 views.py의 index 함수를 호출해준다. 만약 path의 / 부분이 abcd/였다면 localhost:8000/user/abcd/ 를 입력하면 index라는 python 코드가 해석되는 것이다. 이런 URL 디자인 패턴을 ‘우아한 URL 패턴’이라고 한다. 이를 통해 아래와 같이 첫 페이지를 확인할 수가 있다!
User, Account db 설계
# Database
# https://docs.djangoproject.com/en/3.0/ref/settings/#databases

DATABASES = {
    'default': {
        'ENGINE': 'django.db.backends.sqlite3',
        'NAME': os.path.join(BASE_DIR, 'db.sqlite3'),
    }
}
settings.py 부분을 보면 위와같이 database 항목이 있다. 그리고 django는 default 옵션으로 sqlite3를 사용한다. 만약 mysql과 같이 다른 db사용을 위해서는 해당 부분을 변경해주어야 한다. 그리고 settings.py의 하위 항목부분에 시간설정 부분이 존재한다.
LANGUAGE_CODE = 'en-us'

TIME_ZONE = 'UTC'

USE_I18N = True

USE_L10N = True

USE_TZ = True
한국 시간을 사용하기 위해서 아래와 같이 변경해주었다.
LANGUAGE_CODE = 'en-us'

TIME_ZONE = 'Asia/Seoul'
자 이번에는 models.py를 수정하여 database와 관련된 필드에 대한 구성을 해보도록 하겠다. 제일 먼저 해야될 것이 사용자에 대한 db정보를 생성하는 것이다. 그렇다면 user를 관리하기 위해서는 어떤 값들이 필요할까를 고민해볼 차례이다. 생각나는 것들을 적어보면 다음과 같다.
- 이름
- 생일
- 성별
- 가입 날짜
- id
- password
- email address
- user_no(primary key)
- 계정 상태(active 여부)
자 이제 위의 정보를 토대로 사용자로부터 입력을 받을 정보를 추려보면 다음과 같다.
개인정보
- 이름
- 생일
- 성별
계정정보
- id
- password
- email address
위의 정보들을 종합하여 내가 처음으로 설계한 models.py의 모습은 다음과 같다.
from django.db import models
from django import forms

class User(models.Model):
    name = models.CharField(max_length=20)
    birth = models.DateField()
    area = models.CharField(max_length=10)
    sex_selection = (
        ('M', '남성'),
        ('W', '여성'),
    )
    sex = models.CharField(max_length=1, choices=sex_selection)

class Account(models.Model):
    user_info = models.ForeignKey(
        User,
        on_delete = models.CASCADE,
        verbose_name="개인정보"
    )
    account_no = models.AutoField(primary_key=True)
    id = models.CharField(max_length=10, verbose_name='ID')
    password = forms.CharField(max_length=16, widget=forms.PasswordInput)
    email = models.EmailField(max_length=32, verbose_name='이메일')
    created_date = models.DateTimeField(auto_now_add=True, verbose_name="가입날짜")
    comment = models.CharField(max_length=20, verbose_name="코멘트")
    account_status_selection = (
        ('O', '정상'),
        ('X', '삭제'),
        ('B', '정지'),
    )
    status = models.CharField(max_length=1, choices=account_status_selection)
자 이제 확인을 위해서 settings.py에 user app을 추가하도록 한다.
INSTALLED_APPS = [
    'django.contrib.admin',
    'django.contrib.auth',
    'django.contrib.contenttypes',
    'django.contrib.sessions',
    'django.contrib.messages',
    'django.contrib.staticfiles',
    'user',
]
자 이제 makemigrations를 사용하여 db를 생성한다.
root@50a2c9a1cf4b:/code/eatenAway# python manage.py makemigrations user
Migrations for 'user':
  user/migrations/0001_initial.py
    - Create model User
    - Create model Account
models.py에서 적용한 변경사항이나 추가된 혹은 삭제된 사항들을 감지하여 파일로 생성하는 단계가 makemigrations가 되는 것이다. 그리고 migrate의 경우 적용되지 않는 migrations 값들을 적용시키는 역할을 하기 때문에 해당 명령어도 아래와 같이 실행시키면 적용이 된다.
root@50a2c9a1cf4b:/code/eatenAway# python manage.py migrate
Operations to perform:
  Apply all migrations: admin, auth, contenttypes, sessions, user
Running migrations:
  Applying user.0001_initial... OK
자 이제 admin 페이지에 두 model을 추가해보자. 이를 위해서는 user/admin.py에 아래와 같이 정보를 추가해주어야 된다.
from django.contrib import admin
from .models import User, Account

admin.site.register(User)
admin.site.register(Account)
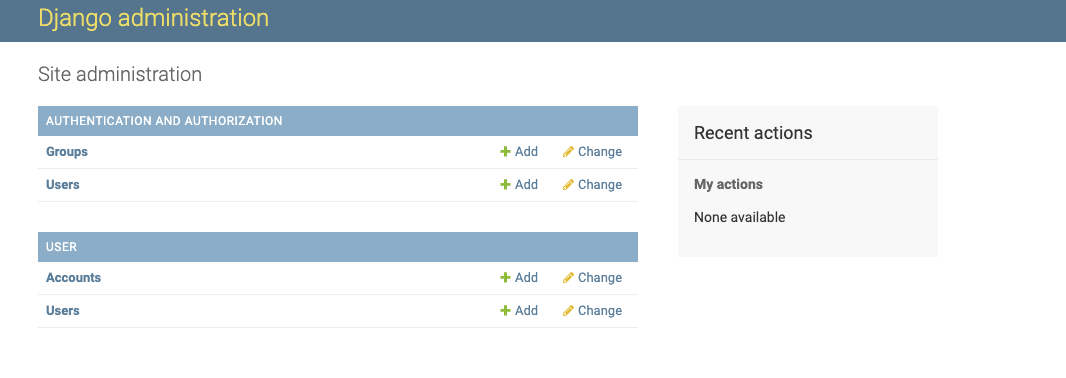
이제 localhost:8000/admin/ 에 superuser로 접속하면 정보가 추가된 것을 확인할 수 있다!
이제 제대로 추가가 되었는지 확인을 할겸 렌더링해보도록 하겠다. 이 과정에서 manage.py shell을 통해 정보를 추가할 수도 있는데 나의 경우 admin 페이지를 통해 추가하였다.
urlpatterns = [
    path('', views.index, name='index'),
    path('user/', views.getuser, name='getuser'),
]
가장 먼저 user/라는 sub url을 user/urls.py에 추가하였다. 이제 /user/user로 접속하면 뿌려줄 값을 views.py 부분에 추가하면 된다.
from django.http import HttpResponse
from .models import *
from itertools import chain

def index(request):
    return HttpResponse("HelloWorld from user!")

def getuser(request):
    account_info = Account.objects.order_by('account_no')
    user_info = User.objects.filter(id=account_info[0].user_info_id)
    result = chain(account_info.values(), user_info.values())
    return HttpResponse(result)
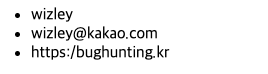
여러 삽질을 통해 위와 같은 코드를 작성하였다. QuerySet으로 결과값을 받아오는데 해당 값에 대한 filter 및 order_by등을 통한 가공이 가능하다. 다른 모델에서 나온 두 쿼리셋을 어떻게 하면 합칠까에 대해서 삽질을 많이했는데 itertools를 사용하여 두 값을 체인하면 아래와 같은 결과를 가져올 수 있다.

여러 사용법은 아래의 링크를 참고하면 될듯하다.
이제 templates에 연동을 해보자. 이를 위해 user 하위에 templates/index.html을 생성하였고 아래와 같이 작성하였다.
<p>No User.</p>
그리고 해당 부분을 views.py와 연동하는 작업을 위해 아래와 같이 수정하였다.
from django.http import HttpResponse
from django.shortcuts import render
from .models import *
from itertools import chain

def index(request):
    return HttpResponse("HelloWorld from user!")

def getuser(request):
    account_info = Account.objects.order_by('account_no')
    user_info = User.objects.filter(id=account_info[0].user_info_id)
    return render(request, 'index.html',{'user_info' : account_info})
render가 index.html에 user_info라는 객체의 정보로 account_info를 넘겨주게 되면 해당 부분을 html이 뿌려주는 것이다. 결과를 확인해보면 아래와 같이 내용이 출력되는 것을 확인할 수 있다.
이제 간단한 MVT 모델에 대한 학습을 끝냈다.
지금 시점에서 막상 Models을 ForeignKey로 설계를 하니 초보자인 나에게 사용하기가 여간 불편한게 아니었다. 그래서 해당 부분을 하나로 통합하기로 하였다. 그래서 다음과 같이 다시 구조를 변경하였다.
from django.db import models
from django import forms

class Account(models.Model):
    account_no = models.AutoField(primary_key=True)

    name = models.CharField(max_length=20, verbose_name='이름', default='Chihiro')
    birth = models.DateField(null=True)
    area = models.CharField(max_length=10, verbose_name='지역', default='Seoul')
    sex_selection = (
        ('M', '남성'),
        ('W', '여성'),
    )
    sex = models.CharField(max_length=1, choices=sex_selection, default='W')

    id = models.CharField(max_length=10, verbose_name='ID')
    password = forms.CharField(max_length=16, widget=forms.PasswordInput)
    email = models.EmailField(max_length=32, verbose_name='이메일')
    created_date = models.DateTimeField(auto_now_add=True, verbose_name="가입날짜")
    comment = models.CharField(max_length=20, verbose_name="코멘트")

    account_status_selection = (
        ('O', '정상'),
        ('X', '삭제'),
        ('B', '정지'),
    )
    status = models.CharField(max_length=1, choices=account_status_selection)
이제 위와 같이 DB를 수정하게 되면 기존의 ForeignField 값인 name, birth, area 그리고 sex에 대한 설정값이 사라지기 때문에 그게 대한 default를 세팅해주어야 된다.
root@50a2c9a1cf4b:/code/eatenAway# python manage.py makemigrations
You are trying to add a non-nullable field 'sex' to account without a default; we can't do that (the database needs something to populate existing rows).
Please select a fix:
 1) Provide a one-off default now (will be set on all existing rows with a null value for this column)
 2) Quit, and let me add a default in models.py
Select an option: 2
만약 default 또는 null=true가 없을 경우에 위와 같은 문제가 발생한다. 이제 수정한 뒤에 아까와 같이 명령을 실행해주면 된다.
root@50a2c9a1cf4b:/code/eatenAway# python manage.py makemigrations
Migrations for 'user':
  user/migrations/0002_auto_20200303_1905.py
    - Remove field user_info from account
    - Add field area to account
    - Add field birth to account
    - Add field name to account
    - Add field sex to account
    - Delete model User
root@50a2c9a1cf4b:/code/eatenAway# python manage.py migrate
Operations to perform:
  Apply all migrations: admin, auth, contenttypes, sessions, user
Running migrations:
  Applying user.0002_auto_20200303_1905... OK
Default 옵션으로 설정한 값들은 생각을 해보니 딱히 없앨 필요가 없을 것 같아서 필요해지기 전까지는 저대로 두기로 하였다. 이제 모델을 작성했으니 templates을 연결하여 회원가입을 짤 차례이다.
템플릿
동아리 후배로부터 HTML 템플릿을 추천받았기에 해당 템플릿을 사용하도록 하겠다. 템플릿을 사용할 때는 꼭!! 라이센스를 확인해야된다.
사실은 밑에 있는 템플릿을 사용하려다가 도저히 프론트쪽이 이해가 안되서 바꿨다 ㅎㅎ..
다행히 해당 템플릿의 라이센스는 CC BY 3.0 였다. footer만 남기고는 마음껏 사용해도 될 것 같다.
회원가입 페이지 만들기
admin 페이지를 통해 Account 정보를 손쉽게 확인이 가능하다. 이 점을 활용하여 회원가입 페이지를 작성해보도록 하겠다.
urlpatterns = [
    path('', views.index, name='index'),
    path('user/', views.getuser, name='getuser'),
    path('signup/', views.signup, name='signup'),
]
이제 URL을 수정한 뒤 signup에 해당하는 골격을 짠다.
def getuser(request):
    return render(request, 'signup.html', {})
이제 templates을 signup.html로 넣어줬는데 CSS가 정상적으로 로드되지 않았다.
django에서는 static에 css/js등의 값을 넣어서 관리한다고 하는데 이를 위해서 위의 링크를 따라 작성하였다. 간단하게 요약해놓자면 settings.py에 경로에 대한 정보를 아래와 같이 입력한다.
STATIC_URL = '/static/'
STATICFILES_DIRS = (
    os.path.join(BASE_DIR, 'static'),
)
그 후 user/static 아래에 파일들을 옮긴 후 아래와 같이 html 템플릿에 load static 및 static을 붙힌 경로로 바꿔주면 된다.
<!doctype html>
{% load static %}
<html class="no-js" lang="zxx">

<head>
  <meta charset="utf-8">
  <meta http-equiv="x-ua-compatible" content="ie=edge">
  <title>Burger</title>
  <meta name="description" content="">
  <meta name="viewport" content="width=device-width, initial-scale=1">

  <!-- <link rel="manifest" href="site.webmanifest"> -->
  <link rel="shortcut icon" type="image/x-icon" href="{% static 'img/favicon.png' %}">
이 시점에서 느낀건데 HTML을 이쁘게 만들면서 하기에는 프론트를 1도 모르기 때문에 거의 불가능에 가깝다고 보았다. 그래서 볼만한 수준의 정도만 만들고 넘어가는 방식으로 진행을 해야할 것 같다. (html에 대한 부분의 코드는 생략한다.)
recaptcha
로봇이 아닙니다를 위해서 recaptcha를 추가해주기 위해서 아래의 링크를 참조하였다.
여기서 submit action이 수행시에 캡차 여부를 확인하기 위한 스크립트를 추가로 작성하였다.
  var check = function() {

    if (document.getElementById('password').value == document.getElementById('password2').value) {
      document.getElementById('message').style.color = 'green';
      document.getElementById('message').innerHTML = '패스워드가 일치합니다.';
    } else {
    document.getElementById('message').style.color = 'red';
    document.getElementById('message').innerHTML = '패스워드가 올바르지 않습니다.';
    }
  }
  function checkRecap(){
    var v = grecaptcha.getResponse();
    if(v.length==0){
      alert('캡차를 확인하세요');
      return false;
    }
    else{
      return true;
    }
  }
위의 코드의 checkRecap은 아래의 사이트에서 가져왔다.
여러 사이트에서 invisible의 형식으로 button에 캡차를 넣기도 하던데 실습을 하는데 잘 안되서 지금처럼 checkRecap을 onsubmit에서 거치도록 구현하였다.
이 시점에서 회원가입 폼을 받는 페이지에서의 HTML의 구현은 다 되었고 아이디와 이메일 사용여부를 확인해주는 부분을 구현해야 된다.
rest framework 도입
회원가입 부분에서 아이디/이메일 중복 체크 및 회원가입 버튼을 클릭한 경우에 REST api로 처리가 되면 어떨가라는 고민을 하게 되었고 이 부분에 도입을 해보기로 하였다. 이를 위해서 django-rest-auth를 추가적으로 설치를 해주었다.
root@b099b068dc26:/code# pip install django-rest-auth django-rest-authtoken
root@b099b068dc26:/code# pip list
Package                 Version
----------------------- -------
asgiref                 3.2.3
attrs                   19.3.0
coverage                5.0.3
Django                  3.0.3
django-cors-headers     3.2.1
django-rest-auth        0.9.5
django-rest-authtoken   1.2.4
djangorestframework     3.11.0
djangorestframework-jwt 1.11.0
more-itertools          8.2.0
packaging               20.1
pip                     20.0.2
pluggy                  0.13.1
py                      1.8.1
PyJWT                   1.7.1
pyparsing               2.4.6
pytest                  5.3.5
pytest-cov              2.8.1
pytz                    2019.3
setuptools              45.1.0
six                     1.14.0
sqlparse                0.3.0
wcwidth                 0.1.8
wheel                   0.34.2
이제 settings.py 부분에서 INSTALLED_APP에 rest와 관련된 모듈들을 추가해주어야 된다.
INSTALLED_APPS = [
    'django.contrib.admin',
    'django.contrib.auth',
    'django.contrib.contenttypes',
    'django.contrib.sessions',
    'django.contrib.messages',
    'django.contrib.staticfiles',
    'rest_framework',
    'rest_framework.authtoken',
    'rest_auth',
    'user',
]
지금부터는 아래의 블로그의 내용을 보면서 공부를 진행하였다.
이번에는 user app아래에 api/serializers.py를 생성한다.
from rest_framework import serializers
from ..models import Account


class AccountSerializer(serializers.ModelSerializer):
    class Meta:
        model = Account
        fields = '__all__'
        extra_kwargs = {"password": {"write_only": True}}
다음과 같이 ModelSerializer로 AccountSerializer를 생성한다. password같은 경우 숨겨야 하는 값이기 때문에 extra_kwargs로 write_only로 설정해준다.
from django.http import HttpResponse
from django.shortcuts import render
from .models import *
from rest_framework import viewsets
from .api.serializers import AccountSerializer

class AccountViewSet(viewsets.ModelViewSet):
    queryset = Account.objects.all()
    serializer_class = AccountSerializer
views.py 부분에 다음과 같이 AccountViewSet을 추가해준다.
from django.conf.urls import url
from django.urls import path, include
from rest_framework import routers
from . import views

router = routers.DefaultRouter()
router.register('account', views.AccountViewSet)

urlpatterns = [
    path('user/', views.getuser, name='getuser'),
    path('signup/', views.signup, name='signup'),
    path('', include(router.urls))
]
그리고 urls.py 부분에 router를 설정해줌으로써 /user/account로 라우팅을 해주게 된다.
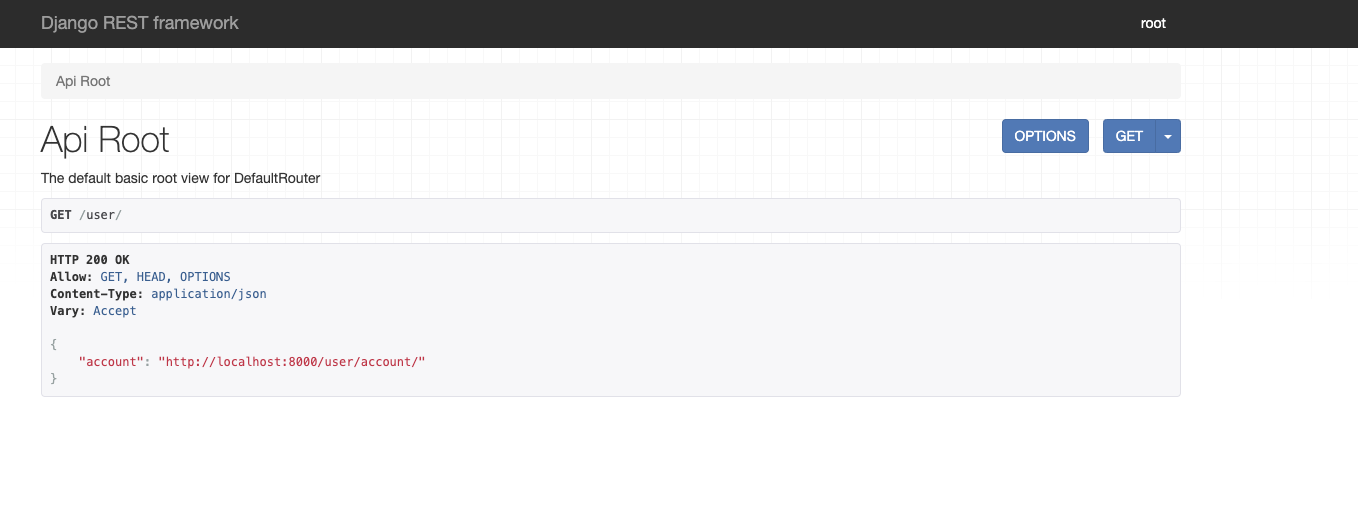
이 시점에서 localhost:8000/user/로 접속을 하면 위와 같은 창을 확인할 수가 있다.
여기서 조금 더하여 id를 검사하여 해당 아이디 값을 찾아주는 query_param은 다음의 방식으로 추가할 수 있다.
class AccountViewSet(viewsets.ModelViewSet):
    queryset = Account.objects.all()
    serializer_class = AccountSerializer

    def get_queryset(self):
        qs = super().get_queryset()

        search = self.request.query_params.get('id', '')
        if search:
            qs = qs.filter(id=search)
        return qs
위와 같이 작성하면 localhost:8000/user/account/?id=wizley와 같이 찾아보면 그에 따른 결과값을 가져올 수 있다.
ID / email 중복 검사
이제 이 부분을 아주 긴 삽질의 시간을 지나 다음과 같이 만들었다. rest api를 활용하여 /user/api/check/username or email 의 형식으로 값을 조회하여 사용가능한 경우에 사용됨을 사용불가능한 경우에는 불가능함을 알려주는 코드를 작성하였다. 이 과정에서 id를 username으로 변경하여 migration을 진행하였다.
urls.py는 다음과 같이 수정하였다.
urlpatterns = [
    path('signup/', views.signup, name='signup'),
    path('api/', views.AccountList.as_view()),
    path('api/check/username/<str:username>/', views.is_username_exist.as_view()),
    path('api/check/email/<str:email>/', views.is_email_exist.as_view())
]
그 뒤 serializer 부분에 검증코드를 추가하였다.
class AccountSerializer(serializers.ModelSerializer):
    email = serializers.EmailField()

    class Meta:
        model = Account
        fields = '__all__'
        extra_kwargs = {"password": {"write_only": True}}

    def validate_username(self, value):
        if Account.objects.filter(username=value).exists():
            raise serializers.ValidationError("이미 사용중인 아이디입니다.")
        return "사용가능한 아이디입니다."

    def validate_email(self, value):
        if Account.objects.filter(email=value).exists():
            raise serializers.ValidationError("해당 이메일은 이미 사용중입니다.")
        return "사용가능한 이메일입니다."

    def validate_password(self, value):
        if len(value) < 8:
            raise serializers.ValidationError("패스워드는 최소 %s자 이상이어야 합니다." % 8)
        return value
처리를 위한 코드를 views.py에 추가하였다.
"""
id 중복 검사
/user/api/check/id/<str:id>/
"""
class is_username_exist(APIView):
    def get_object(self, username):
        try:
            return Account.objects.get(username=username)
        except Account.DoesNotExist:
            return "OK"

    def get(self, request, username):
        ac = self.get_object(username)
        if ac == "OK":
            return Response("사용가능한 아이디입니다.")
        return AccountSerializer(ac).validate_username(username)

"""
email 중복 검사
/user/api/check/username/<str:username>/
"""
class is_email_exist(APIView):
    def get_object(self, email):
        try:
            return Account.objects.get(email=email)
        except Account.DoesNotExist:
            return "OK"

    def get(self, request, email):
        ac = self.get_object(email)
        if ac == "OK":
            return Response("사용가능한 이메일입니다.")
        return AccountSerializer(ac).validate_email(email)
그리고 해당 부분을 handle하는 확인 코드를 XMLHttpRequest를 활용하여 작성하였다.
  function checkUsername(){
    id = document.getElementById('username').value;
    if(id.length<1){
      alert('아이디를 입력하세요.');
    }
    else{
      xhr = new XMLHttpRequest();
      link = 'http://localhost:8000/user/api/check/username/' + id;
      xhr.open('GET', link, false);
      xhr.send();
      var content = xhr.responseText;
      alert(content);
    }
  }

  function checkEmail(){
    email = document.getElementById('email').value;
    var regExp = /^[0-9a-zA-Z]([-_.]?[0-9a-zA-Z])*@[0-9a-zA-Z]([-_.]?[0-9a-zA-Z])*.[a-zA-Z]{2,3}$/i;
      if (regExp.test(email)){
      xhr = new XMLHttpRequest();
      link = 'http://localhost:8000/user/api/check/email/' + email;
      xhr.open('GET', link, false);
      xhr.send();
      var content = xhr.responseText;
      alert(content);
    }
    else{
      alert('잘못된 이메일 형식입니다');
    };
  }
여기까지 작성이 끝나면 아이디 및 이메일 중복검사 기능이 수행된다. 하지만 형식이 마음에 들지 않아서 약간의 수정을 하도록 하겠다.
먼저 api라는 앱을 추가하여 해당 url과 처리를 관리하는 부분을 user로부터 분리하였다. 그 후 api로 시작하는 경로에 다음과 같이 url pattern을 추가하였다.(정확히 말하면 user -> api로 수정하면서 이전하였다.)
urlpatterns = [
    path('accounts/', views.AccountList.as_view()),
    path('accounts/verify/', views.verifyExistence.as_view()),
    path('accounts/verify/<str:username>/', views.verifyExistence.as_view()),
]
verify는 세분화적으로 2개로 나뉘는데 verify그 자체는 GET 메소드를 받아서 id의 중복검사를 수행하는 루틴을 수행할 것이고 POST로 데이터를 받으면 email의 중복검사를 처리하도록 수정하였다. 그에 따라 serializer는 다음과 같다.
from rest_framework import serializers
from user.models import Account


class AccountSerializer(serializers.ModelSerializer):
    email = serializers.EmailField()

    class Meta:
        model = Account
        fields = '__all__'
        extra_kwargs = {"password": {"write_only": True}}

    def validate_username(self, value):
        if Account.objects.filter(username=value).exists():
            return False
        else:
            return True

    def validate_email(selfself, value):
        if Account.objects.filter(email=value).exists():
            return False
        else:
            return True
각각에 대해서 존재하는지에 대한 여부를 검사하는 코드를 시리얼라이저 내부에 넣어두었다. 해당 기능들은 form 데이터를 검증하여 유저를 생성하는 과정에서도 사용되기 때문에 해당 위치에 분리해두었다.
from django.utils import timezone
import datetime
from user.forms import AccountForm
from django.http import HttpResponse, Http404
from django.shortcuts import render
from rest_framework.response import Response
from rest_framework.views import APIView
from .serializers import AccountSerializer
from user.models import Account

class AccountList(APIView):
    def get(self, request):
        queryset = Account.objects.all()
        serializer = AccountSerializer(queryset, many=True)
        return Response(serializer.data)

    def post(self, request):
        email = request.data['email']
        print('DEBUG email : ', email)

"""
id 중복 검사 :
GET /api/account/verify/<str:id>/

email 중복 검사 :
POST /api/account/verify/
"""
class verifyExistence(APIView):
    def getObject_with_username(self, username):
        try:
            return Account.objects.get(username=username)
        except Account.DoesNotExist:
            return "OK"

    def getObject_with_email(self, email):
        try:
            return Account.objects.get(email=email)
        except Account.DoesNotExist:
            return "OK"

    def get(self, request, username):
        ac = self.getObject_with_username(username)
        if ac == "OK":
            return Response("사용가능한 아이디입니다.")
        else:
            if AccountSerializer(ac).validate_username(username):
                return Response("사용가능한 아이디입니다.")
            else:
                return Http404


    def post(self, request):
        email = request.data['email']
        ac = self.getObject_with_email(email)
        if ac == "OK":
            return Response("사용가능한 이메일입니다.")
        if AccountSerializer(ac).validate_email(email):
            return Response("사용가능한 이메입니다.")
        else:
            return Http404
views.py의 경우 verifyExistence라는 클래스가 궁극적으로 id/email의 중복검사를 수행해주는데 get과 post가 각각 id와 email에 대한 정보를 넘겨받는다. 그리고 시리얼라이저 내부의 검증코드루틴의 결과에 따라 리턴을 수행한다.
POST의 경우 csrf_token에 대한 정보가 없으면 forbidden이 발생하기 때문에 해당 부분에 대한 처리가 필요했다.
function checkEmail(){
  email = document.getElementById('email').value;
  var csrf_token = $('[name=csrfmiddlewaretoken]').val();
    if (regExp.test(email)){
      $.ajax({
          type: 'POST',
          url: 'http://localhost:8000/api/accounts/verify/',
          data : {
              email: email,
              csrfmiddlewaretoken: csrf_token,
          },
          error: function(xhr, status, error){
              alert("이미 사용중인 이메일입니다.")
            return false;
          },
          success: function(xhr){
            alert("사용가능한 이메일입니다.");
            return true;
          },
      });
  }
  else{
    alert('잘못된 이메일 형식입니다');
  };
}
이를 위해서 ajax를 통해 POST 데이터를 전송할 때 csrf_token에 대한 값을 같이 날려주어야 된다. email과 csrfmiddlewaretoken을 같이 전송을 해주게 되면 그 결과가 error인지 success인지에 따라 분기를 다르게 탐으로써 조건문의 수행이 된다.
마지막으로 javascript코드를 static/js/signup.js로 분리하는 것으로 id/email 검증에 대한 구현이 마무리되었다.
회원가입 구현
회원가입의 경우에도 REST로 처리해야되는데 내가 그리는 로직상 이동하는 페이지와 API 서버는 다르기 때문에 ajax로 POST를 쏘는 방식으로 구현을 진행하였다.
function lastCheck(){
  id = document.getElementById('username').value;
  if(id.length<1){
    alert('아이디를 다시 확인해주세요.');
    return false;
  }

  if(document.getElementById('password').value != document.getElementById('password2').value){
    alert('패스워드를 다시 확인해주세요.');
    return false;
  }

  if(document.getElementById('password').value.length < 8){
    alert('패스워드 최소길이는 8글자입니다.');
    return false;
  }

  email = document.getElementById('email').value;
  if(!(regExp.test(email))){
    alert('이메일을 다시 확인해주세요.');
    return false;
  }

  if(!checkRecap()){
    return false;
  }

    function tryRes(){
      var queryString = $("form[name=registerForm]").serialize();

        $.ajax({
            type: 'POST',
            url: 'http://localhost:8000/api/accounts/',
            data : queryString,
            dataType : 'json',
            async: false,
            error: function(xhr, status, error){
                alert('정보를 다시 확인해주세요.');
                grecaptcha.reset();
                flag = false;
            },
            success: function(xhr){
                alert('회원가입 신청이 완료되었습니다.');
                flag = true;
            },
        });

        return flag;
       }

       var res = tryRes();
       return res;
}
폼이 전송되는 obSubmit 시점에서 해당 함수가 호출이되는데 javascript단에서 한번 form 데이터를 검증한다. 그 후 tryRes라는 함수가 REST api로 POST를 쏘게 되는데 그 값의 여부에 따라서 flag값이 설정이 된다. 처음에는 함수로 진행하여 res로 값을 빼지 않았을 경우에 ajax의 response가 돌아오기 까지의 시간이 느리기 때문에 아래의 flow가 실행되는 문제가 있어서 res에 남아두고 해당 값을 return 하는 방식을 사용하였다.
해당 REST를 컨트롤 하기 위해서 urls.py는 다음과 같이 추가되었다.
urlpatterns = [
    path('accounts/', views.AccountList.as_view()),
    path('accounts/verify/', views.verifyExistence.as_view()),
    path('accounts/verify/<str:username>/', views.verifyExistence.as_view()),
]
AccountList라는 Class는 유저의 계정을 생성/조회/삭제/최신화하는 역할을 위해서 개설되었고 지금은 post에 대한 값만 처리를 진행한다.
class AccountList(APIView):
    def get(self, request):
        return Response('HelloWorld')

    def post(self, request):
        form_data = AccountForm(request.data)

        if not checkRecaptcha(request.data['g-recaptcha-response']):
            return Response("fail.", status=HTTP_400_BAD_REQUEST)

        if form_data.is_valid():
            cl = verifyExistence();
            ac = verifyExistence.getObject_with_username(cl, form_data.cleaned_data['username'])
            if not AccountSerializer(ac).validate_username(form_data.cleaned_data['username']):
                return Response('fail.', status=HTTP_400_BAD_REQUEST)

            ac = verifyExistence.getObject_with_email(cl, form_data.cleaned_data['email'])
            if not AccountSerializer(ac).validate_email(form_data.cleaned_data['email']):
                return Response('fail.', status=HTTP_400_BAD_REQUEST)

            new_account = form_data.save(commit=False)
            new_account.set_password(form_data.cleaned_data['password'])
            new_account.save()
            return Response('success.', status=HTTP_201_CREATED)

        else:
            return Response('fail.', status=HTTP_400_BAD_REQUEST)
리턴값은 2가지로 나뉜다. 실패했을 경우 400_BAD_REQUEST를 리턴하고 성공할 경우에만 201_CREATED를 리턴해준다. 그리고 그 과정에서 form_data와 비교하여 값이 제대로 POST 데이터로 들어왔는지 검증을 해준 뒤, id/email 검증을 수행한다. 그 후 new_account로 form_data를 넘겨준뒤 save를 진행한다. 이 과정에서 평문으로 저장되는 password를 해쉬화 하기 위해서 set_password 패스워드를 사용하고 싶었기에 user/models.py를 다음과 같이 변경하였다.
from django.db import models
from django import forms
from django.contrib.auth.models import AbstractBaseUser

class Account(AbstractBaseUser):
    account_no = models.AutoField(primary_key=True)

    name = models.CharField(max_length=20, verbose_name='이름', default='Chihiro')
    birth = models.DateField(null=True)
    area = models.CharField(max_length=10, verbose_name='지역', default='Seoul')
    sex_selection = (
        ('M', '남성'),
        ('W', '여성'),
    )
    sex = models.CharField(max_length=1, choices=sex_selection, default='W')

    username = models.CharField(max_length=10, verbose_name='아이디')
    password = models.CharField(max_length=16, verbose_name='패스워드')
    email = models.EmailField(max_length=32, verbose_name='이메일')
    created_date = models.DateTimeField(auto_now_add=True, verbose_name="가입날짜")
    comment = models.CharField(max_length=20, verbose_name="코멘트", blank=True)
    profile = models.ImageField(upload_to="user_profile/profile_picture", blank=True)

    account_status_selection = (
        ('O', '정상'),
        ('X', '삭제'),
        ('B', '정지'),
        ('W', '검증'),
    )
    status = models.CharField(max_length=1, choices=account_status_selection, default="W")

    USERNAME_FIELD = 'username'

    def __str__(self):
        return self.username
AbstractBaseUser를 상속받는 방식으로 set_password와 같이 기본 메소드를 상속받는게 가능하다. 그리고 이 경우에 USERNAME_FIELD를 명시를 해줘야 한다.
위와 같이 구현을 하면 회원가입에 대한 처리가 /api/account URL을 통해 POST로 처리가 된다.
이메일 인증 구현
이메일 인증의 경우 아래의 사이트에 기본적인 사용방법이 적혀있다.
settings.py에 EMAIL 전송과 관련된 값들을 적어준다. 물론 중요한 아이디/패스워드 정보는 secrets.json 파일에 빼놓고 가져오는 방식을 사용한다.
# Google SMTP
EMAIL_BACKEND = 'django.core.mail.backends.smtp.EmailBackend'
EMAIL_HOST = 'smtp.gmail.com'
EMAIL_HOST_USER = get_secretKey("EMAIL_HOST_USER")
EMAIL_HOST_PASSWORD = get_secretKey("EMAIL_HOST_PASSWORD")
EMAIL_PORT = 587
EMAIL_USE_TLS = True
DEFAULT_FROM_EMAIL = EMAIL_HOST_USER
토큰을 만드는 과정에 대한 코드는 api/views.py의 아이디 정보를 만든 뒤 생성한다.
            new_account = form_data.save(commit=False)
            new_account.set_password(form_data.cleaned_data['password'])
            new_account.save()

            user = Account.objects.get(username=form_data.cleaned_data['username'])
            message = render_to_string('activate.html', {
                'domain': 'localhost:8000',
                'user': user,
                'uid': urlsafe_base64_encode(force_bytes(user.pk)),
                'token': account_activation_token.make_token(user)
            })

            mail_subject = 'eaten-Away 이메일 인증'
            to_email = form_data.cleaned_data['email']
            email = EmailMessage(mail_subject, message, to=[to_email])
            email.send()
여기서 new_account로 인하여 새로운 Account 정보가 DB에 저장이 되고 난 뒤 user로 해당 계정에 대한 정보를 가져와 message를 만들어 activate.html에 파싱해준다. 이 과정에서 account_activation_token.make_token에 의하여 토큰에 대한 정보가 메일에 남게된다.
from django.contrib.auth.tokens import PasswordResetTokenGenerator
import six


class AccountActivationTokenGenerator(PasswordResetTokenGenerator):
    def _make_hash_value(self, user, timestamp):
        return (
                six.text_type(user.pk) + six.text_type(timestamp) + six.text_type(user.active)
        )

account_activation_token = AccountActivationTokenGenerator()
token의 경우 다음과 같이 Account의 pk정보와 timestamp 정보를 토대로 해쉬화 한다.
{% load static %}
{% load i18n %}
{% blocktrans %}
{{ user.username }} 님, 아래의 링크를 클릭하여 회원가입을 완료해주세요.
{% endblocktrans %}
http://{{ domain }}{% url 'activate' uidb64=uid token=token %}
template의 경우 email로 전송되는 값을 가지고 있는데 여기서 domain, url, uid, token의 값이 링크화 되게 된다. 그리고 이 값들은 윗 부분의 render_to_string 부분의 값을 통해 결정이 된다. 이를 통해 사용자가 회원가입을 신청하게 되면 hash된 link가 가입한 이메일 주소로 전송이 되게 된다.
wizley님, 아래의 링크를 클릭하여 회원가입을 완료해주세요.

http://localhost:8000/api/activate/NDk/5ek-d54078f9b30b418cacf4
그럼 위와 같이 링크가 형성이 되고 누르게 되면 사용자 계정이 활성화 상태가 된다. 이제 해당 부분을 처리하기 위한 url 등록이 필요하다.
path('activate/<str:uidb64>/<str:token>', views.EmailActivate.as_view(), name='activate')
class EmailActivate(APIView):
    permission_classes = (permissions.AllowAny, )

    def get(self, request, uidb64, token):
        try:
            uid = force_text(urlsafe_base64_decode(uidb64))
            user = Account.objects.get(pk=uid)
        except:
            user = None
        try:
            if user is not None and account_activation_token.check_token(user, token):
                user.status = 'O'
                user.active = True
                user.save()
                return render(request, 'emailverifysuccess.html', {'result':True})
            else:
                return render(request, 'emailverifysuccess.html', {'result':False})
        except:
            return render(request, 'emailverifysuccess.html', {'result':False})
이제 링크에 접속이 되면 get으로 들어오는 데이터에 대해 검증을 한뒤 result의 결과에 따라 emailverifysuccess.html을 렌더하게 된다. 그 과정에서 user.status와 user.active에 대한 값이 설정이 된다.
rest_framework의 편의성을 위한 User model 변경
로그인에서 토큰방식을 사용하기 위해 고민을 하던 와중에 rest_framework의 jwt 또는 auth_token이 눈에 들어왔다. 여러 앱에 대하여 모의해킹을 하는 과정에서 많이들 사용하는 것 같았기 때문이다. 하지만 구현을 하던 중 하나의 문제를 마주하였다. 해당 값들은 BASE USER 모델에 대해서 지원을 해주기 때문에 내가 임의로 만든 Account라는 커스텀 모델에 적용이 안되는 것이다. 결국 여러모로 고민을 해보다가 많은 개발자들이 User를 사용하기 때문에 나 또한 userModel을 변경하기로 마음먹었다.
from django.db import models
from django import forms
from django.contrib.auth.models import AbstractBaseUser, BaseUserManager


class AccountManager(BaseUserManager):
    def create_user(self, username, password=None):
        if not username:
            raise ValueError('Account must have an username')
        user = self.model(
            username = username,
        )

        user.set_password(password)
        user.save(using=self._db)
        return user

    def create_superuser(self, username, password):
        user = self.create_user(
            username,
            password=password,
        )
        user.is_admin = True
        user.save(using=self._db)
        return user


class Account(AbstractBaseUser):
    account_no = models.AutoField(primary_key=True)

    name = models.CharField(max_length=20, verbose_name='이름', default='Chihiro')
    birth = models.DateField(null=True, verbose_name='생일')
    area = models.CharField(max_length=10, verbose_name='지역', default='Seoul')
    sex_selection = (
        ('M', '남성'),
        ('W', '여성'),
    )
    sex = models.CharField(max_length=1, verbose_name='성별', choices=sex_selection, default='W')

    username = models.CharField(max_length=10, verbose_name='아이디', unique=True)
    password = models.CharField(max_length=100, verbose_name='패스워드')
    email = models.EmailField(max_length=32, verbose_name='이메일')
    created_date = models.DateTimeField(auto_now_add=True, verbose_name="가입날짜")
    comment = models.CharField(max_length=20, verbose_name='코멘트', blank=True)
    profile = models.ImageField(upload_to="user_profile/profile_picture", verbose_name='프로필', blank=True)

    account_status_selection = (
        ('O', '정상'),
        ('X', '삭제'),
        ('B', '정지'),
        ('W', '검증'),
    )
    status = models.CharField(max_length=1, verbose_name='계정 상태', choices=account_status_selection, default="W")
    active = models.BooleanField(default=False, verbose_name="이메일 인증여부")

    is_active = models.BooleanField(default=True)
    is_admin = models.BooleanField(default=False)

    objects = AccountManager()

    USERNAME_FIELD = 'username'

    def __str__(self):
        return self.username

    def has_perm(self, perm, obj=None):
        return True

    def has_module_perms(self, app_label):
        return True

    @property
    def is_staff(self):
        return self.is_admin
기존의 방식에서 username에 unique옵션을 추가해주었고, AccountManager를 추가하였다. 해당 클래스는 helper와 같은 역할을 한다. 그 뒤 settings.py에 USER_MODEL에 대한 정보를 추가하였다.
# USER MODEL
AUTH_USER_MODEL = 'user.Account'
그 뒤 migrations을 하려고 하는데 제대로 적용이 되지 않았다. 그래서 sqlite를 삭제하였음에도 불구하고 superuser가 이미 존재하기 때문에 작동을 제대로 하지 않는 문제가 발생하였다. 그 경우 아래의 명령어를 통해 해결이 가능하였다.
python manage.py migrate --run-syncdb
이와 같이 지정을 하고 나면 Account라는 custom model이 장고의 User Model로 설정이 완료된다.
jwt를 활용하여 로그인 구현
Account를 User.model로 설정을 했으니 로그인 부분에 jwt 프레임워크를 사용하였다.
from rest_framework_jwt.views import obtain_jwt_token, refresh_jwt_token, verify_jwt_token, ObtainJSONWebToken

    path('token/', obtain_jwt_token),
    path('token/verify/', verify_jwt_token),
    path('token/refresh/', refresh_jwt_token),
먼저 api의 urls.py에 다음의 3가지 경로를 추가한다.
user/views.py 부분에서 로그인을 처리하는 함수는 다음과 같다.
def login(request):
    if(request.method == 'POST'):
        username = request.POST['username']
        password = request.POST['password']
        recaptcha = request.POST['g-recaptcha-response']

        url = "http://localhost:8000/api/accounts/login/"
        r = requests.post(url, data={'username': username, 'password': password, 'g-recaptcha-response': recaptcha})

        if not r.json()['token']:
            return render(request, 'login.html', {})
        else:
            token = r.json()['token']
            response = HttpResponseRedirect('/user/main/')
            response.set_cookie('token', token)
            return response
    else:
        if(request.COOKIES.get('token')):
            if checkTokenVerification(request):
                response = HttpResponseRedirect('/user/main')
                return response
            else:
                response = HttpResponseRedirect('/user/login')
                response.delete_cookie('token')
                return response
        return render(request, 'login.html', {})
POST의 형태로 값이 들어올 경우에 /api/accounts/login으로 post요청을 보내게 된다. 그리고 그 결과값으로 token이 돌아올 경우에 token을 cookie에 추가하여 main페이지로 이동하게 된다. 만약 POST가 아닌 형식으로 login 페이지에 들어오게 된 경우 token이 cookie에 존재하는 경우에는 token에 대한 값을 검증한다. 만약 토큰이 정상적인 값이라면 main으로 바로 리다이렉트를 하고 그게 아닌 경우에 token 쿠키를 삭제한 뒤 login 폼을 띄워준다.
"""
post : login
delete : logout
"""
class AccountAuthentication(APIView):
    authentication_classes = (BasicAuthentication, )
    permission_classes = (AllowAny, )

    def authenticateAccount(self, username, password):
        try:
            AccountInfo = Account.objects.get(username=username)

            if check_password(password, AccountInfo.password):
                if AccountInfo.status == 'O':
                    return True
                else:
                    return False
            else:
                return False
        except:
            return False

    def post(self, request):
        if not checkRecaptcha(request.data['g-recaptcha-response']):
            return Response("fail.", status=HTTP_400_BAD_REQUEST)

        username = request.data['username']
        password = request.data['password']

        if self.authenticateAccount(username=username, password=password):
            url = "http://localhost:8000/api/token/"
            r = requests.post(url, data={'username': username, 'password': password})
            if not r.json()['token']:
                return Response('fail', status=HTTP_400_BAD_REQUEST)
            else:
                token = r.json()['token']
                return Response({'token': token}, status=HTTP_200_OK)
        else:
            return Response('fail.', status=HTTP_400_BAD_REQUEST)

        return Response('failed', status=HTTP_400_BAD_REQUEST)
api/views.py 부분에서 login을 처리할 때 불리는 루틴은 AccountAuthentication 내부의 post이다. recaptcha를 먼저 검증한 뒤 username, password를 기반으로 사용자 정보와 일치하는지 검사한다. 그 뒤 Account의 정보중에 status가 활성화 상태인 경우에 token을 발급해주는 /api/token으로 발급을 요청한다. 만약 성공적으로 발급된 경우에 token을 return 해주고 그게 아닌경우 400_BAD_REQUEST를 띄우게 된다.
food app 개발
이제 음식과 관련된 서비스부분의 개발을 하기 위해서 food라는 이름으로 app을 새로 생성하였다.
root@b099b068dc26:/code/eatenAway# django-admin startapp food
이제 settings.py에 해당 app을 추가한다.
INSTALLED_APPS = [
    ...
    'user',
    'food',
    'api',
]
csv 파일로 bulk_create하여 음식정보 한번에 추가하기
먼저 음식에 대한 DB를 생성할 것인데 그 이름을 Food라고 하겠다. 그리고 필드는 다음과 같이 설정하였다.
from django.db import models


class Food(models.Model):
    menuname = models.CharField(verbose_name='메뉴이름', max_length=30, unique=True)
    category = models.CharField(verbose_name='카테고리', max_length=30,)
    country = models.CharField(verbose_name='나라', max_length=30,)
    ingredient = models.CharField(verbose_name='재료', max_length=30, null=True)
    taste = models.CharField(verbose_name='맛', max_length=30,)
    stock = models.BooleanField(verbose_name='국물여부', default=False)
    description = models.CharField(verbose_name='설명', max_length=50)
    profile = models.ImageField(upload_to="food_profile/profile_picture", verbose_name='음식사진', blank=True)

    is_active = models.BooleanField(verbose_name='활성화 여부', default=True)

    def __str__(self):
        return self.menuname
model에 대해서 설명을 하자면 category는 크게 밥/패스트푸드/면으로 나누었고 ingredient는 고기/해물/야채로 구분하였다. taste의 경우 단맛 ~ 보통 ~ 매운맛인데 주관적인 기준으로 1-3 ~ 4 ~ 5-7로 나누었다. description의 경우 해당 Food에 대한 탭을 표시하기 위한 설명이고 profile은 음식에 대한 사진정보가 들어간다.
이제 excel 파일을 활용하여 menuname, category, country, ingredient, taste, stock에 대한 정보를 csv파일의 형식으로 만들었다. 이제 해당 파일을 읽고 Food Model에 추가하는 코드를 작성한다.
(CSV파일을 읽어서 django 모델을 bulk_create하기)[https://junebuug.github.io/2018-02-19/make-bulk-update-from-csv-django]
import os
import django
import csv
os.environ.setdefault('DJANGO_SETTINGS_MODULE', 'eatenAway.settings')

django.setup()

from food.models import Food

f = open('FoodList.csv', 'r', encoding='utf-8')
info = []

rdr = csv.reader(f)

for row in rdr:
    menuname, category, country, ingredient, taste, stock, description, tmp = row
    if stock == 'TRUE':
        stock = True
    else:
        stock = False
    tuple = (menuname, category, country, ingredient, taste, stock, description)
    info.append(tuple)

f.close()

instances = []
for (menuname, category, country, ingredient, taste, stock, description) in info:
    instances.append(Food(menuname=menuname, category=category, country=country, ingredient=ingredient, taste=taste, stock=stock))

Food.objects.bulk_create(instances)
이제 해당 코드를 실행시키면 정상적으로 Food에 추가되는 것을 확인할 수 있다.
root@b099b068dc26:/code/eatenAway# python bulk.py
['menuname', 'category', 'country', 'ingredient', 'taste', 'stock', 'description', '']
['간장 치킨', '패스트푸드', '한국', '고기', '1', 'FALSE', '', '']
['양념 치킨', '패스트푸드', '한국', '고기', '3', 'FALSE', '', '']
['그라탕', '패스트푸드', '이탈리아', '야채', '4', 'FALSE', '', '']
['피자', '패스트푸드', '이탈리아', '야채', '4', 'FALSE', '', '']
['피시앤칩스', '패스트푸드', '영국', '해물', '4', 'FALSE', '', '']
['반미', '패스트푸드', '베트남', '고기', '3', 'FALSE', '', '']
['버거킹', '패스트푸드', '미국', '고기', '2', 'FALSE', '', '']
['서브웨이', '패스트푸드', '미국', '고기', '4', 'FALSE', '', '']
['수제버거', '패스트푸드', '미국', '고기', '2', 'FALSE', '', '']
['시카고피자', '패스트푸드', '미국', '고기', '4', 'FALSE', '', '']
['치즈버거', '패스트푸드', '미국', '고기', '3', 'FALSE', '', '']
['핫도그', '패스트푸드', '미국', '고기', '2', 'FALSE', '', '']
['햄버거', '패스트푸드', '미국', '고기', '2', 'FALSE', '', '']
['후라이드 치킨', '패스트푸드', '미국', '고기', '4', 'FALSE', '', '']
['갈비찜', '밥', '한국', '고기', '1', 'FALSE', '', '']
['갈치조림', '밥', '한국', '해물', '1', 'FALSE', '', '']
['감자탕', '밥', '한국', '고기', '3', 'TRUE', '', '']
['경양식 돈가스', '밥', '한국', '고기', '2', 'FALSE', '', '']
['고등어 구이', '밥', '한국', '해물', '3', 'FALSE', '', '']
['곱창', '밥', '한국', '고기', '5', 'FALSE', '', '']
['김밥', '밥', '한국', '야채', '4', 'FALSE', '', '']
['김치볶음밥', '밥', '한국', '고기', '3', 'FALSE', '', '']
['김치찌개', '밥', '한국', '야채', '5', 'TRUE', '', '']
['낙지볶음', '밥', '한국', '해물', '6', 'FALSE', '', '']
['단팥죽', '밥', '한국', '야채', '1', 'TRUE', '', '']
['닭발', '밥', '한국', '고기', '7', 'FALSE', '', '']
['닭볶음탕', '밥', '한국', '고기', '5', 'TRUE', '', '']
['닭불고기덮밥', '밥', '한국', '고기', '5', 'FALSE', '', '']
menu에 대한 정보 뿌려주는 페이지 작성하기
이전과 비슷한 형식이다. REST로 음식에 대한 정보를 가져와 response로 돌려주고 그에 대한 결과를 기준으로 template에 뿌려주면 된다.
    path('food/', views.FoodList.as_view()),
    path('food/<str:foodname>', views.FoodList.as_view()),
api의 url로는 2개를 추가했는데 위는 post, 밑은 get을 처리해준다. post의 경우 해당 메뉴의 이미지를 돌려주고 아래의 food/피자 형식의 url은 메뉴에 대한 여러 정보를 리턴해준다.
from django.urls import path, include
from . import views

urlpatterns = [
    path('test/',  views.testPage, name='test'),
    path('menu/<str:foodname>', views.testPage, name='menu'),
]
food의 url에 menu/foodname을 추가하였으니 이제 localhost:8000/food/menu/피자의 형식으로 접근을 하게되면 해당 메뉴에 대한 정보를 뿌려주게 된다. 그를 위해서 다음과 같이 코드를 작성하였다.
from django.shortcuts import render, redirect
import requests
from .models import Food


def testPage(request, foodname):
    url = "http://localhost:8000/api/food/"
    r = requests.get(url+foodname)
    if not r.status_code == 200:
        return redirect('/user/intro/')
    menu = r.json()

    r = requests.post(url, data={'foodname': menu['menuname']})
    if r.status_code == 200:
        img = r.raw.read()
        print(len(img))

    return render(request, 'foodmenu.html', {'menu':menu})
json 형식으로 menu를 받아와 그와 관련된 값들을 template에서 menu.taste와 같은 형식으로 뿌려준다. 그리고 그 뒤 post는 이미지 파일에 대한 정보를 가져오는 것은 확인하였지만 로직상 받아서 처리해주기가 어려웠기에 주석처리를 한 부분이다. 이렇게 받아온 정보를 토대로 template에 뿌려주면 해당 탭에 대한 구현이 끝나게 된다.
사용자 정보 그래프로 뿌려주기
오랜만에 다시 글을 이어 적는듯한 느낌인데 흠흠, 사용자가 먹은 음식에 대한 부분을 뿌려주기는 모습을 상상하였기 때문에 당연히 해당 부분에 대한 처리 부분을 만들어주어야 했다. 사용자에 그래프 정보는 크게 3가지로 나누어서 구현하였다.
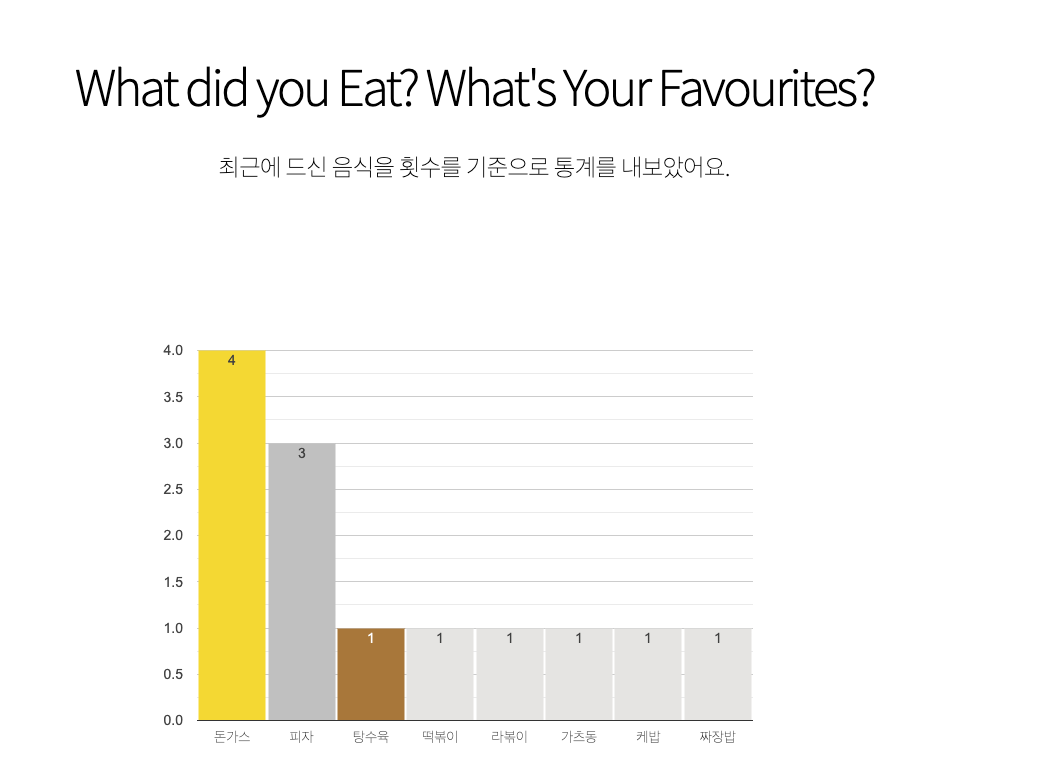
- 최근 9일간 먹은 음식의 횟수에 따른 통계
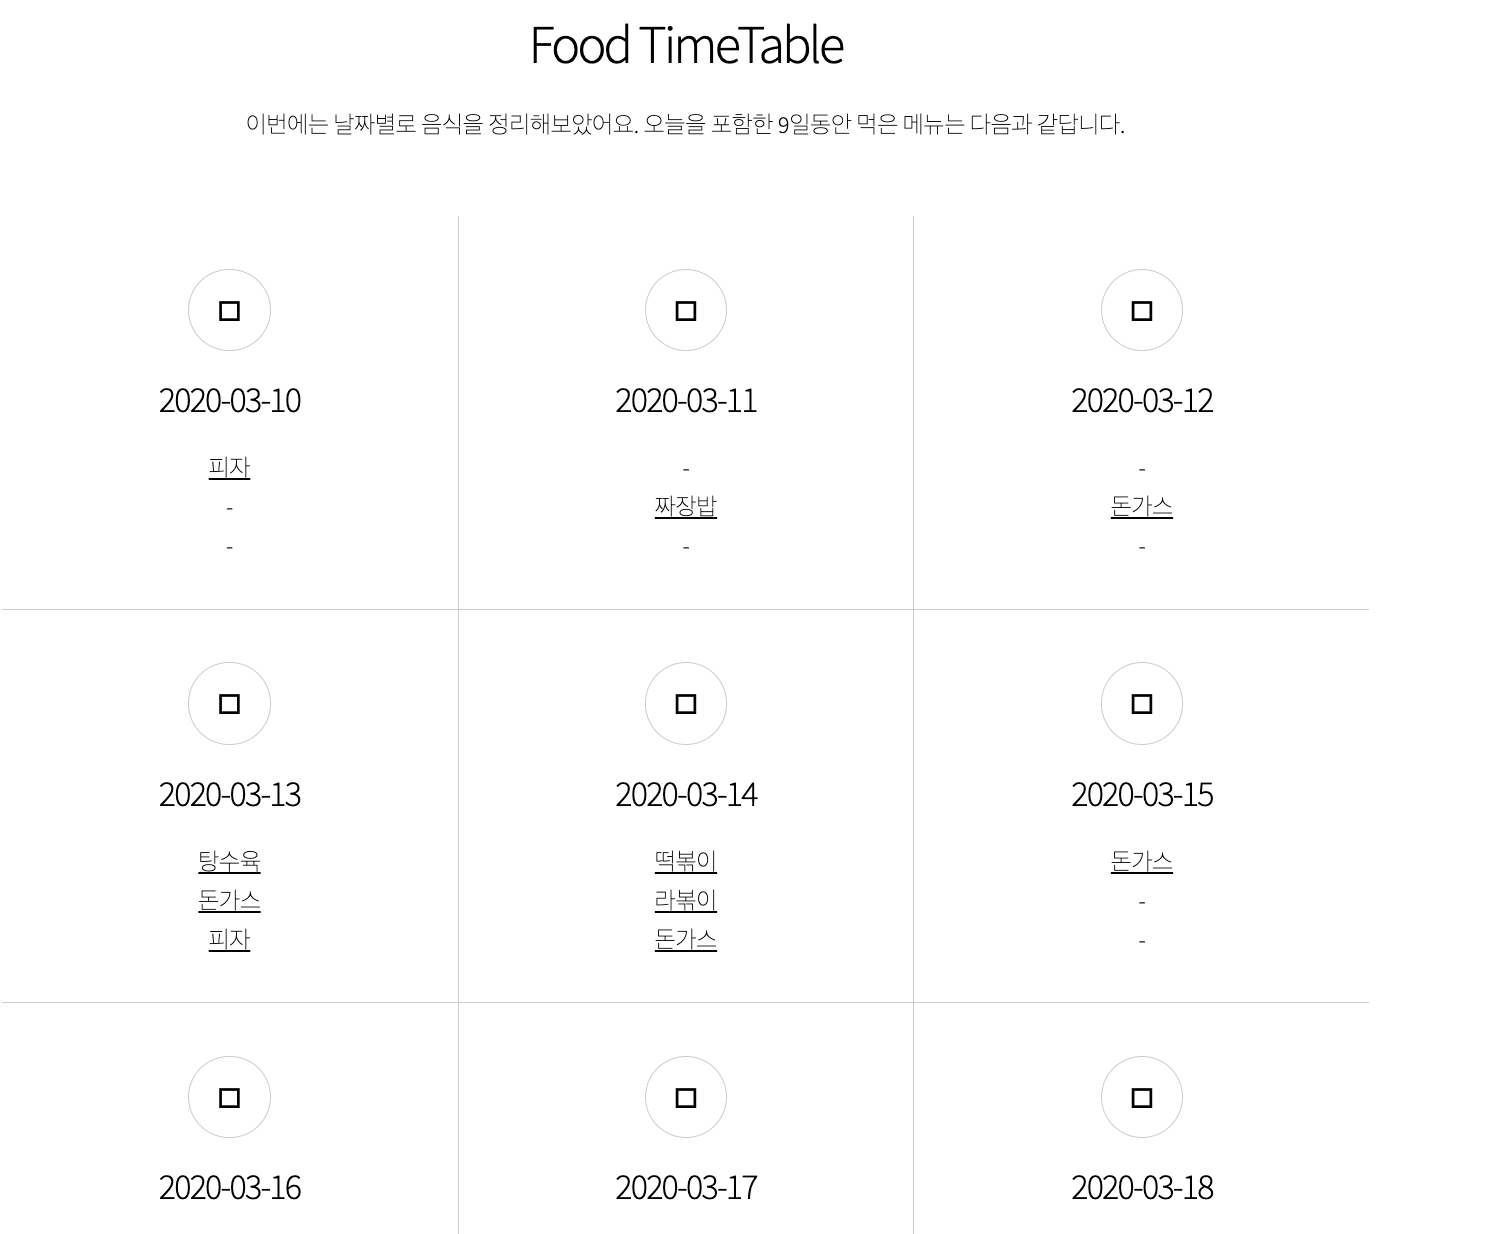
- 최근 9일간 먹은 음식의 종류를 날짜에 따라 아침/점심/저녁 통계
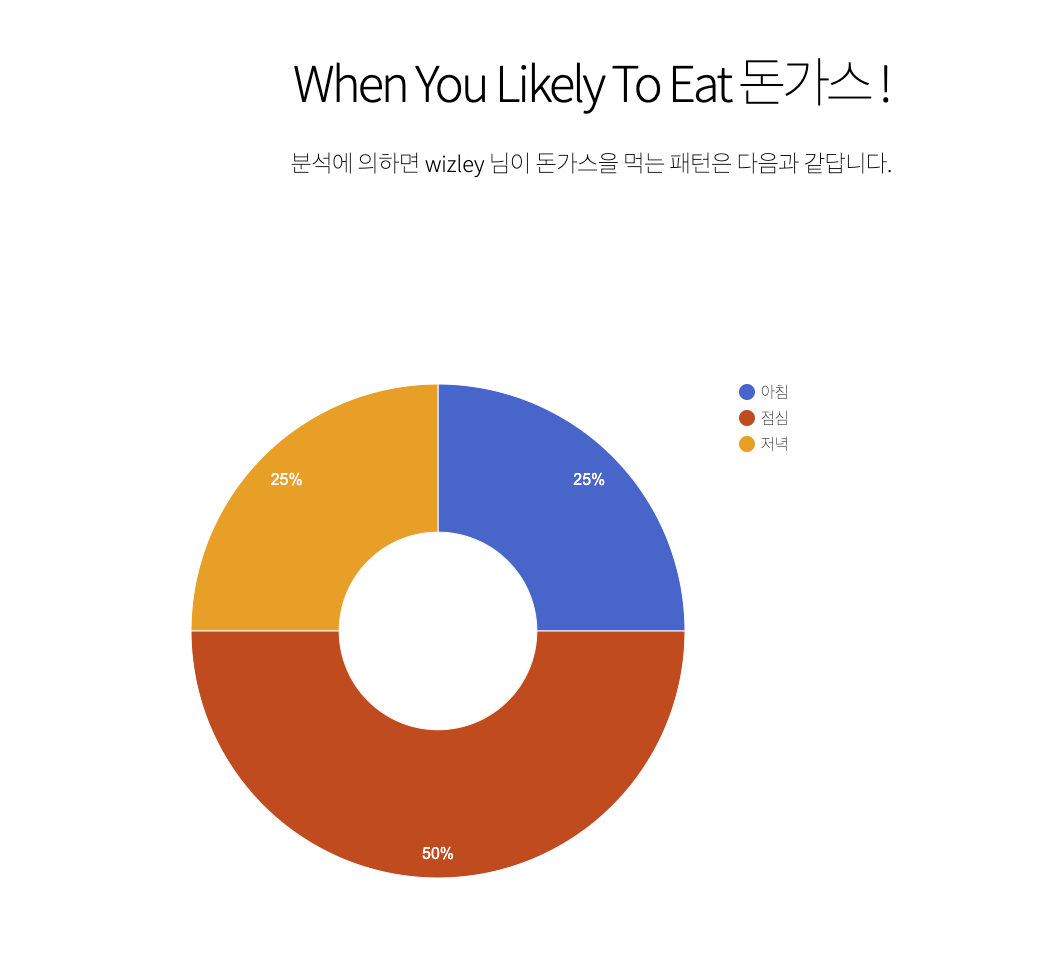
- 특정 음식을 아침/점심/저녁을 기준으로 비율에 대한 통계
그래프의 경우 직접 그릴 실력은 안되기 때문에 많은 고민을 했었는데 구글차트에서 땡겨와 쓸 수가 있었다. 그렇게 가져온 형식은 다음과 같다.
<script type="text/javascript" src="https://www.gstatic.com/charts/loader.js"></script>

<script type="text/javascript">
    google.charts.load("current", {packages:['corechart']});
    google.charts.setOnLoadCallback(drawChart);
    function drawChart() {
      var data = google.visualization.arrayToDataTable([
       ["Element", "먹은 횟수", { role: "style" } ],
        {% for key, value in foodcount.items %}
        {% if forloop.counter == 1 %}
        ["{{ key }}", {{ value }}, "gold"],
        {% elif forloop.counter == 2 %}
        ["{{ key }}", {{ value }}, "silver"],
        {% elif forloop.counter == 3 %}
        ["{{ key }}", {{ value }}, "color: #b87333"],
        {% else %}
        ["{{ key }}", {{ value }}, "color: #e5e4e2"],
        {% endif %}
        {% endfor %}
      ]);

      var view = new google.visualization.DataView(data);
      view.setColumns([0, 1,
                       { calc: "stringify",
                         sourceColumn: 1,
                         type: "string",
                         role: "annotation" },
                       2]);

      var options = {
        width: 900,
        height: 600,
        bar: {groupWidth: "95%"},
        legend: { position: "none" },
      };
      var chart = new google.visualization.ColumnChart(document.getElementById("columnchart_values"));
      chart.draw(view, options);
  }

  function goFood(){
    redirect_url = "http://localhost:8000/food/menu/" + document.getElementById('gowithfoodname').value;
    window.location.href = redirect_url;
  }
  </script>
위와 같이 javascript를 통해 그래프를 임의로 그리는 것이 가능하다. 위의 코드는 음식을 먹은 횟수에 따라 막대그래프에 그려주는 코드 부분이다.
해당 부분의 값을 채우기 위해서 api을 하나 생성하였는데 url은 다음과 같다.
path('food/user/<str:username>', views.UserDailyFoodList.as_view()),
세부 코드를 보면 get과 post로 값을 받는다. get은 위의 그래프와 Food TimeTable기능을 처리하기 위한 api이다.
class UserDailyFoodList(APIView):
    # FIXME : AUTHENTICATION, PERMISSION LEVEL TO TOKEN
    authentication_classes = (BasicAuthentication,)
    permission_classes = (AllowAny,)

    def get(self, request, username):
        if not username:
            return Response(HTTP_400_BAD_REQUEST)
        try:
            data = DailyUserFood.objects.filter(username=username, date__range=[datetime.date.today() - datetime.timedelta(days=9), datetime.date.today()])
            if not data.exists():
                return Response('no info', HTTP_400_BAD_REQUEST)
            else:
                res = dict()
                foodcount = dict()
                dateinfo = dict()
                for row in data:

                    if not row.food in foodcount:
                        foodcount[row.food] = 1
                    else:
                        foodcount[row.food] +=1

                    if not str(row.date) in dateinfo:
                        dateinfo[str(row.date)] = dict()
                        dateinfo[str(row.date)][row.mealkind] = row.food

                    else:
                        dateinfo[str(row.date)][row.mealkind] = row.food

                res['foodcount'] = foodcount
                res['dateinfo'] = sorted(dateinfo.items())
                json_res = json.dumps(res)
                return Response(json_res, HTTP_200_OK)
        except:
            return Response(HTTP_400_BAD_REQUEST)

    def post(self, request, username):
        if not username:
            return Response(HTTP_400_BAD_REQUEST)
        if not request.POST.get('foodname'):
            return Response(status=HTTP_400_BAD_REQUEST)
        try:
            data = DailyUserFood.objects.filter(username=username, food=request.data['foodname'])
            if not data.exists():
                return Response(HTTP_400_BAD_REQUEST)
            else:
                res = dict()
                for row in data:
                    if not row.mealkind in res:
                        res[row.mealkind] = 1
                    else:
                        res[row.mealkind] += 1
                    json_res = json.dumps(res)
                return Response(json_res, HTTP_200_OK)
        except:
            return Response(HTTP_400_BAD_REQUEST)
dictionary 형태는 대략적으로 나타내보면 아래와 같다.
{
  foodcount:{
    '돈가스': 4,
    '피자': 3,
    ...
  }
  dateinfo:{
    '2020-03-10' :{
        'B' : 돈가스
        'L' : 피자
        'D' :
    },
    '2020-03-11' :{
        'B' :
        'L' :
        'D' :
    }
  }
}
이렇게 가져온 값들을 view에서 처리한 뒤에 뿌려주면 된다. (url에서는 jwt_value내에 username을 넣어놨기 때문에 해당 정보를 토대로 요청을 하면 된다.)
url = "http://localhost:8000/api/food/user/"
r = requests.get(url+jwt_value['username'])
try:
    res = json.loads(r.json())
    return render(request, 'main.html', {'username':jwt_value['username'], 'foodcount':res['foodcount'], 'dateinfo':res['dateinfo'], 'choice':choice})
except:
    return render(request, 'main.html', {'username':jwt_value['username'], 'choice':choice})
dateinfo 부분을 토대로 가공하면 아래와 같이 TimeTable을 생성할 수 있다.
위의 UserDailyFoodList 클래스의 post 부분은 특정 메뉴에 대한 아침/점심/저녁에 먹은 비율에 대한 그래프를 표시하는데 사용된다.
def menuDetail(request, foodname):
    if (request.COOKIES.get('token')):
        if checkTokenVerification(request):
            jwt_value = jwt.decode(request.COOKIES.get('token'), JWT_AUTH['JWT_SECRET_KEY'])
            url = "http://localhost:8000/api/food/user/"
            r = requests.post(url+jwt_value['username'], data={'foodname': foodname})
            try:
                chart = json.loads(r.json())
            except:
                chart = {'nope':1}

            url = "http://localhost:8000/api/food/"
            r = requests.get(url + foodname)
            if not r.status_code == 200:
                return redirect('/user/main/')
            menu = r.json()

            url = "http://localhost:8000/food/user/"
            return render(request, 'foodmenu.html', {'username':jwt_value['username'], 'menu': menu, 'chart': chart})

    else:
        return redirect('/user/intro/')
menuDetail 부분이 음식에 대한 세부정보를 뿌려주는데 그 부분에서 post로 foodname을 보내주게 되면 횟수에 대한 결과를 res[row.mealkind] 인 B/L/D 로 추가된다. 해당 결과를 뿌려주기만 하면 된다.
이렇게 graph에 대한 부분을 구글차트를 활용하여 구현할 수 있었다.
사용자에게 맞는 음식 추천하기
사실 음식을 추천하는 기능은 중요한 기능인데 추천 알고리즘 및 AI에 대한 기초가 전혀 없기 때문에 random에 의존한 방식으로 구현을 하였다. 음식은 총 7가지를 추천하며 다음에 의거한다.
- 최근에 제일 많이 먹은 음식
- 최근에 먹은 음식들의 taste 평균에 해당되는 음식
- 최근에 먹은 음식들 중 가장 많이 소비한 재료로 이루어진 음식
- 최근에 먹은 음식들 중 가장 많이 소비한 근원지(나라)의 음식
- 최근에 먹은 음식들 중 가장 많이 소비한 카테고리의 음식
- 완전 랜덤
- 완전 랜덤
역시나 url을 추가해준다. 아참, 이 추천 코드의 경우 사용자에 대한 정보가 존재하지 않을 시 추천에 대한 결과를 가져오지 못한다. 또한 코드가 반복되고 효율적이지 않기 때문에 이런식으로 코드를 짜서 흉내냈구나 정도로만 생각해주면 좋겠다.
path('food/preference/<str:username>', views.UserFoodPreferenceList.as_view()),
처리하는 부분에 대한 코드는 다음과 같다.
class UserFoodPreferenceList(APIView):
    # FIXME : AUTHENTICATION, PERMISSION LEVEL TO TOKEN
    authentication_classes = (BasicAuthentication,)
    permission_classes = (AllowAny,)

    def get(self, request, username):
        try:
            data = DailyUserFood.objects.filter(username=username, date__range=[datetime.date.today() - datetime.timedelta(days=9), datetime.date.today()])
            if not data.exists():
                return Response('no info', HTTP_400_BAD_REQUEST)
            else:
                res = dict()
                mostpick = dict()
                categories = dict()
                ingredients = dict()
                countries = dict()

                count = 0
                taste = 0
                for row in data:
                    foodname = row.food
                    foodname_based_data = Food.objects.get(menuname=foodname)
                    taste += int(foodname_based_data.taste)

                    if not foodname_based_data.menuname in mostpick:
                        mostpick[foodname_based_data.menuname] = 1
                    else:
                        mostpick[foodname_based_data.menuname] += 1

                    if not foodname_based_data.ingredient in ingredients:
                        ingredients[foodname_based_data.ingredient] = 1
                    else:
                        ingredients[foodname_based_data.ingredient] += 1

                    if not foodname_based_data.category in categories:
                        categories[foodname_based_data.category] = 1
                    else:
                        categories[foodname_based_data.category] += 1

                    if not foodname_based_data.country in countries:
                        countries[foodname_based_data.country] = 1
                    else:
                        countries[foodname_based_data.country] += 1

                    count += 1

                taste = int(taste/count)
                mostpick = sorted(mostpick.items(), key=operator.itemgetter(1), reverse=True)
                ingredients = sorted(ingredients.items(), key=operator.itemgetter(1), reverse=True)
                categories = sorted(categories.items(), key=operator.itemgetter(1), reverse=True)
                countries = sorted(countries.items(), key=operator.itemgetter(1), reverse=True)

                res['모스트 원픽'] = Food.objects.filter(menuname=mostpick[0][0]).order_by("?").first().menuname

                tmp = Food.objects.filter(taste=taste).order_by("?").first().menuname
                while tmp in res.values():
                    tmp = Food.objects.filter(taste=taste).order_by("?").first().menuname
                res['평균적인 맛에 의거한 추천'] = tmp

                tmp = Food.objects.filter(ingredient=ingredients[0][0]).order_by("?").first().menuname
                while tmp in res.values():
                    tmp = Food.objects.filter(ingredient=ingredients[0][0]).order_by("?").first().menuname
                res['재료에 의한 추천'] = tmp

                tmp = Food.objects.filter(category=categories[0][0]).order_by("?").first().menuname
                while tmp in res.values():
                    tmp = Food.objects.filter(category=categories[0][0]).order_by("?").first().menuname
                res['음식의 종류에 따른 추천'] = tmp

                tmp = Food.objects.filter(country=countries[0][0]).order_by("?").first().menuname
                while tmp in res.values():
                    tmp = Food.objects.filter(country=countries[0][0]).order_by("?").first().menuname
                res['특정 나라음식 추천'] = tmp

                tmp = Food.objects.order_by("?").first().menuname
                while tmp in res.values():
                    tmp = Food.objects.order_by("?").first().menuname
                res['랜덤 추천'] = tmp

                tmp = Food.objects.order_by("?").first().menuname
                while tmp in res.values():
                    tmp = Food.objects.order_by("?").first().menuname
                res['묻지마 추천'] = tmp
                return Response(res, HTTP_200_OK)
        except:
            return Response(HTTP_400_BAD_REQUEST)
말 그래도 사용자가 최근에 먹은 음식에 대한 정보를 가져와 dict으로 조합한 뒤 그 정보를 기준으로 order_by(?) 를 사용하여 랜덤으로 가져와서 res에 넣어서 돌려준다. 그 과정에서 각각의 음식이 겹치지 않도록 while문으로 처리를 해주었다.(분명 더 좋은 방식이 있으리라…)
사용자가 먹은 음식에 대한 정보 등록하는 페이지 생성
음식에 대한 조회 및 결과를 그래프로 뿌려주는 것이 main의 역할이기 때문에 결국 사용자가 자신이 어떤 음식을 먹었는지에 대한 정보를 DB에 업데이트를 해야된다. 그를 위해서 UI에서 사용자로부터 입력을 쉽게 받을 수 있도록 하는 작업이 필요하다.
방식은 기존과 크게 다르지 않다. food 부분에 url을 3개를 추가해주어서 관리를 담당하도록 설계하였다.
from django.urls import path, include
from . import views

urlpatterns = [
    path('menu/<str:foodname>', views.menuDetail, name='menu'),
    path('addmenu/', views.addMenu, name='addmenu'),
    path('checkdatemenu/', views.checkDateMenu, name='checkdatemenu'),
    path('updatedatemenu/', views.updateDateMenu, name='updatedatemneu'),
]
addmenu는 사용자로부터 날짜를 입력받는 첫 페이지이다. 해당 정보가 post로 넘어가게 되면 checkdatemenu부분에서는 아침/점심/저녁으로 해당 날짜에 저장된 값을 가져온다. 그리고 사용자는 아래의 form을 활용하여 새로운 데이터를 추가하거나 기존의 것을 수정하는 것이 가능하다. 위에 대한 처리를 위해 api 쪽의 url도 추가해주었다.
    path('food/date/<str:username>/<str:date>', views.UserFoodByDate.as_view()),
    path('food/date/<str:username>', views.UserFoodByDate.as_view()),
get은 특정 날짜의 사용자의 음식메뉴에 대한 정보를 가져올때 호출이 되며 post는 값을 저장할때 호출이 된다.
'''
get : 특정 일자의 유저의 아침/점심/저녁 리스트 리턴
post : 특정 일자의 아침/점심/저녁 정보 추가 또는 업데이트 및 삭제
'''
class UserFoodByDate(APIView):
    # FIXME : AUTHENTICATION, PERMISSION LEVEL TO TOKEN
    authentication_classes = (BasicAuthentication,)
    permission_classes = (AllowAny,)

    def get(self, request, username, date):
        data = DailyUserFood.objects.filter(username=username, date=date)
        if not data.exists():
            return Response(HTTP_400_BAD_REQUEST)
        else:
            res = {}
            res['B'] = res['L'] = res['D'] = '-'
            for row in data:
                res[row.mealkind] = row.food
            return Response(res, HTTP_200_OK)


    def post(self, request, username):
        try:
            date = request.data['date']
            mealkind = request.data['mealkind']
            foodname = request.data['foodname']
            food_data = Food.objects.get(menuname=foodname)
            mealkind_choice = ['B', 'L', 'D']
            if not mealkind in mealkind_choice:
                return Response(HTTP_400_BAD_REQUEST)
        except:
            return Response(HTTP_400_BAD_REQUEST)
        try:
            data = DailyUserFood.objects.get(username=username, date=date, mealkind=mealkind)
            data.food = foodname
            data.save()
            return Response(HTTP_201_CREATED)

        except DailyUserFood.DoesNotExist:
            data = DailyUserFood(username=username, food=foodname, mealkind=mealkind, date=date)
            data.save()
            return Response(HTTP_201_CREATED)
이제 food의 views쪽에서 form의 값을 토대로 REST통신을 한 결과값을 처리해주기만 하면 된다.
def addMenu(request):
    if(request.COOKIES.get('token')):
        if checkTokenVerification(request):
            return render(request, 'addmenu.html', {})
    else:
        return redirect('/user/intro')


def checkDateMenu(request):
    if(request.COOKIES.get('token')):
        if checkTokenVerification(request):
            jwt_value = jwt.decode(request.COOKIES.get('token'), JWT_AUTH['JWT_SECRET_KEY'])
            url = "http://localhost:8000/api/food/date/"
            r = requests.get(url + jwt_value['username'] + '/' + request.POST['date'])
            if not r.status_code == 200:
                dateres = {}
            else:
                dateres = r.json()

            return render(request, 'checkdatemenu.html', {'username':jwt_value['username'], 'date':request.POST['date'], 'Breakfast':dateres['B'], 'Lunch':dateres['L'], 'Dinner':dateres['D']})
    else:
        return redirect('/user/intro')


def updateDateMenu(request):
    if(request.COOKIES.get('token')):
        if checkTokenVerification(request):
            jwt_value = jwt.decode(request.COOKIES.get('token'), JWT_AUTH['JWT_SECRET_KEY'])
            url = "http://localhost:8000/api/food/date/"
            r = requests.post(url + jwt_value['username'], data=request.POST)
            if not r.status_code == 200:
                msg = '정보를 다시 확인해주세요.'

            else:
                msg = '요청이 정상적으로 반영되었습니다.'

            r = requests.get(url + jwt_value['username'] + '/' + request.POST['date'])
            if not r.status_code == 200:
                dateres = {}
            else:
                dateres = r.json()

            return render(request, 'updatedatemenu.html', {'msg':msg, 'date':request.POST['date'], 'Breakfast':dateres['B'], 'Lunch':dateres['L'], 'Dinner':dateres['D']})
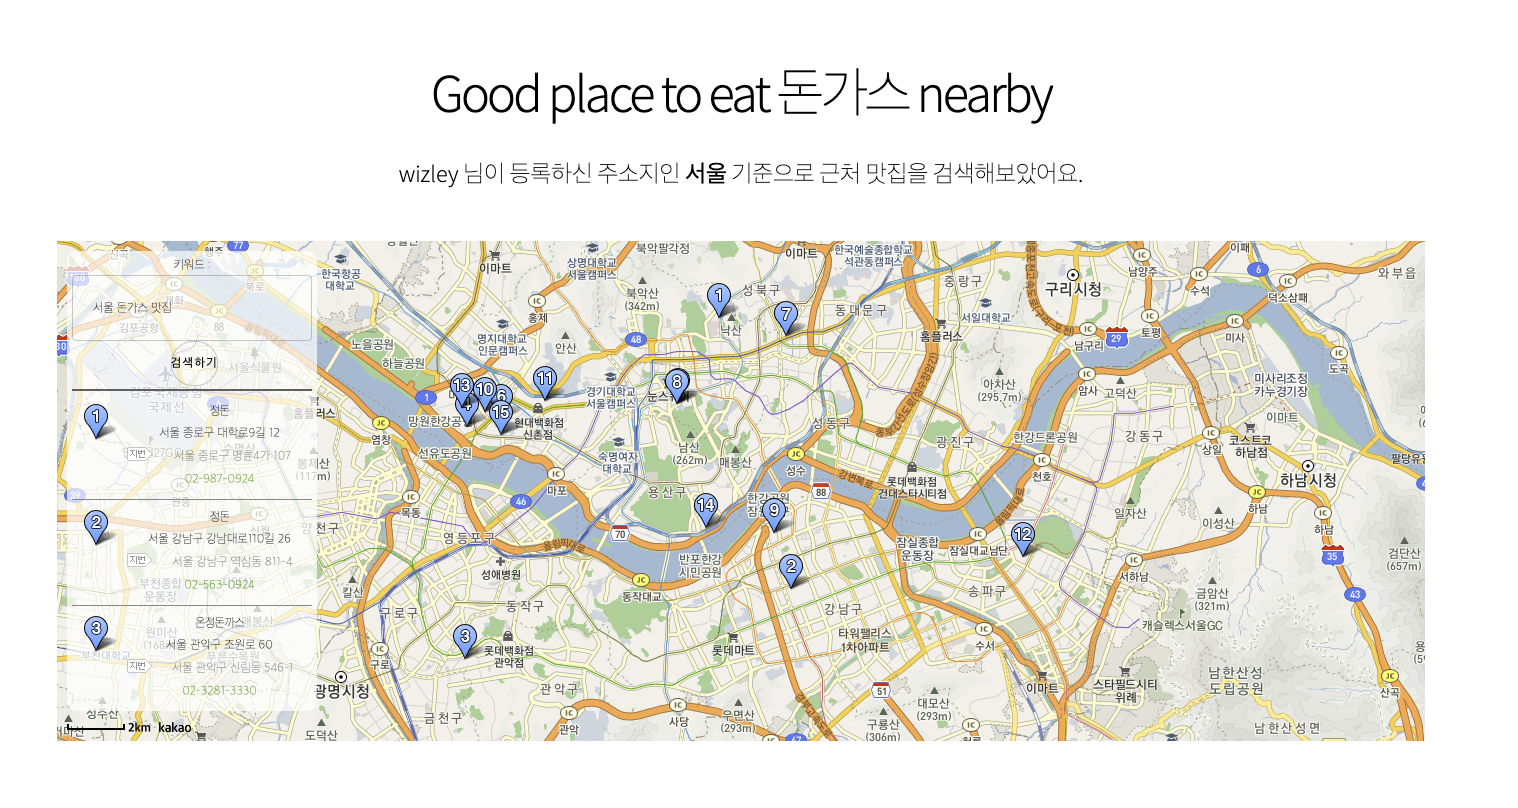
kakao map api 연동하기
당장 구현하고 싶었던 것은 menu탭에서 특정 음식 목록에 들어갔을 때 사용자의 area 정보를 토대로 근처의 해당 음식점에 대한 정보를 맵으로 표현해주는 것이었다. 이를 위해서 네이버와 카카오 맵 api를 써보았는데 예제부터가 카카오가 훨씬 자세하고 쓰기가 간편했다. 거의 수정을 안하고 사용하였다!!
kakao map api 관련 key를 입력받은 뒤 그대로 적용해주면 된다. 이를 위해서 사용자 DB로부터 area에 대한 정보를 가져왔던 /api/accounts/profile의 정보와 menuname을 토대로 검색 부분만 변경해주면 된다.
<section class="wrapper style1 align-center">
    <div class="inner">
        <h2>Good place to eat {{ menu.menuname }} nearby</h2>
        <p>{{ username}} 님이 등록하신 주소지인 <strong>{{ user_profile.area }}</strong> 기준으로 근처 맛집을 검색해보았어요.</p>

        <section>
            <div class="content" align="center">

                <div class="map_wrap">
                    <div id="map" style="width:100%;height:100%;position:relative;overflow:hidden;"></div>

                    <div id="menu_wrap" class="bg_white">
                        <div class="option">
                            <div>
                                <form onsubmit="searchPlaces(); return false;">
                                    키워드 : <input type="text" value="{{ user_profile.area }} {{ menu.menuname }} 맛집" id="keyword" size="15">
                                    <button type="submit">검색하기</button>
                                </form>
                            </div>
                        </div>
                        <hr>
                        <ul id="placesList"></ul>
                        <div id="pagination"></div>
                    </div>
                </div>


            </div>
        </section>
    </div>
</section>
그러면 아래와 같이 이쁜 지도창을 구현할 수 있다.
DailyUserFood REST DELETE로 삭제하기
그 전에 수정과 추가는 구현을 했었는데 DELETE 부분에 대한 구현을 끝마치지 않았었다. 이를 위해서 url을 하나 추가하였다.
path('food/date/<str:username>/<str:date>/<str:mealkind>', views.UserFoodByDate.as_view()),
DELETE의 경우 data를 같이 넘기지 못하기 때문에 쿼리 조회에 필요한 정보인 username, date, mealkind를 url로 입력을 받기로 하였다.
def delete(self, request, username, date, mealkind):
    try:
        data = DailyUserFood.objects.get(username=username, date=date, mealkind=mealkind)
        data.delete()
        return Response(HTTP_200_OK)
    except:
        return Response(HTTP_400_BAD_REQUEST)
그리고 위와 같이 get을 통해 찾은 뒤 delete를 하도록 설정해주면 끝이 난다.
리팩토링 및 API에 JWT 권한 설정
구현하고자 하는 기능들을 대부분 구현한 후에 해야되는 것은 리팩토링 작업이다! 내가 짱짱 개발자가 아니기 때문에 무조건적으로 코드를 손봐야되는데 views.py의 가독성을 높히는 방향으로 가고자하였고, 각각을 클래스화시켜서 나누는 방식으로 진행하였다.
user app 리팩토링
기존의 코드를 user app 하위에 새 파일을 작성하여 관리하였다. views.py에서 요청하는 requests를 apis.py 하위의 클래스에 통일하여 배치하였다.
import requests
import operator
import json


class APIAboutUser:
    def __init__(self, username, token):
        self.username = username
        self.token = token

    def get_user_token(self, password, recaptcha):
        url = "http://localhost:8000/api/accounts/login/"
        r = requests.post(url, data={'username': self.username, 'password': password, 'g-recaptcha-response': recaptcha})
        if r.status_code == 200:
            res = r.json()['token']
        else:
            res = None
        return res

    def get_user_profile(self):
        url = "http://localhost:8000/api/accounts/profile/"
        r = requests.get(url + self.username, headers={'Authorization': 'JWT ' + self.token})
        if r.status_code == 200:
            res = r.json()
        else:
            res = None
        return res

    def get_user_preference(self):
        url = "http://localhost:8000/api/food/preference/"
        r = requests.get(url + self.username, headers={'Authorization': 'JWT ' + self.token})
        if r.status_code == 200:
            res = r.json()
        else:
            res = None
        return res

    def get_user_foodcount(self):
        url = "http://localhost:8000/api/food/user/"
        r = requests.get(url + self.username, headers={'Authorization': 'JWT ' + self.token})
        if r.status_code == 200:
            print(r.json())
            res = json.loads(r.json())
            if res is not None:
                res2 = res['dateinfo']
                res3 = sorted(res['foodcount'].items(), key=operator.itemgetter(1), reverse=True)
        else:
            res2 = res3 = None
        return res2, res3
그리고 token관련 작업 또한 tokens.py를 새로 만들어서 관리하는 방식으로 변경하였다.
from eatenAway.settings import JWT_AUTH
import requests
import jwt


class Token:
    def __init__(self, token):
        self.token = token

    def has_token(self):
        if self.token is not None:
            return True
        else:
            return False

    def get_account_token(self, username, password):
        url = "http://localhost:8000/api/token/"
        r = requests.post(url, data={'username': username, 'password': password})
        if r.status_code == 200:
            res = r.json()['token']
        else:
            res = None
        return res

    def verify(self):
        if self.has_token():
            url = "http://localhost:8000/api/token/verify/"
            r = requests.post(url, data={'token': self.token})
            if r.status_code == 200 and r.json()['token']:
                return True
            else:
                return False
        return False

    def decode_jwt(self):
        if self.has_token() and self.verify():
            return jwt.decode(self.token, JWT_AUTH['JWT_SECRET_KEY'])
        return None
이렇게 변경을 하게 되면 views.py의 main 페이지 부분은 다음과 같이 이쁘게 변환이 가능하다.
def RenderMainPage(request):
    tk = Token(request.COOKIES.get('token'))
    tk_jwt_value = tk.decode_jwt()
    if tk_jwt_value is not None:
        username = tk_jwt_value['username']
        user_api = APIAboutUser(tk_jwt_value['username'], tk.token)
        user_profile = user_api.get_user_profile()
        choice = user_api.get_user_preference()
        date_info, food_count = user_api.get_user_foodcount()
        return render(request, 'main.html',
                      {'username': username, 'foodcount': food_count, 'dateinfo': date_info,
                       'choice': choice, 'user_profile': user_profile})
    else:
        response = HttpResponseRedirect('/user/login')
        response.delete_cookie('token')
        return response
food app 리팩토링
food app도 마찬가지로 requests를 통해 api와 통신하는 부분을 apis.py로 분리하였다.
import requests
import json


class APIAboutFood:
    def __init__(self, username, foodname, tk):
        self.username = username
        self.foodname = foodname
        self.tk = tk

    def get_food_detail(self):
        url = "http://localhost:8000/api/food/"
        r = requests.get(url + self.foodname, headers={'Authorization': 'JWT ' + self.tk})
        if r.status_code == 200:
            res = r.json()
        else:
            res = None
        return res

    def get_user_food(self):
        url = "http://localhost:8000/api/food/user/"
        r = requests.post(url + self.username, data={'foodname': self.foodname}, headers={'Authorization': 'JWT ' + self.tk})
        if r.status_code == 200:
            res = json.loads(r.json())
        else:
            res = {'nope': 1}
        return res

    def get_user_food_by_date(self, date):
        url = "http://localhost:8000/api/food/date/"
        r = requests.get(url + self.username + '/' + date, headers={'Authorization': 'JWT ' + self.tk})
        if r.status_code == 200:
            res = r.json()
        else:
            res = dict()
            res['B'] = res['L'] = res['D'] = '-'
        return res

    def update_user_food_by_date(self, requested_data):
        url = "http://localhost:8000/api/food/date/"
        r = requests.post(url + self.username, data=requested_data, headers={'Authorization': 'JWT ' + self.tk})
        if r.status_code == 200:
            res = '요청이 정상적으로 반영되었습니다.'
        else:
            res = '정보를 다시 확인해주세요.'
        return res

    def delete_user_food_by_date(self, date, mealkind):
        url = "http://localhost:8000/api/food/date/"
        r = requests.delete(url + self.username + '/' + date + '/' + mealkind, headers={'Authorization': 'JWT ' + self.tk})
        if r.status_code == 200:
            res = '요청이 정상적으로 반영되었습니다.'
        else:
            res = '정보를 다시 확인해주세요.'
        return res
그에 따라 아래와 같이 좀 더 가독성이 좋아진 views.py를 마주하게 된다.
def RenderFoodPage(request, foodname):
    tk = Token(request.COOKIES.get('token'))
    tk_jwt_value = tk.decode_jwt()
    if tk_jwt_value is not None:
        username = tk_jwt_value['username']
        food_api = APIAboutFood(username, foodname, tk.token)
        user_api = APIAboutUser(username, tk)
        chart = food_api.get_user_food()
        user_profile = user_api.get_user_profile()
        menu = food_api.get_food_detail()
        return render(request, 'foodmenu.html',
                      {'username': username, 'menu': menu, 'chart': chart, 'user_profile': user_profile})
    else:
        response = HttpResponseRedirect('/user/login')
        response.delete_cookie('token')
        return response
api app 리팩토링
마지막으로 api app의 경우 accounts.py, foods.py를 세부적으로 관리하여 각각 해당 앱의 Model과 관련된 작업을 하는 부분을 분리하였다.
from django.contrib.auth.hashers import check_password
from django.utils.http import urlsafe_base64_encode, urlsafe_base64_decode
from django.utils.encoding import force_bytes, force_text
from django.template.loader import render_to_string
from .tokens import account_activation_token
from django.core.mail import EmailMessage
from user.models import Account


class UserAccount:
    def __init__(self, username, password):
        self.username = username
        self.password = password
        self.account = None

    def is_account_status_ok(self):
        if self.account.status == 'O':
            return True
        else:
            return False

    def is_account_available(self):
        try:
            self.account = Account.objects.get(username=self.username)
            if self.is_account_status_ok():
                return True
            else:
                return False
        except:
            return False

    def is_password_correct(self):
        if self.is_account_available() and check_password(self.password, self.account.password):
            return True
        else:
            return False

    def already_have_username(self):
        try:
            res = Account.objects.get(username=self.username)
            return True
        except:
            return False

    def already_have_email(self, email):
        try:
            res = Account.objects.get(email=email)
            return True
        except:
            return False

    def get_account_by_pk(self, uidb64):
        uid = force_text(urlsafe_base64_decode(uidb64))
        res = Account.objects.get(pk=uid)
        self.account = res
        return res

    def get_account(self):
        res = Account.objects.get(username=self.username)
        return res

    def check_account_activation(self, token):
        if self.account is None:
            return False
        elif account_activation_token.check_token(self.account, token):
            self.account.status = 'O'
            self.account.active = True
            self.account.is_active = True
            self.account.save()
            return True
        return False

    def get_email_link(self):
        user = self.get_account()
        message = render_to_string('activate.html', {
            'domain': 'localhost:8000',
            'username': self.username,
            'uid': urlsafe_base64_encode(force_bytes(user.pk)),
            'token': account_activation_token.make_token(user)
        })
        return message

    def send_email(self, email):
        mail_subject = 'eaten-Away 이메일 인증'
        to_email = email
        message = self.get_email_link()
        email = EmailMessage(mail_subject, message, to=[to_email])
        email.send()
이와 같이 분리함으로써 views.py에서 중복되는 코드들을 줄일 수 있을 뿐더러 가독성도 향상되었다.
"""
GET : user/apis.py -> get_user_preference (/api/food/preference/<str:username>)
용도  : 특정 기간 내의 사용자의 음식 리스트를 조회하여 추천 메뉴 7개를 선정함
"""
class APIForUserFoodChoice(APIView):

    def get(self, request, username):
        UserFood = DailyFood(username)
        foodlist = UserFood.get_user_food_with_day(9)

        if not foodlist.exists():
            return Response(status=HTTP_400_BAD_REQUEST)

        else:
            res = UserFood.get_preference()
            return Response(res, status=HTTP_200_OK)
사용자가 먹은 음식 리스트를 토대로 7가지의 음식을 추천해주는 코드는 무려 다음과 같이 8줄 내외로 줄어들었다.
JWT API 권한 설정
예전에 settings.py에서 코드를 다음과 같이 변경하였었다.
REST_FRAMEWORK = {
    'DEFAULT_PERMISSION_CLASSES': (
        'rest_framework.permissions.IsAuthenticated',
    ),
    'DEFAULT_RENDERER_CLASSES': (
        'rest_framework.renderers.JSONRenderer',
    ),
    'DEFAULT_AUTHENTICATION_CLASSES': (
        'rest_framework_jwt.authentication.JSONWebTokenAuthentication',
        'rest_framework.authentication.SessionAuthentication',
        'rest_framework.authentication.BasicAuthentication',
    ),
}
하지만 개발하는 과정에서는 테스트를 위해서 권한을 AllowAny로 뒀었는데 보안성 강화를 위해서 유저가 로그인 후에 사용할 수 있는 기능을 제공하는 API부분에 JWT가 필요하도록 설정해주자. 이미 위의 코드에 등장하지만 headers를 다음과 같이 추가해주면 된다.
def get_food_detail(self):
    url = "http://localhost:8000/api/food/"
    r = requests.get(url + self.foodname, headers={'Authorization': 'JWT ' + self.tk})
    if r.status_code == 200:
        res = r.json()
    else:
        res = None
    return res
Authorization 부분에 JWT + token 값을 추가해주면 성공할 경우에는 정상적인 API 기능이 수행되고 잘못된 값일 경우 401이 status_code로 돌아오게 된다. 이를 통해 로그인 된 사용자의 JWT 토큰을 검증하여 API가 기능을 하게 되었다.
GITHUB link
대댓글 기능을 구현하지 않긴 하였지만 해당 서비스에서 굳이 필요한 기능이라고 판단되지 않았기 때문에 과감히 생략하였다. 아래의 링크를 통해 전체 소스 코드를 확인가능하다. (url에 대한 부분은 완전하게 설정을 하지 않았고, DEBUG 모드도 True인 상태이다.)